Introduzione

Segui questa guida per sostituire la batteria ricaricabile del Moto G4 Plus. Se la tua batteria è gonfia, prendi adeguate precauzioni.

Per la tua sicurezza, scarica la vecchia batteria sotto il 25% prima di smontare il telefono. Questo ridurrà il rischio di un pericoloso surriscaldamento se la batteria verrà danneggiata accidentalmente nel corso della riparazione.

  1. lxT1UwKFgURyGcaK
    lxT1UwKFgURyGcaK
    1jye2DaRjg6xaoVK
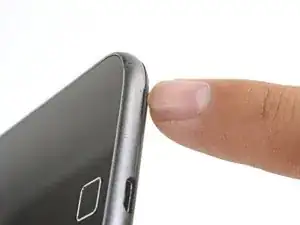
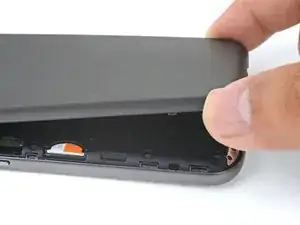
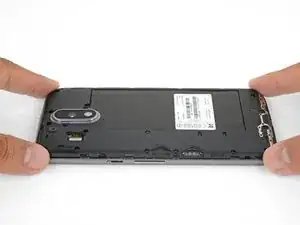
    • Inserisci un'unghia o uno spudger nella cavità sul bordo inferiore del telefono, vicino alla porta di ricarica.

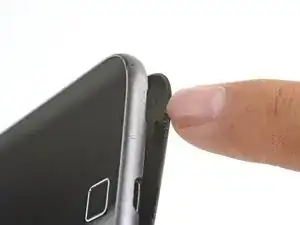
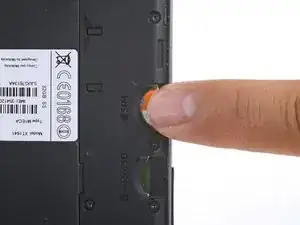
    • Solleva la cover posteriore dal corpo del telefono.

  2. bYe3O62W1Wt2gtmv
    bYe3O62W1Wt2gtmv
    ZRw4LGhEDAptG1C1
    GYFrkRTtyKQlEd4B
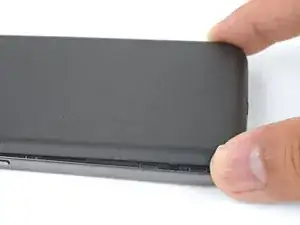
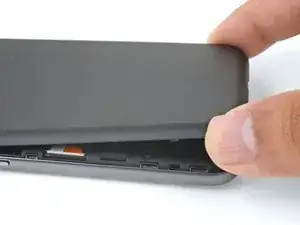
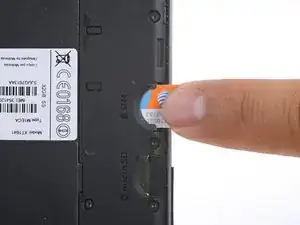
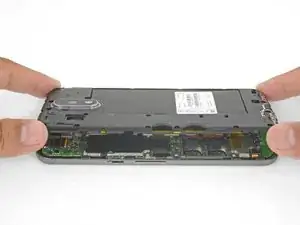
    • Continua ad alzare delicatamente la cover posteriore finché tutte le clip di plastica si saranno sganciate.

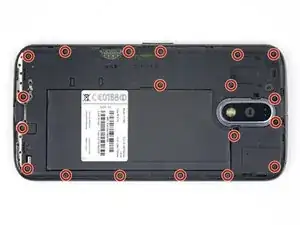
    • Rimuovi la cover posteriore.

    • Per rimontare la cover, allineala sopra la scocca e premi con delicatezza tutto attorno ai bordi finché senti che le clip scattano in posizione di blocco.

  3. MaIl6GDNwMyW3grX
    MaIl6GDNwMyW3grX
    GW6DOBihck1UBAjI
    • Fai scorrere fuori la scheda SIM per rimuoverla.

    Tenho un Motorola g4 plus 64 G

    El celular se volvía loco abriendo y cerrando aplicaciones

    Ahora no reconoce la tarjeta SIM

    Internet y Wasapp funciona

    Alguien sabe donde lo reparan soy de Argentina Buenos Aires CABA

    Florencia Garrido -

  4. Y2bjMadRQCjPq6bx
    • Rimuovi le 19 viti T3 da 3,1 mm che fissano il telaio centrale.

    A pair of binocular magnifiers is helpful here. Also, a magnetic pickup will help pull the tiny screws out of their counterbores.

    John Fossey -

    Well I'm stuck. 3 screw heads are stripped on mine, not lucky as they are two on USB port end and screw in-between two SIM slots. Phone bought new and this is 1st time screws have been touched, could see they were already stripped before getting screwdriver near them. Any tips on removing stripped screws?

    Mark Wintle -

    Hi Mark,

    I’m sorry to hear that! You can try some techniques from the stripped screw guide.

    Arthur Shi -

    I found that a T4 driver was the correct size for the screws.

    craig rhombs -

  5. GWhTNtKHDQJSDPMj
    GWhTNtKHDQJSDPMj
    NHQGAZWDKlNcbEPB
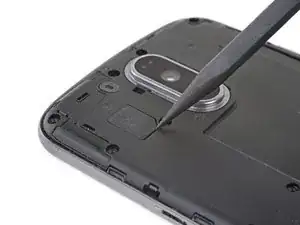
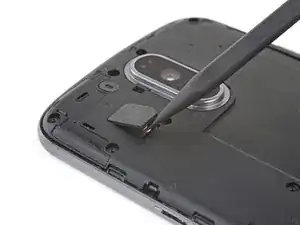
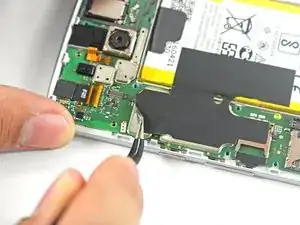
    • Usa la punta di uno spudger per sollevare la cover di gomma sopra il connettore del flash della fotocamera.

    • Rimuovi la cover di gomma.

  6. OJ5Fd4d5Z2XoxdSJ
    OJ5Fd4d5Z2XoxdSJ
    jgbdAx6g5ACgeNYZ
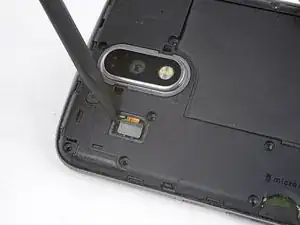
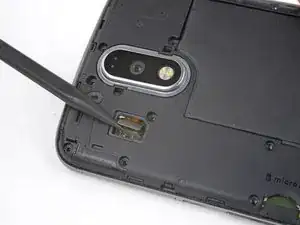
    • Usa la punta di uno spudger per sollevare e quindi disconnettere il connettore del flash della fotocamera.

  7. W32KIcqo5YIFpbJE
    W32KIcqo5YIFpbJE
    BvV2RE33Xg4YIrS2
    XyJnRSGqnQMNF6GM
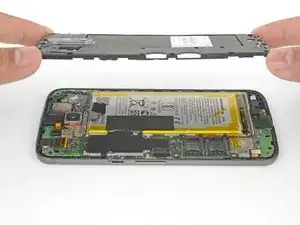
    • Prendendolo dai bordi, smuovi il telaio centrale e sollevalo dalla scocca.

    • Rimuovi il telaio centrale.

  8. cKHNL1FamCU5dnJR
    cKHNL1FamCU5dnJR
    gtZvU3O3HOCkIVVa
    • Stai molto attento a non perforare la batteria con attrezzi affilati. Una batteria al litio-ioni danneggiata può prendere fuoco e/o esplodere.

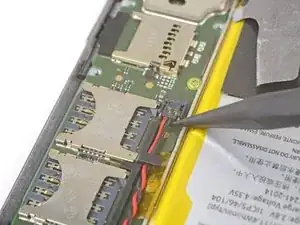
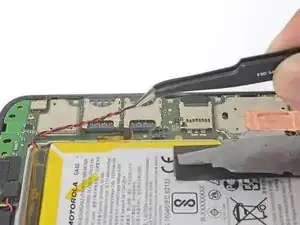
    • Stacca il nastro adesivo che fissa i cavi della batteria e rimuovilo.

    • Stacca e rimuovi il nastro adesivo nero a cavallo tra la batteria e il telefono.

    • Benché nessuno di questi pezzi di nastro sia necessario per l'operatività del telefono, mettili da parte, se sono ancora in buone condizioni, per usarli nel processo di reinstallazione.

  9. Bfp1NnsXcvWBibdD
    Bfp1NnsXcvWBibdD
    4dnSoBQCeltW12NK
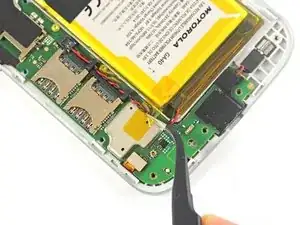
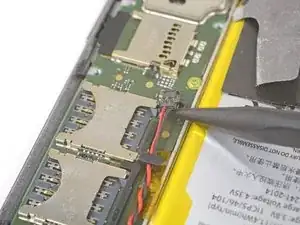
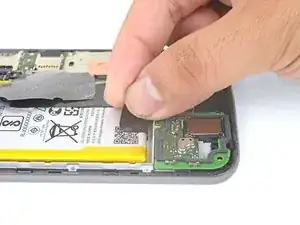
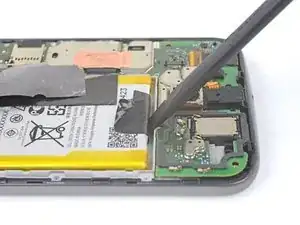
    • Infila la punta di uno spudger sotto i cavi rossi e neri della batteria e fai leva delicatamente verso l'alto.

    • Non tirare direttamente la spina, perché danneggeresti lo zoccolo sulla scheda. Fai molta attenzione a dove far leva, evitando di farlo sulla presa stessa.

    • In fase di rimontaggio, allinea il connettore sul suo zoccolo e premilo verticalmente per ricollegarlo.

  10. nt22DOKrSYEXRwXJ
    nt22DOKrSYEXRwXJ
    jKLniTeXpWZsqVEH
    • Usa delle pinzette o le dita per sfilare i cavi della batteria dalle staffe di plastica.

  11. ZKWAJrj2tjMODGja
    ZKWAJrj2tjMODGja
    jGKF3XeKMqHHDGOB
    y1OsQoSImBTLGvGG
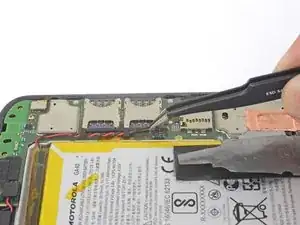
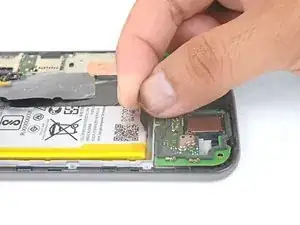
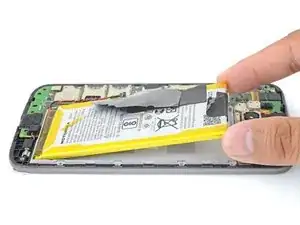
    • Stacca dalla batteria l'estremità della linguetta di estrazione, afferrala e tirala lentamente ma costantemente per separare la batteria dalla scocca.

    • Per ammorbidire l'adesivo si possono usare poche gocce di alcol isopropilico ad alta concentrazione (90% o superiore) lungo ciascuno dei lati.

    • Se la linguetta di estrazione si rompe, usa uno spudger per far leva delicatamente attorno ai bordi della batteria finché non si stacca.

    • Non deformare o perforare la batteria: se la danneggi, può incendiarsi e/o esplodere.

    • Non rimontare mai una batteria danneggiata o deformata: sostituiscila.

    Does anybody know, what the black tape covering the metal cans an the battey is made of? It seems to have a heat insulating effect.

    David Kilias -

    No, but the tape completely separated from itself when I removed it. Glue separated from the backing. I figure the glue in the frame is holding it well enough.

    Alan Kristensen -

    I found prying the battery out was the trickiest part of this job. Take your time and pry with the plastic tool, working from the end away from the wires, but try not to deform the battery in the process. It does finally come out.

    John Fossey -

    Hi, I cannot remove the Battery, it has too strong glue. Any Ideas?

    Regards

    Moritz Strack -

    You can try to drip some high concentration isopropyl alcohol along the battery edge to help loosen the adhesive.

    Arthur Shi -

  12. ehBg24hidmq3SD3u
    • Rimuovi la batteria.

    • Per installare la batteria, orientala in modo che i cavi escano verso la parte posteriore del telefono e il connettore della batteria sia sul lato della scheda madre.

    • Elimina qualsiasi residuo di colla rimasto che potrebbe impedire alla batteria di posizionarsi perfettamente a filo della scocca. Usa alcune strisce del foglio adesivo incluso nel kit batteria oppure del nastro biadesivo per fissare la batteria alla scocca.

Conclusione

Per riassemblare il tuo dispositivo, segui i passi descritti in ordine inverso.

Dopo aver completato questa guida, calibra la batteria appena installata.

Porta i tuoi rifiuti elettronici a un riciclatore certificato R2 o e-Stewards.

La riparazione non è andata secondo i piani? Vai sulla nostra comunità Risposte Motorola Moto G4 Plus per trovare aiuto nella risoluzione dei problemi.

Arthur Shi

Membro da: 03/01/18

248233 Reputazione

10 commenti

in step 9, when i took the connector away the hole plug came out :( need micro soldering to paste the conector to the board

Jorge Martinez -

I’m really sorry to hear that! I’ll add some extra warning on that step.

Arthur Shi -

One of the last screws stripped and I wasn't applying a lot of force. Being a jeweler, I tried every trick I knew of but that sucker would not budge. Since it was a corner screw, I rotated the entire cover (while pulling up on it to miss the components directly beneath) to expose all of the battery area. Hope I explained that part well enough. The battery was also tough to remove. I think they used way too much glue the first time around. Anyway, I was thrilled it powered right up with the new battery and I saved over $50 bucks doing it myself (and with the help of ifixit.com). Thanks!

Anna White -

Thank you for the guide! My wife and I did it together and the steps were very clear.

Abhay Ramakrishnan -

Mega mega mega, kinderleicht, Spitzenbeschreibung…

Alexander Albrecht -

Très bien expliqué étape par étape. ATTENTION : le connecteur de flash et de batterie ne sont pas évident à enlevé. S’assurer de bien clipser le connecteur de la nouvelle batterie, sinon il ne tiens pas.

vgm.380v -

Hi, thanks a lot! Successfully changed the battery today (45 minutes). But… with a T4 Torx screwdriver (?) I almost damaged the first two screws with a T3 one. Then, no problem with a T4. Thanks again.

Patrick PELLEN -

Parfait! Merci beaucoup ! 15 minutes suffisent

bertin -

Tolle Anleitung. Habe den Akku vor drei Monaten erfolgreich getauscht. Das Glück war aber nur von kurzer Dauer. Die letzten 2,5 Monate lief alles gut, aber eines schönen Tages war schluss mit Lustig. Der neue Akku entlädt sich leider sehr schnell und springt plötzlich von 55 % auf Ausschalten. Ich mag das Phone eigentlich sehr gerne und es macht sonst alles was es soll - doch nun muss ich es fast ständig am Netz halten. Was würdet ihr machen? Habe ich einfach Pech gehabt und würdet es nocheinmal mit einem neuen Akku versuchen?

Great instructions. Successfully replaced the battery three months ago. But the happiness was short-lived. The last 2.5 months everything went well, but one fine day was schluss mit Lustig. The new battery unfortunately discharges very quickly and suddenly jumps from 55% to switch off. I really like the phone and it does everything it's supposed to do - but now I have to keep it plugged in almost all the time. What would you do? Have I just had bad luck and would you try it again with a new battery?

Guybrush Threepwood -

Wo hast du denn den Akku gekauft? Ich würde mich da mal melden. Scheint eher ein Problem des Akkus zu sein. PS: Guter Username. ;)

Fabian Neidhardt -