Introduzione

Le Plantronics Voyager Legend sono delle cuffie Bluetooth, con delle funzionalità comode come una durata della batteria estesa e una porta di carica magnetica facile da usare. Grazie a queste funzioni, i problemi di alimentazione possono essere gestiti di conseguenza, per assicurarsi un ciclo vitale del dispositivo più lungo. Questa guida ti mostrerà come smontare attentamente l'unità principale, rimuovere i circuiti interni di alimentazione, rimuovere e sostituire la batteria e rimontare l'unità per aumentarne il ciclo vitale.

  1. OWTUexJp1XTWKuGw
    OWTUexJp1XTWKuGw
    lnkVmmHSiITER2QN
    drKhnDfethG2hn2E
    • Rimuovi la copertura esterna protettiva morbida.

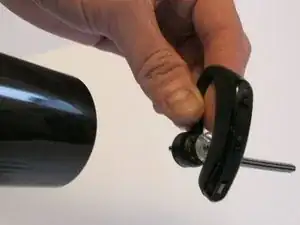
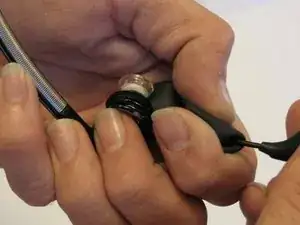
    • Usa una pistola termica (o un asciugacapelli) per scaldare l'unità principale delle Plantronics Voyager Legend. Questo ammorbidirà l'adesivo che fissa la copertura all'alloggio.

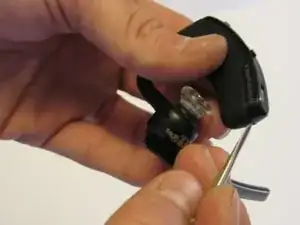
    • Usa la punta di un piccolo spudger in metallo per iniziare a separare la copertura dall'alloggio.

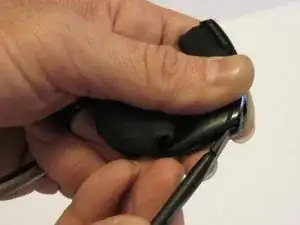
    • Usa la parte arrotondata dello spudger per staccare delicatamente il resto della copertura.

    • Potrebbe essere necessario riscaldare l'unità per mantenere l'adesivo abbastanza morbido per rimuovere la copertura senza danneggiarla.

  2. 6jBOKmxFGjWSSmse
    6jBOKmxFGjWSSmse
    ZsMgMelJlGOfYqLk
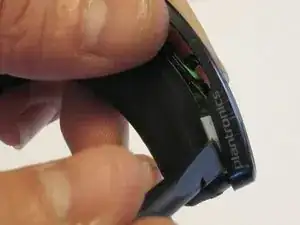
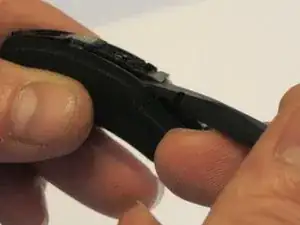
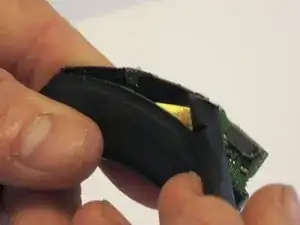
    • Scopri l'alloggio in plastica.

    • Piega alla rovescia la copertura protettiva morbida.

    • Tira completamente via l'alloggio dalla copertura, svelando il cavo principale che collega l'intera unità.

    • Questa manovra è richiesta per la rimozione dei circuiti, che sarà mostrata successivamente.

  3. MdFJUi5B3PiUuVrk
    MdFJUi5B3PiUuVrk
    Fo4icE2Zi3Xg1hqH
    3hWT1ddUO4fPMvD4
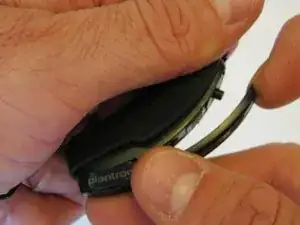
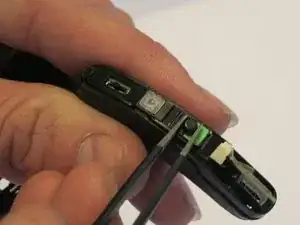
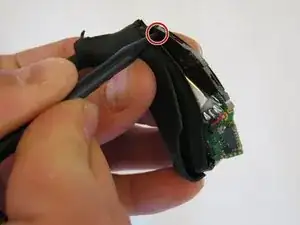
    • Rimuovi la placca protettiva sotto l'alloggio.

    • La placca è tenuta ferma da una serie di ganci e magneti.

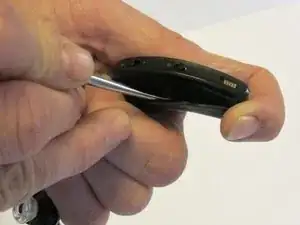
    • Usa la parte piatta di uno spudger per iniziare a rilasciare i ganci, iniziando dalla parte opposta alla porta di carica.

    • Continua lungo il perimetro dell'alloggio, fino a rilasciare tutti i ganci.

    • Solleva la placca dall'alloggio.

  4. 5NcdhxObhL2Hj2sO
    5NcdhxObhL2Hj2sO
    cNEotiHX1QLrcmOn
    oU2eOD2oKBwdKUKW
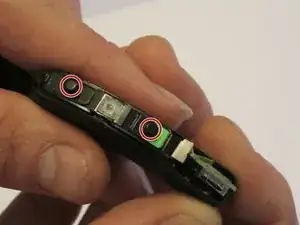
    • Rimuovi i tasti di accensione e del volume.

    • Usa delle pinzette di precisione per rimuovere il tasto del volume sollevandolo dal suo alloggio.

    • Usa delle pinzette di precisione per rimuovere il tasto del volume, segnandoti il suo orientamento, sollevandolo dal suo alloggio.

  5. YuDUuUTf6kmVAWLI
    YuDUuUTf6kmVAWLI
    LnRbqYkOPrBfkKM5
    lbvq1nZeGpWqVwRE
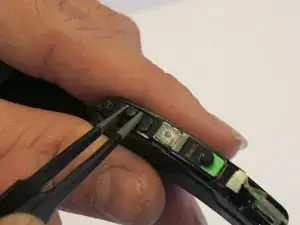
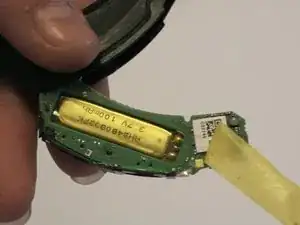
    • Inizia la rimozione dei circuiti della batteria.

    • Usa la parte piatta di uno spudger per iniziare a sollevare contro l'aletta in metallo del bordo superiore dell'unità della scheda logica.

    • Dopo averla sollevata abbastanza, usa la punta dello spudger per finire di sollevarla. Lo puoi fare infilando la punta dello spudger nel foro sul lato opposto alla porta di carica.

    Anyone know how to open the Plantronics Voyager Legend Desk Top Charger.

    The internal battery has gone faulty.

    Thanks for your time.

    Ivor Mac -

  6. H4M36TAkEUmkQvYo
    • Rimuovi la scheda logica, svelando l'unità della batteria.

  7. W1QQsxUg3UiSagjA
    W1QQsxUg3UiSagjA
    DMuaeemuyRImavLA
    ygb6kUCCokiZxy6A
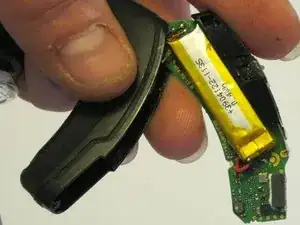
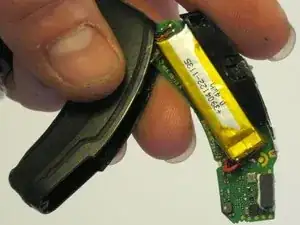
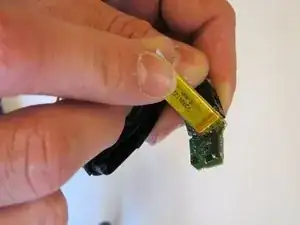
    • Libera la batteria dal suo alloggio sulla scheda logica.

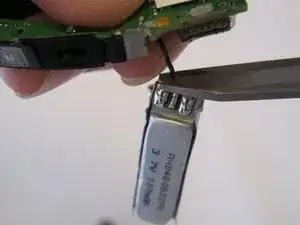
    • Trova il piccolo pezzo di nastro adesivo sotto la batteria. Usa un paio di pinzette di precisione per rimuovere questo nastro adesivo.

    • Solleva la batteria dal suo alloggio.

  8. YlxOTXyYm6KGc2sM
    YlxOTXyYm6KGc2sM
    YrPPATEOYD1d2ffC
    mrlY4ViuIxK4dZh6
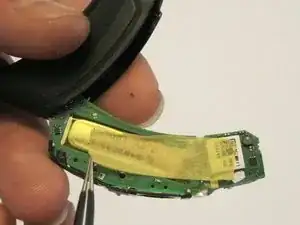
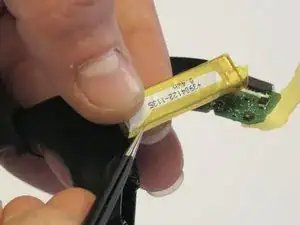
    • Accedi ai contatti della batteria.

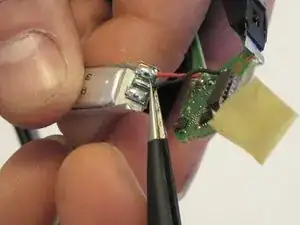
    • Usa delle pinzette di precisione per rimuovere il nastro adesivo trasparente ambrato che copre la batteria. Questo svelerà un pezzo più piccolo di nastro adesivo trasparente ambrato che copre i contatti della batteria.

    • Usa delle pinzette di precisione per rimuovere il pezzo di nastro adesivo più piccolo, scoprendo i contatti.

  9. eMGKIMUWXQTQDCnC
    eMGKIMUWXQTQDCnC
    DC4oxXnLwtAElLLH
    OdBst5oOk6QJYoqr
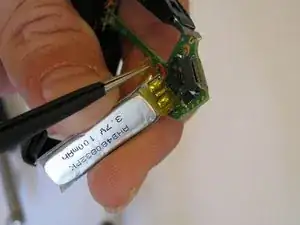
    • Rimuovi la batteria originale e sostituiscila con una nuova.

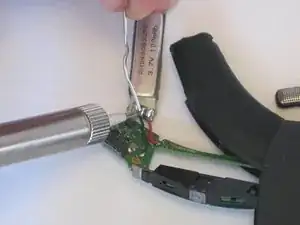
    • Scollega i contatti usando un paio di taglifili. Puoi usare delle forbici se non hai dei tagliafili.

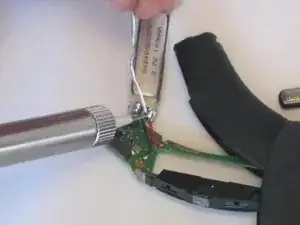
    • Salda il cavo nero della terra sulla nuova batteria.

    • Salda il cavo rosso del polo positivo sulla nuova batteria.

    • Fai riferimento alla guida alla saldatura di iFixit per vedere come saldare.

    Thank you for the guide. I consulted it and replaced my battery. It works perfectly. The replacement battery from Amazon was about $15 and that is a small fraction of replacing the headset. One revision I suggest is that removing the rubberized covering was not required for me. The seam that joins the two parts of the shell lines up with the edge of that rubberized cover. I used a razer blade to carefully separate the halves without disturbing the rubber skin. The battery came with new wires, so I left them attached and soldered the ends on the PCB rather than on the battery. As good as new, only better.

    Mr. Fox -

Conclusione

Per rimontare il tuo dispositivo, segui le istruzioni in ordine inverso usando un adesivo per riattaccare la copertura protettiva morbida all'alloggio in plastica.

Lewis Certain

Membro da: 10/09/15

2287 Reputazione

13 commenti

nice guide...

where could you order a replacement battery? ebay and others do not sell the exact replacements... or do they?

badrutsima -

Excellent Guide!

Battery appears to be available (Via Google Search): AHB480832PK 3.7v 100ma

Will Walker -

How to put it back again ? and is it gonna be how it used to be ? with the rubber being torn apart ??

aristotlehasan -

1. I dont really think you need to remove the rubber. It gets stretched and torn and doesn't go back the same even with adhesive. I think the black plastic "cap" can be removed without fully removing the rubber. Other than that the repair worked ok, but it doesn't look/feel the same so I ended up buying another one anyway and now this is my spare. It's a fairly delicate/complex operation and probably not worth the effort.

Mark -

I agree. I left the rubber intact on mine for that very reason, only slightly unsticking the edge with the guitar pick, which enabled me to pop the hard plastic panel/cap off reasonably easily. I did manage to break the clip at the top edge (above the power button) but a small drop of superglue was all that was needed to fix it. It definitely feels the same as before, so I’m glad I spent the AUD$30 for the battery instead of another AUD$130 for a new headset. It’s a shame to waste otherwise perfectly working hardware.

Also, for anyone who is currently running on a firmware version older than v110, if your PLT Hub software alerts you to upgrade to v110 (I was running v109), it is possible you will have issues with unstable call audio (media audio plays fine). If you experience this problem, you can check my solution (involving a downgrade and a reset) here: https://community.polycom.com/t5/Bluetoo...

Otherwise, just stay on v109!

tony -

where can you get a replacement cover?

stevef52 -

There seems to be no way to get the cover to snap back on once I’m done. I’ve been struggling with that and it is the biggest hindrance to getting it back into operation. Can you consider detailing the reassembly sometime?

Jeff Weaver -

There is absolutely no need to remove the rubber! Plus, you have to start ripping the plate from the charging connector side, otherwise the chance to break the single latch (on the VOL+/- side) is very large.

Marco D. Rassau -

What is a good adhesive to use? My problem is only that rubber has separated.

alan erickson -

Step 3 was difficult as even moving around the entire perimeter carefully did not keep the clips open. But mine completely failed at step 5. Trying to lift the metal tab just bent the tab. Made sure nothing was attached all the way around, but could not remove the circuit board as indicated. Finally gave up and pried it out to see how it was put together even though it damaged it.

Rick Jaffe -

You are kidding me that this is your solution!! Horrible !

LifeIsLove -