Introduzione

Usa questa guida per sostituire una batteria morta o usurata del tuo Galaxy A50.

Se la tua batteria è gonfia, prendi adeguate precauzioni. Per la tua sicurezza, scarica la batteria da sostituire sotto il 25% prima di smontare il telefono. In questo modo si riduce il rischio di un pericoloso incendio se la batteria viene danneggiata accidentalmente nel corso della riparazione.

In fase di rimontaggio, ti servirà dell'adesivo di ricambio per riattaccare alcuni componenti.

  1. Tter6xHe42gG2BMm
    Tter6xHe42gG2BMm
    sR6YlmvO5nGrTnXR
    bRDLPC3aeq1gXgWx
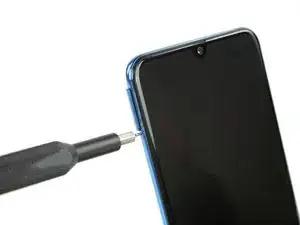
    • Inserisci uno strumento di estrazione SIM, una punta cacciavite per estrazione SIM o una graffetta raddrizzata nel piccolo foro sul vassoio SIM sul lato sinistro del telefono.

    • Premi con decisione per espellere il vassoio.

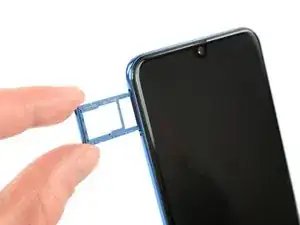
    • Rimuovi il vassoio della scheda SIM.

    • Quando rimetterai al suo posto le schede, accertati che siano correttamente orientate all'interno del vassoio.

  2. hQqQMV2uIHPIJMNq
    • Per prima cosa, spegni il telefono.

    • Scalda un iOpener e applicalo sulla cover posteriore per ammorbidire l'adesivo.

    • L'adesivo utilizzato sul Samsung Galaxy A50 è molto tenace. Se non riesci ad aprire il dispositivo con l'iOpener, puoi provare con un asciugacapelli, una pistola termica o una piastra riscaldata. Stai attento, però, a non surriscaldare il telefono: sia lo schermo AMOLED sia la batteria interna sono sensibili al calore eccessivo.

    Überhitzen das Gerät nicht, das AMOLED-Display und der Akku sind sehr hitzeempfindlich.

    Nur ein kleiner Tippfehler-Hinweis: (Überhitze das Gerät nicht)

    Jonas Hahn -

    OK, korrigiert. Das kann übrigens jeder machen, iFixit ist ein Wiki.

    VauWeh -

    how long should the heat pack be used for?

    David Hall -

    The heat pack is in the wrong position in photo - the glue that you are heating is actually all around the edge of the phone!

    David Hall -

  3. SaR1nWctkfCekyW2
    SaR1nWctkfCekyW2
    F6WgLBgnrW1bSZdS
    wMENyH4P5ZXwdQXU
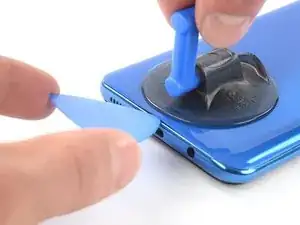
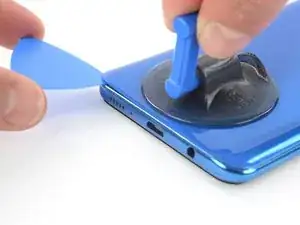
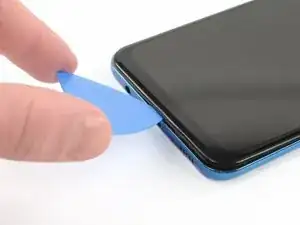
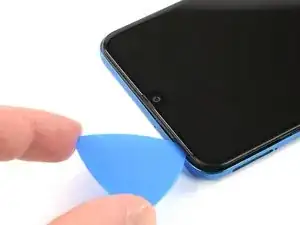
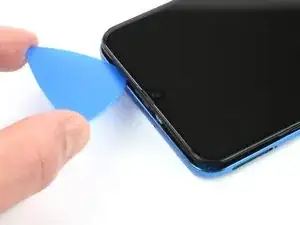
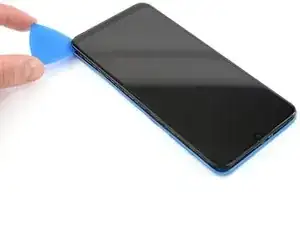
    • Inserisci un plettro di apertura dal lato inferiore del telefono vicino alla porta USB-C.

    • Se non riesci a infilare il plettro di apertura tra la cover posteriore e il midframe, puoi usare una ventosa oppure del nastro adesivo tenace per sollevare il pannello posteriore quanto basta a creare una fessura.

    • Fai scorrere il plettro di apertura fino all'angolo inferiore sinistro.

    It would be much better to attempt the opening from the top of the phone as there is a delicate flex PCB antenna at the bottom just where you stick the pick in that can get damaged.

    David Hall -

  4. J6hoMZYSHdAR3St6
    J6hoMZYSHdAR3St6
    6lcmRp4Rgrvs5Mgv
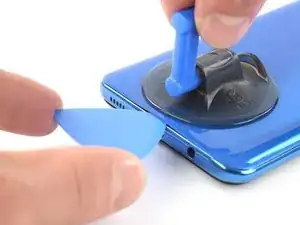
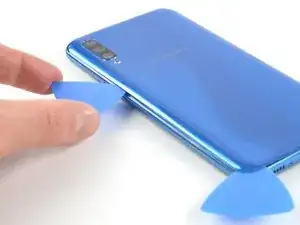
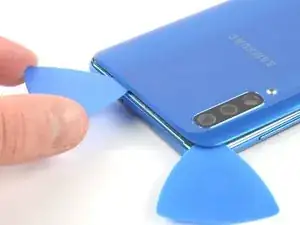
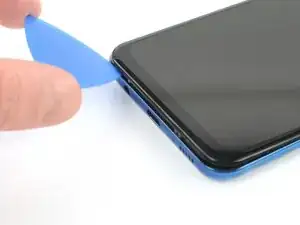
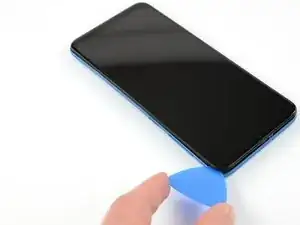
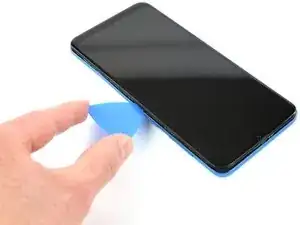
    • Inserisci un secondo plettro di apertura e fallo scorrere dal fondo fino all'angolo superiore sinistro per tagliare la colla.

    • Se hai dei problemi nel procedere, applica dell'altro calore per ammorbidire ulteriormente l'adesivo. Segui le istruzioni per l'iOpener per evitare il surriscaldamento.

    • Lascia i plettri di apertura nella loro posizione per impedire che la colla possa riattaccarsi.

  5. JeOJFGaHeVgLGwhJ
    JeOJFGaHeVgLGwhJ
    yArlWRJHNyBgskmB
    sg2pqmNKAs4fVnWn
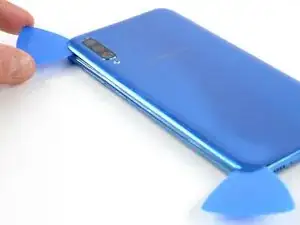
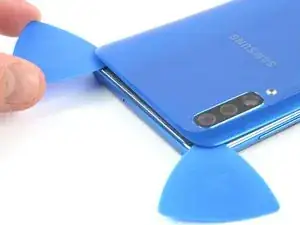
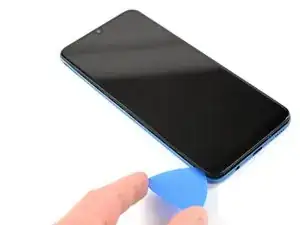
    • Inserisci un terzo plettro di apertura sotto l'angolo superiore sinistro del pannello posteriore.

    • Fai scorrere il plettro di apertura lungo il bordo superiore del telefono.

    • Lascia il plettro di apertura nell'angolo superiore destro per impedire che la colla possa riattaccarsi.

  6. cWya5vxHi3KMPW4j
    cWya5vxHi3KMPW4j
    oCfao3PLFWBonI5w
    VHcirgPVDSFwhxGi
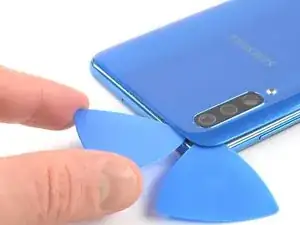
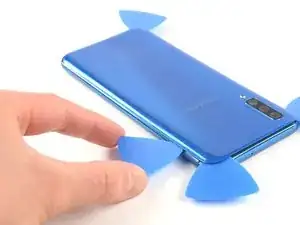
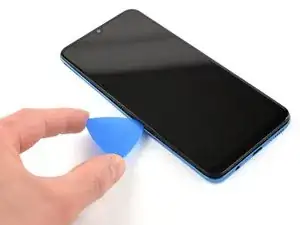
    • Inserisci un quarto plettro di apertura sotto l'angolo superiore destro della cover posteriore.

    • Fai scorrere la punta del plettro di apertura lungo il lato del telefono fino all'angolo inferiore destro per tagliare l'adesivo.

    • Lascia il plettro di apertura nell'angolo inferiore destro per impedire che la colla possa riattaccarsi.

  7. kIkBXjkFmSSdLs5C
    • Rimuovi la cover posteriore.

    • Dopo aver installato la cover posteriore, applica una pressione forte e costante sul telefono per diversi minuti per favorire un buon incollaggio. Una buona soluzione è disporlo sotto una pila di libri pesanti.

    Very straight forward and simple replacement to do with the right tools, I used my hot air gun work station so this might have been alot easier for me then someone without one? Hair dryers work too, just in case a hot airgun station is not available to you dont worry you can do this repair without, but some form of heat will make life alot simpler :)

    Matthew Newton -

  8. WVI6nRb1nSMWSGgH
    • Rimuovi le 13 viti a croce Phillips #00 lunghe 4 mm.

    To separate the screen from the mid-frame a few pointers I picked up from a video
    1. use a hard pry tool such as iFixit Opening Tool
    2. start on a long side about quarter way down from corner
    3. work around the frame careful not hook the button assembly

    Code Jason -

  9. CRHDLwJGoJCxBOoY
    CRHDLwJGoJCxBOoY
    1aBAEPVXflQt5RXG
    kGmHNhoPcMSrlOi4
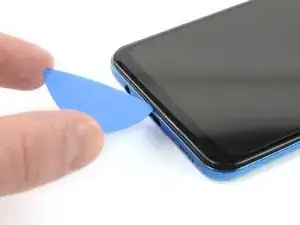
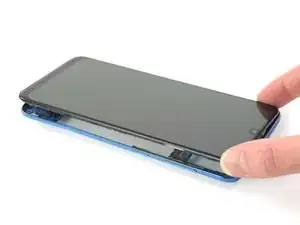
    • Inserisci un plettro di apertura tra lo schermo e il midframe nella parte inferiore del telefono, al di sopra della porta USB-C.

    • Fai scorrere il plettro lungo il bordo inferiore per sganciare le clip.

  10. DsGiJEtDJPnADDPo
    DsGiJEtDJPnADDPo
    PMyuxmGFRADklYMa
    sjQOSkPdHkJ5YTnP
    • Continua a far scorrere il plettro lungo il bordo sinistro del telefono per sganciare le clip.

  11. WXMTgpNI4rWSgpBa
    WXMTgpNI4rWSgpBa
    RZWKpWOZmIblvqoM
    • Fai scorrere il plettro di apertura lungo il bordo superiore.

  12. EIdPPpmEVuFHUFMM
    EIdPPpmEVuFHUFMM
    cDVOxhcBiRsJiYqb
    s1FuyKT51goegcL6
    • Fai scorrere il plettro di apertura lungo il bordo destro fino a raggiungere l'angolo inferiore destro del telefono.

  13. OqjiaORnQHVMUsBk
    OqjiaORnQHVMUsBk
    OKQmTq5DPo6kKHGh
    • Accertati di aver sganciato tutte le clip che fissano il midframe.

    • Stacca il midframe del telefono.

  14. et2slvL3JoopN6TW
    et2slvL3JoopN6TW
    Wm2L6KdX3ddXQgJN
    • Usa uno spudger per scollegare la batteria sollevando il connettore dal suo zoccolo.

  15. tcWXSq6bFpQIKjnj
    tcWXSq6bFpQIKjnj
    QsqvT1yWeewHJler
    WuORrn1RJwU1gPKJ
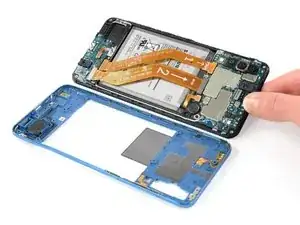
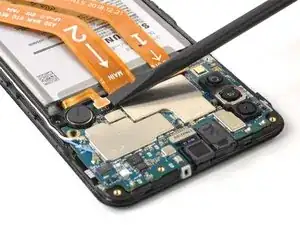
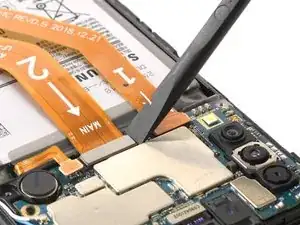
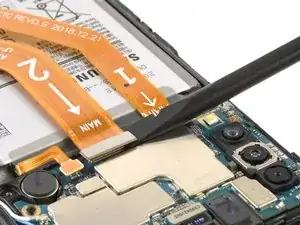
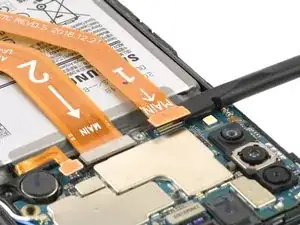
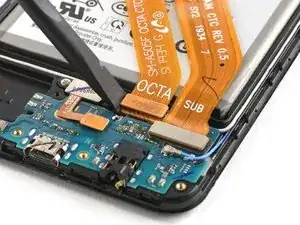
    • Usa l'estremità piatta di uno spudger per sollevare e disconnettere dalla scheda madre i cavi di interconnessione e dello schermo.

  16. UenLYjYYmH3IdaZN
    UenLYjYYmH3IdaZN
    Y22KMLRtFMuxJ1Sp
    jxBUVVRLQFEFZeWO
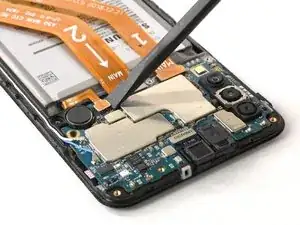
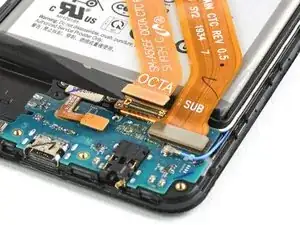
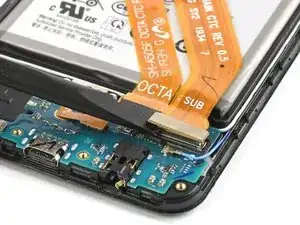
    • Usa l'estremità piatta di uno spudger per sollevare e disconnettere i cavi flessibili della porta di ricarica e dello schermo dalla scheda figlia.

  17. ZhNWKOhJrBUNhaGy
    ZhNWKOhJrBUNhaGy
    ZJDSumfjU4VIDZo2
    • L'adesivo che blocca la batteria del Samsung Galaxy A50 è estremamente tenace.

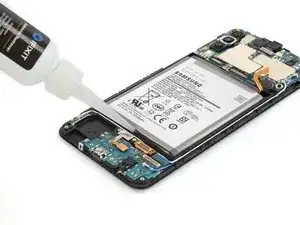
    • Applica dell'alcol isopropilico sotto ogni angolo della batteria e lasciagli diversi minuti di tempo per consentirgli di penetrare e indebolire l'adesivo.

    • In alternativa, applica un iOpener riscaldato sullo schermo direttamente dietro la batteria per due minuti per ammorbidire l'adesivo. Ripeti il processo se necessario.

    Pro tip. i Highly recommend that you decharge the battery 100% before you even try to touch the battery. Reason is these kind of batterys do not like to be bend og damaged at all. If the battery is charged and you bend it, it can burst into flames or even explode, if you hear a hissing sound or see smoke instant push the phone away from you.. in worst case it can send out a 30cm burning flame or maybe it just make smoke and nothing happen.. So always drain the telephone of power before you try to remove the battery… Example turn on wifi and make it stream a movie or something until it run out of power is an easy way to do this ;-) No matter what i recommend to use safety glasses just in case. PRO tip.. in general if you repair any machine with a battery disconnect it and make sure it has no power.. A car battery is safe, but the kind in some electronic devices are not.. so make sure battery has no power.!!!!

    Peder -

  18. Gyhkl5XbOURn6TfL
    Gyhkl5XbOURn6TfL
    e4NrfydAtLxoGMjE
    NVAXJCXJRYmXxeem
    • Fai del tuo meglio per non deformare la batteria nel corso della procedura. Se danneggiate, le batterie agli ioni di litio con involucro flessibile possono rilasciare sostanze chimiche pericolose, incendiarsi o perfino esplodere. Non usare troppa forza e non far leva sulla batteria con strumenti metallici.

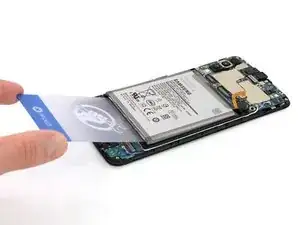
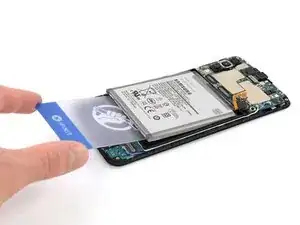
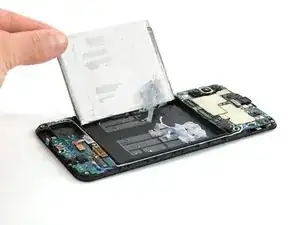
    • Inserisci una scheda in plastica sotto il bordo inferiore della batteria e quindi spingilo con delicatezza sotto la batteria.

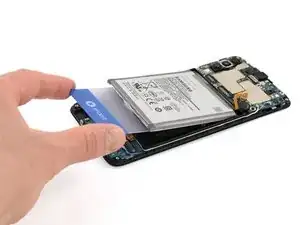
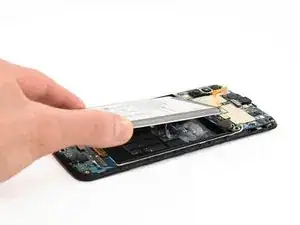
    • Continua a far scorrere la scheda di plastica sotto la batteria per separare l'adesivo.

    Pro tip. i Highly recommend that you decharge the battery 100% before you even try to touch the battery. Reason is these kind of batterys do not like to be bend og damaged at all. If the battery is charged and you bend it, it can burst into flames or even explode, if you hear a hissing sound or see smoke instant push the phone away from you.. in worst case it can send out a 30cm burning flame or maybe it just make smoke and nothing happen.. So always drain the telephone of power before you try to remove the battery… Example turn on wifi and make it stream a movie or something until it run out of power is an easy way to do this ;-) No matter what i recommend to use safety glasses just in case. PRO tip.. in general if you repair any machine with a battery disconnect it and make sure it has no power.. A car battery is safe, but the kind in some electronic devices are not.. so make sure battery has no power.!!!!

    Peder -

    If youve been struggling with this part for the past 30 mins (just like me), i recommend using the blue thingies from the steps where you removed the screen and backplate, worked immediately

    ashlynn -

  19. HVfokP32iZRsdJhn
    HVfokP32iZRsdJhn
    NYGoGYieUfTX2jtZ
    • Rimuovi la batteria.

    • Non installare una batteria danneggiata o deformata, perché questo rappresenta un potenziale rischio per la sicurezza. Sostituiscila con una batteria nuova.

    • Prima di installare un nuova batteria, rimuovi tutto l'adesivo rimasto sul telefono e pulisci le aree di incollaggio con alcol isopropilico e un panno privo di lanugine.

Conclusione

Se possibile, accendi il dispositivo e collauda la tua riparazione prima di installare l'adesivo sostitutivo e sigillare nuovamente il telefono.

Fissa la nuova batteria con adesivo pretagliato o nastro biadesivo. Per posizionarlo correttamente, applica il nuovo adesivo nel dispositivo negli stessi punti della scocca dove c'era il vecchio e non direttamente sulla batteria. Premi con fermezza la batteria nella sua posizione.

Per rimontare il tuo dispositivo, segui queste istruzioni in ordine inverso. Applica del nuovo adesivo dove necessario dopo aver pulito le aree interessate con alcol isopropilico (concentrazione oltre 90%).

Per prestazioni ottimali, calibra la batteria appena installata: caricala al 100% e poi mantienila sotto carica per almeno altre due ore. Quindi usa il telefono finché non si spegne a causa della batteria esaurita. Per finire, carica la batteria ininterrottamente fino al 100%.

Porta i tuoi rifiuti elettronici a un riciclatore certificato R2 o e-Stewards.

La riparazione non è andata come previsto? Prova delle soluzioni di base ai problemi, oppure rivolgiti alla nostra comunità Risposte per trovare aiuto nella risoluzione dei problemi.

Adriana Zwink

Membro da: 18/12/19

47656 Reputazione

14 commenti

Great guide.. One tip… ALWAYS make sure to decharge the battery so it have no power before you do anything… example turn on wifi and stream a movie and when phone is out of power you can remove the battery.. never bend it, use heat, use fluid to desolve the glue behind battery.. never cut/damage or bend the battery and use safety glasses just in case. Battery in a mobile phone is NOT a toy

Peder -

Teşekkürler. Çok açıklayıcı ve anlaşılır biçimde hazırlanan değerli bir rehber olmuş. Gerçekten başarılı.

Ahmet Külahlıoğlu -

My a50 just got a black screen, I have tried the forced reboot for a couple of time it opened but returns to black screen, now I can't open it with force reboot, is this battery or something else

allan_heyz -

I have same problem in same time. On the screen, I only have a circle charging sign, but not a percentage of battery charge when it's charging normally. I think the battery's dead.

inaumoski -

Hi Allan, It's difficult to remotely identify what's wrong with your A50. Let us know what the reason is if you can figure it out.

Adriana Zwink -

Perfecte handleiding! ik heb deze gevolgd en binnen een uurtje was mijn telefoon voorzien van een nieuwe batterij.

Kleine opmerking nog, bij de stappen 9-13 moet je de openingsplectrum wel een beetje schuin naar beneden houden zoals duidelijk te zien is in stap 9/ Als je hem iets vlakker houdt zoals ik eerst deed dan gaan de klemmetjes niet los.

Gertjan Evertse -

Hi @Gertjan, we’re happy to hear that your smartphone is up and running again. Thanks for your feedback!

Adriana Zwink -

Can I use iPhone adhesive strips to hold down the new battery?

Thanasis Dakakis -

Sure, you can use them for your Samsung as well. Good luck with your repair :).

Adriana Zwink -

Zdravím jaké lepidlo můžu použít k nanesení pod baterku?

Bob Bobek -

Clear and informative instructions that are well illustrated. They enabled me to make a successful replacement of the battery. Thank you!

neil evarts -

الله يبارك ماشاء الله

KADER ARAIBIA -

i had the same problem too, i replace it with a new battery and now i got a new problem that give a temperature icon when i connect it to the charger ???

michel Claes -

When refitting the back cover, what adhesive is used? Step 19 says to remove any remaining adhesive -- does that include whatever was used to hold the back cover on originally?

Mike L -