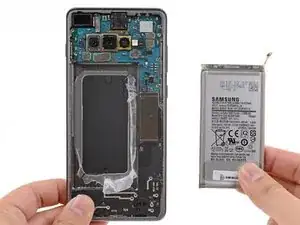
Introduzione
Questa guida mostra come rimuovere e sostituire la batteria del Samsung Galaxy S10+.
La batteria è fissata con dell'adesivo molto tenace. L'uso di alcol isopropilico ad alta concentrazione (oltre 90%) renderà la procedura di rimozione molto più facile.
Se la tua batteria è gonfia, prendi adeguate precauzioni e non scaldare il tuo telefono.
Per la tua sicurezza, scarica la batteria da sostituire sotto il 25% prima di smontare il telefono. Così si riduce il rischio di un pericoloso incendio se la batteria viene danneggiata accidentalmente nel corso della riparazione.
-
-
Scollega il telefono e spegnilo prima di iniziare.
-
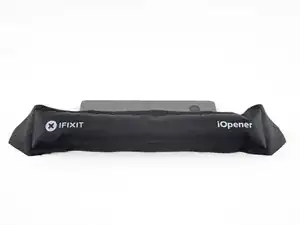
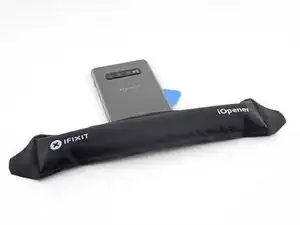
Riscalda un iOpener e applicalo sul bordo destro della cover posteriore per due minuti.
-
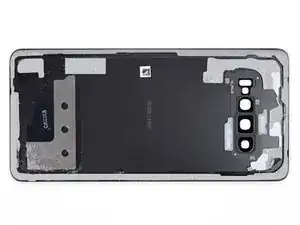
Mentre aspetti, dai un'occhiata all'immagine della cover posteriore già rimossa e prendi nota della disposizione dell'adesivo.
-
-
-
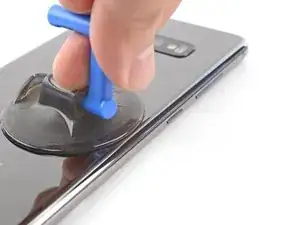
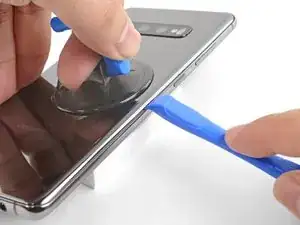
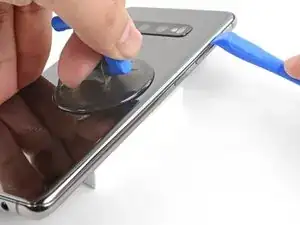
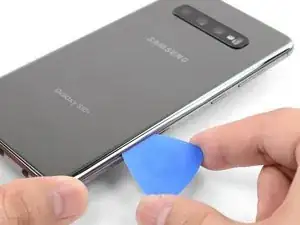
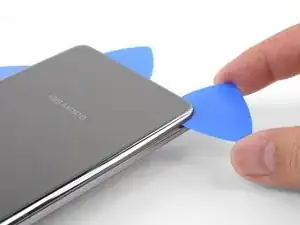
Applica una ventosa al retro del telefono, il più vicino possibile al centro del bordo destro (dove la superficie incollata è più stretta).
-
Tira la ventosa con forza abbastanza elevata e costante per creare una fessura tra la cover posteriore e la scocca.
-
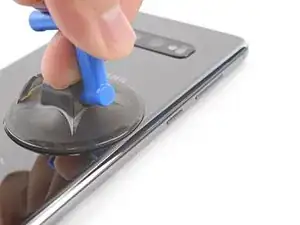
Inserisci la punta di un plettro di apertura nella fessura.
-
Se hai dei problemi a creare la fessura, la soluzione migliore è di applicare dell'altro calore sul bordo e di provare di nuovo col passo precedente.
-
Puoi cercare di far colare nella fessura poche gocce di alcol isopropilico ad alta concentrazione (oltre il 90%) per ammorbidire ancora l'adesivo.
-
-
-
Posa il lato destro riscaldato del telefono su qualcosa che abbia uno spessore di 10-15 mm. Si crea così un angolo sufficiente per poter usare lo strumento di apertura.
-
Immobilizza con le dita il lato sinistro del telefono in modo che non possa scivolare via. Tira la ventosa con un'azione decisa e costante.
-
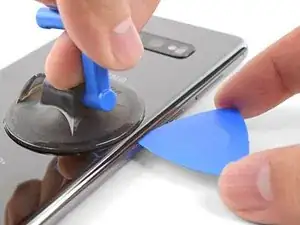
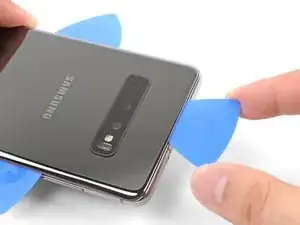
Premi il bordo di uno strumento di apertura nella divisione tra la cover posteriore e la scocca.
-
Fai scorrere alcune volte l'attrezzo di apertura avanti e indietro lungo la divisione.
-
-
-
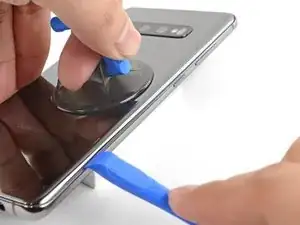
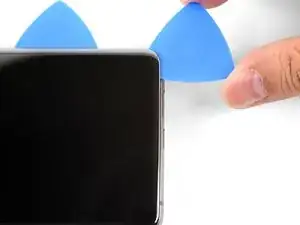
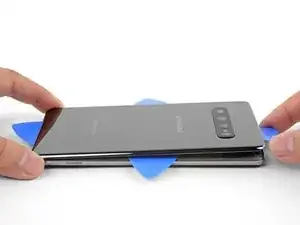
Fai scorrere il plettro di apertura lungo il bordo del telefono, tagliando nel contempo l'adesivo.
-
Lascia un plettro di apertura nella fessura per impedire che l'adesivo si riattacchi.
-
-
-
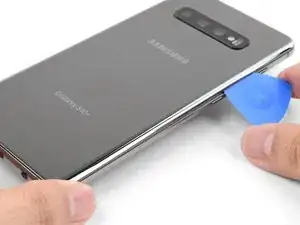
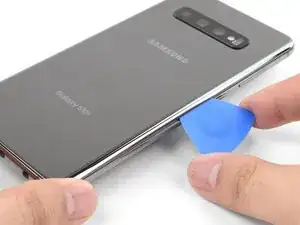
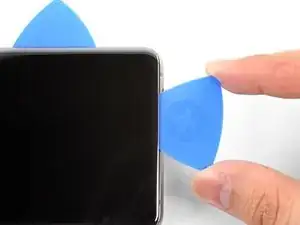
Inserisci un plettro di apertura nel bordo destro vicino all'angolo inferiore destro.
-
Fai scorrere con attenzione il plettro attorno all'angolo. Continua a tagliare lungo il bordo inferiore e attorno all'angolo inferiore sinistro.
-
Lascia un plettro di apertura nella fessura per impedire che l'adesivo si riattacchi.
-
-
-
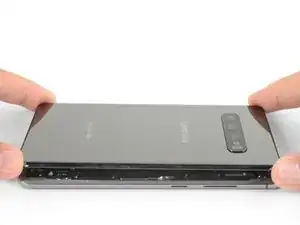
Una volta tagliata la colla tutto attorno al telefono, torci un plettro di apertura in uno dei bordi per favorire il distacco della cover posteriore dalla scocca.
-
Solleva lentamente la cover posteriore. Usa dei plettri di apertura per tagliare tutto l'adesivo rimasto.
-
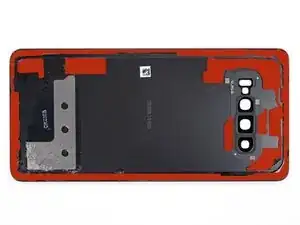
Rimuovi la cover posteriore.
-
-
-
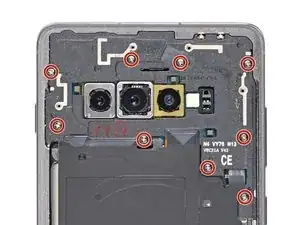
Rimuovi le nove viti a croce Phillips da 4 mm che fissano il telaio intermedio superiore al telefono.
-
-
-
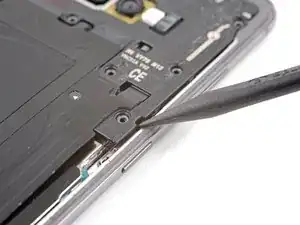
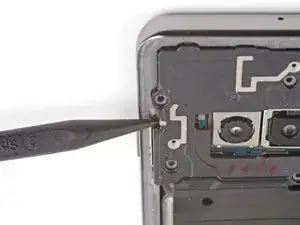
Inserisci la punta di uno spudger nell'incavo sul bordo destro del telaio intermedio, vicino al pulsante Bixby.
-
Fai leva per liberare parzialmente il telaio intermedio dal telefono.
-
-
-
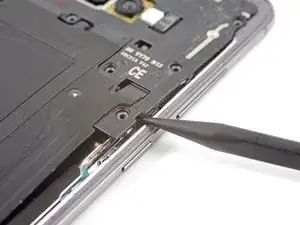
Inserisci la punta di uno spudger nell'incavo sul lato sinistro del telefono, vicino al pulsante di accensione.
-
Fai leva per liberare parzialmente il telaio intermedio dal telefono.
-
-
-
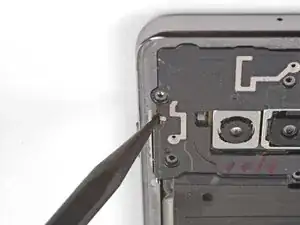
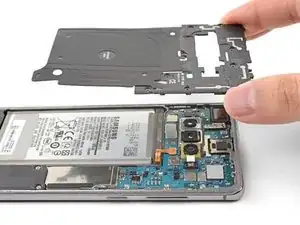
Solleva il telaio intermedio prendendolo dagli angoli superiori e toglilo dal telefono.
-
Allinea il bordo superiore del telaio con il telefono e cala il telaio sul telefono.
-
Usa le dita per esercitare una pressione lungo il perimetro del telaio intermedio per far scattare le clip di bloccaggio. I bordi del telaio dovrebbero essere a filo del bordo del telefono.
-
-
-
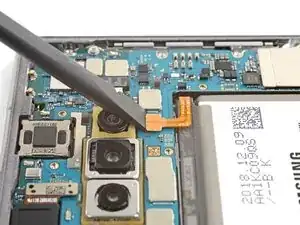
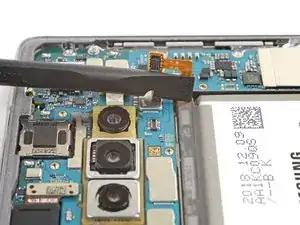
Inserisci l'estremità piatta di uno spudger sotto il connettore della batteria che è attaccato alla scheda madre sotto la fotocamera posteriore.
-
Fai leva per alzare e disconnettere dal suo zoccolo il connettore.
-
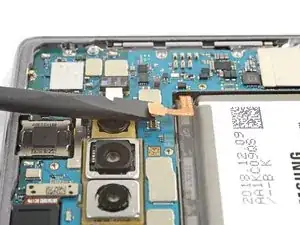
Ripiega con cautela il cavo flessibile della batteria lontano dalla presa della scheda madre per prevenire un contatto accidentale.
-
-
-
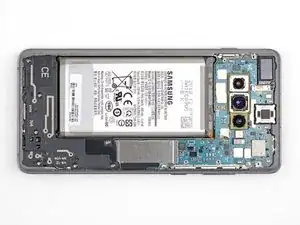
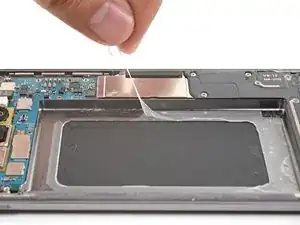
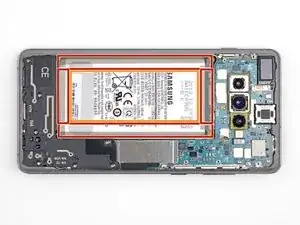
La batteria è incollata molto saldamente. Nota le aree evidenziate sotto la batteria:
-
La scocca, dove la batteria è bloccata da adesivo molto tenace.
-
Una finestra all'interno del telaio, che espone il fragile gruppo display sottostante. Stai attento quando fai leva in questa zona perché potresti danneggiare lo schermo.
-
-
-
Solleva il bordo inferiore del telefono e mantieni il telefono in posizione inclinata.
-
Applica gocce di alcol isopropilico nella fenditura tra la batteria e il telaio intermedio inferiore del telefono.
-
Tieni il telefono in posizione inclinata ancora per un minuto per consentire all'alcol isopropilico di impregnare l'adesivo.
-
In alternativa, scalda un iOpener e applicalo sul lato destro della parte frontale del telefono per due minuti.
-
-
-
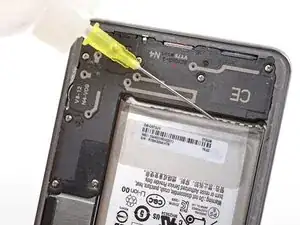
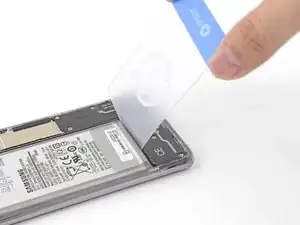
Inserisci l'angolo di una scheda di apertura nella fenditura tra la batteria e il telaio intermedio inferiore.
-
Fai leva per tirare fuori la batteria dal suo alloggiamento.
-
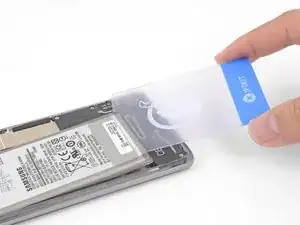
Usa un plettro di apertura, uno strumento di apertura oppure uno spudger per estrarre la batteria. Non usare attrezzi metallici.
-
Ripeti il passo dell'applicazione di alcol isopropilico e prova di nuovo.
-
Cerca di applicare dell'altro calore con un iOpener.
-
-
-
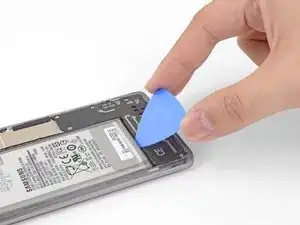
Rimuovi la batteria.
-
Applica adesivo pretagliato oppure nastro biadesivo alla scocca prima di spingere la batteria nel suo alloggiamento.
-
Non applicare dell'adesivo sul dorso esposto del display.
-


Per rimontare il tuo dispositivo, segui queste istruzioni in ordine inverso.
Per prestazioni ottimali, calibra la nuova batteria appena installata dopo aver completato questa guida.
Porta i tuoi rifiuti elettronici a un riciclatore certificato R2 o e-Stewards.
La riparazione non è andata secondo i piani? Vai sulla nostra comunità Risposte per trovare aiuto nella risoluzione dei problemi.

11 commenti
The hardest part was actually getting rid of all the adhesive residue everywhere. That step took the longest. The battery removal went very quickly, surprisingly so.
isely -
Worked great to replace my swollen battery, and thanks to it being swollen I could actually skip the steps to pry open the back cover. Anyway, from my experience everything is correct, the only downside is that I used a little more than a few drops to loosen the battery and after the whole annoyance of removing the glue and placing the new battery I turned on the phone to check everything was working and my back cameras were blurry.... yeah, too much alcohol, had to clean them up very well.... but the sad part is that some of the alcohol made it's way to the front cameras... now they are both blurry.
Brian -
لم استطيع أشحن البطارية خارج أمريكا اذاً ما الفائدة ؟
Omar Al -