Introduzione
Se il tuo dispositivo non resta più carico o non si carica, segui questa guida per sostituire correttamente la batteria nel tuo Samsung Galaxy Tab A 10.1.
Ricambi
-
-
Appoggia il dispositivo con lo schermo rivolto verso l'alto.
-
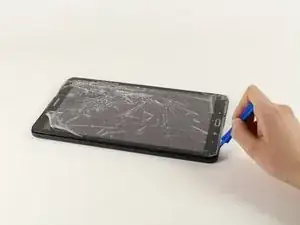
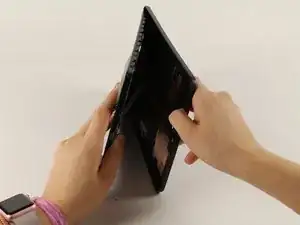
Inizia vicino ad uno dei bordi curvi del dispositivo(usa la seconda immagine come esempio).
-
Infila uno strumento di apertura in plastica tra la copertura posteriore e quella anteriore.
-
-
-
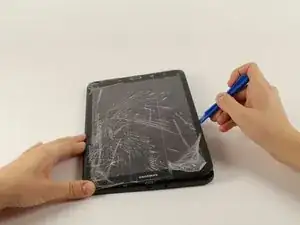
Una volta che lo strumento di apertura in plastica è stato infilato, usalo per fare leva lungo i bordi del dispositivo per separare la copertura posteriore.
-
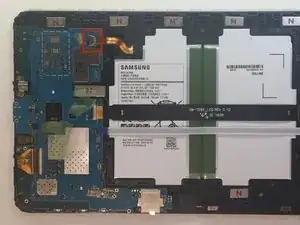
Rimuovi la copertura posteriore dal dispositivo.
-
-
-
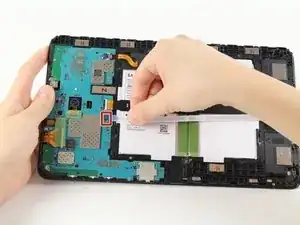
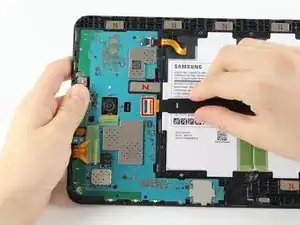
Rimuovi la protezione adesiva e ruota verso l'alto l'aletta di bloccaggio sul connettore ZIF della batteria.
-
Sfila il cavo a nastro arancio della batteria dalla sua presa.
-
-
-
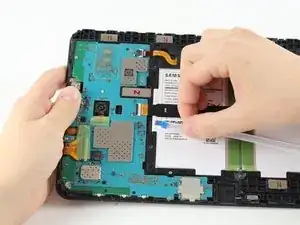
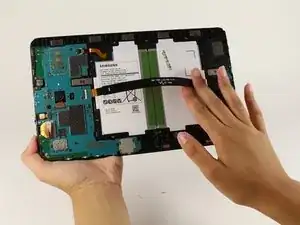
Rimuovi la protezione adesiva, solleva l'aletta di bloccaggio e sfila il cavo a nastro bianco dello speaker dalla sua presa.
-
-
-
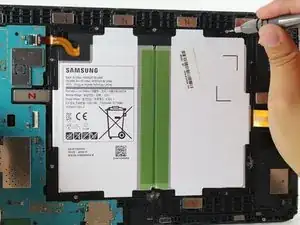
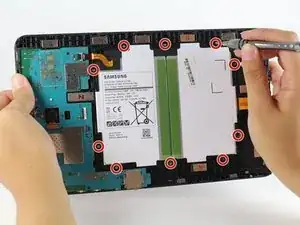
Usa un cacciavite a croce Phillips #000 per svitare le dieci viti da 4 mm attorno alla batteria.
-
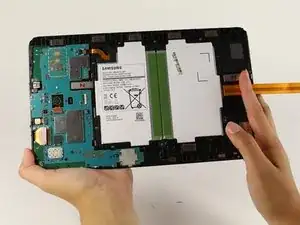
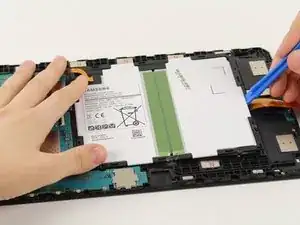
Infila uno strumento di apertura in plastica sotto il bordo inferiore della batteria vicino allo speaker e sollevala.
-
Per rimontare il dispositivo, segui le istruzioni in ordine inverso.
9 commenti
Used this guide up until the disconnecting of the battery in order to fix the black screen of death. Very very helpful. Thank you.
If you have my kind of bad luck — where the latch for the battery flex cable connector sticks to the tape when you remove the tape, and then it will not snap back into place — don’t worry about it too much, because the connector tension will hold the flex cable in place. Just put the tape back over the top as directed.
Why does it say you need a heat gun?
To loosen the adhesive. A hair dryer works well too
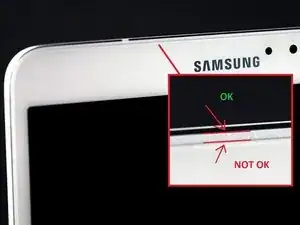
AWESOME!! I was trying to open it from the “NOT OK” place and you saved me to broken the screen… thanks!!
David Leiva -
No problem, enjoy.
Roger L. Ortiz -
Felt it was easier for me to do it from the middles out.
Tanin Garcia -
@rogerlortiz You two seem to be miscommunicating. The author points out the location between the digitizer and frame in which to place a tool. While @Tanin Garcia, whom no longer seems to be member, was pointing out where along the edge from corner to corner it was best to start the separating process.
B. A. Computer Services -
Important: the display is sourrounded with a plastic frame. You need to get beween this frame an the backcover (not directly at glass edge as I tried it first and almost broke the glass). Get a closeup picture of it to clarify.
Oliver Dawid -
wer lesen kann, ist klar im Vorteil - ich hab die SD-Karte drin gelassen. Hat aber funktioniert…
Thomas Wolter -
Don’t use a very small flathead screwdriver as a spudger. Just shattered the screen :(
nikvoss -
Yes, shattered the screen. To the garbage, it goes. A little knowledge is a dangerous thing. This a repair better suited for a professional repair! Thanks for helping me make the decision to get another one!
vancega -