Introduzione

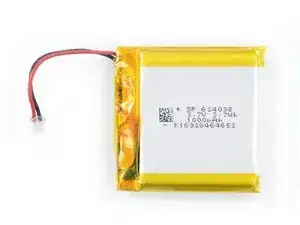
Usa questa guida per rimuovere o sostituire la batteria delle cuffie Sony WH-1000XM3.

Se la batteria è gonfia, prendi le precauzioni appropriate.

Per la tua sicurezza, scarica la batteria al di sotto del 25% prima di smontare le cuffie. Questo riduce il rischio di un pericoloso evento termico se la batteria viene accidentalmente danneggiata durante la riparazione.

Avrai bisogno di un adesivo sostitutivo per rincollare i componenti durante il riassemblaggio del dispositivo.

  1. xJAj6p3OIJv4FS6T
    xJAj6p3OIJv4FS6T
    AqOIFxkFkqpUWvjm
    bNYf1X6AHCcWHTNl
    • Prima di iniziare qualsiasi riparazione, spegni le tue cuffie.

    • Il cuscino auricolare delle Sony WH-1000XM3 è tenuto in sede da delle piccole clip di plastica e la procedura è la medesima per entrambi i cuscini auricolari.

    • Se vuoi sostituire la batteria, dovrai rimuovere il cuscino auricolare DESTRO.

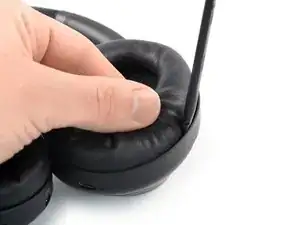
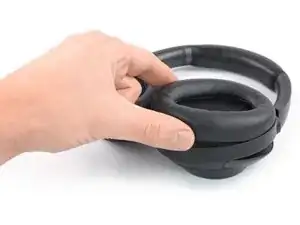
    • Inserisci uno spudger nella fessura tra il cuscino auricolare e e la sua sede in plastica.

    • Puoi anche utilizzare una matita piatta o un cacciavite, ma potresti danneggiare il cuscino auricolare o graffiare le cuffie.

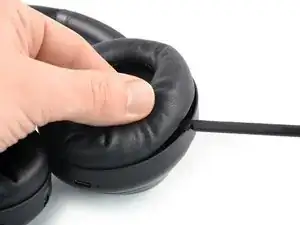
    • Fai leva verso l'alto e solleva il cuscino auricolare spingendo lo spudger verso il basso per sganciare le clip.

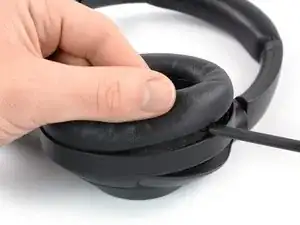
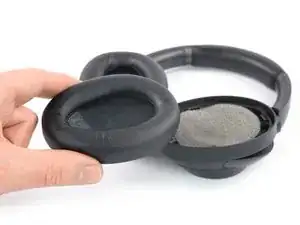
    • Ripeti il passaggio precedente lungo tutto il perimetro del cuscino auricolare in modo da sganciare le restanti clip.

  2. SAAoT6RYDqZv2GvO
    SAAoT6RYDqZv2GvO
    PEchFPIZOPrWbPKJ
    • Ora puoi rimuovere il cuscino auricolare.

  3. DYnPVrGFXsP3Ndd2
    DYnPVrGFXsP3Ndd2
    yXGAFuUgxyCvEkUH
    HFSWYI6ueAbxjNY2
    • Il rivestimento in schiuma che ricopre lo speaker è tenuto fermo da due pezzi di adesivo.

    • Evita di separare i diversi strati di schiuma durante la procedura seguente.

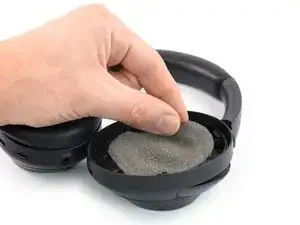
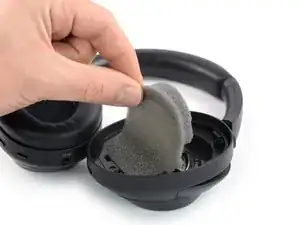
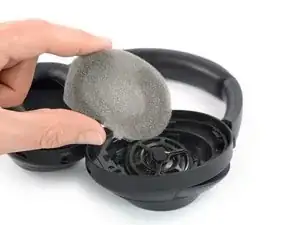
    • Rimuovi attentamente il rivestimento in schiuma dal telaio del padiglione auricolare.

    • Rimuovi il rivestimento in schiuma.

  4. bCxi6Dhc1KZACpQs
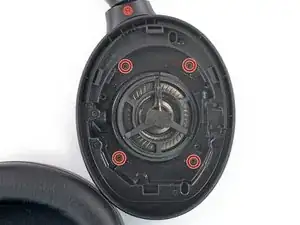
    • Usa un cacciavite a croce Philips per rimuovere le quattro viti da 10,4 mm che tengono ferma la copertura di plastica del telaio del padiglione auricolare.

  5. R2jB4IkiBRljduD1
    R2jB4IkiBRljduD1
    FWVyZZCUnHn1OTTw
    cibbXwYlUmqfVWtR
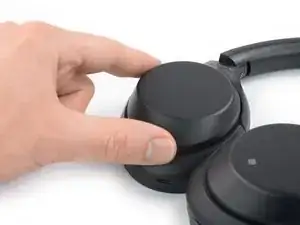
    • Capovolgi le cuffie.

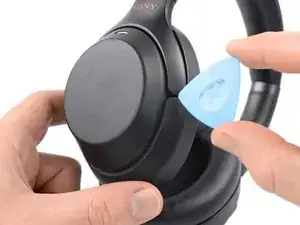
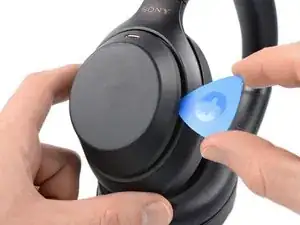
    • Inserisci un plettro di apertura nello spazio tra la copertura in plastica e la struttura della cuffia.

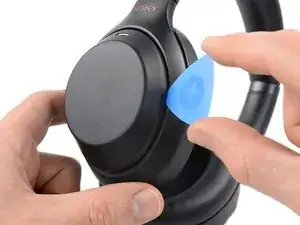
    • Utilizza il plettro di apertura per sollevare il coperchio in plastica finché non riesci ad afferrarlo saldamente.

    • Non cercare ancora di rimuovere completamente il coperchio in plastica. Gli elettrodi all'interno del coperchio che rilevano i controlli gestuali sono ancora collegati all'insieme delle cuffie.

    any old plastic card works fine for this, no need to buy "opening picks"

    AviC -

  6. AqC3gdHVVioYIPPX
    AqC3gdHVVioYIPPX
    FX1n5AxOgpEMFAuC
    KPqyJLsQUVBitQq3
    • Evita di sforzare il cavo di controllo gestuale durante la procedura successiva.

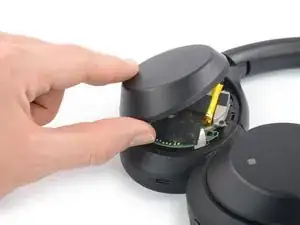
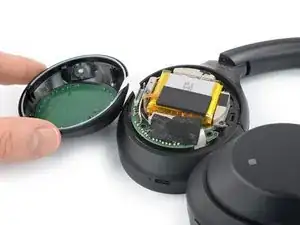
    • Piega con attenzione la copertura dell'auricolare destro verso sinistra, come faresti aprendo la prima pagina di un libro, e posizionala accanto alla struttura dell'auricolare.

    My headphones have an elastic band on the right side that prevents me from folding over the earcup cover to the left.

    Bhavesh Kakwani -

    In case anyone is reading this, the elastic band mentioned is a seal that goes in between the earcup cover and the earcup. The seal might get stuck on a small ribbon cable right above and just to the right of the charging port, just gentle wiggle it free from the ribbon cable and it should come away free

    Ronald Mitchev -

    The gesture control in my headphones is malfunctioning (performs some actions "on its own") for over a year already. The frequency gets more and more annoying so I thought about just disconnecting it (I'm not using it at all tbh.). The quoted comment sort of implies that the headphones may stop working properly without the gesture control panel.

    Anybody any experiences?

    I know my question is kinda "niche", just taking my chances before disassembling the headphones 🙃

    Entio -

  7. VtjIVCaKjvN5EfIb
    VtjIVCaKjvN5EfIb
    UWCOsYbRUhbI3yUd
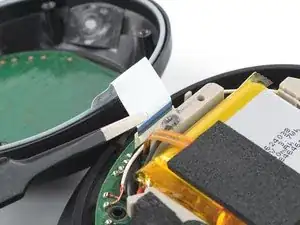
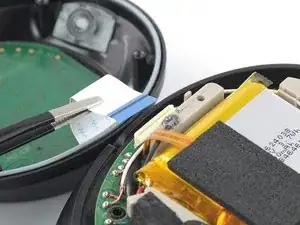
    • Utilizza una pinzetta con punta smussata o le dita per scollegare il cavo a nastro del controllo gesti tirandolo direttamente dalla sua presa.

  8. H4nURUqCoRjgKYFN
    H4nURUqCoRjgKYFN
    ZNYSu3BvUeRvwZs2
    5AiNTx6iQPqiYHsb
    • Non perforare la batteria con strumenti appuntiti. Una batteria perforata potrebbe perdere sostanze chimiche pericolose o prendere fuoco.

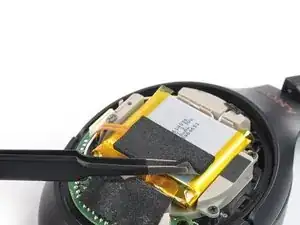
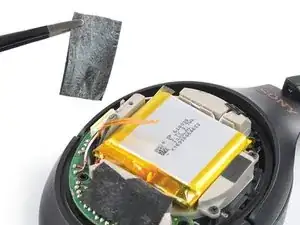
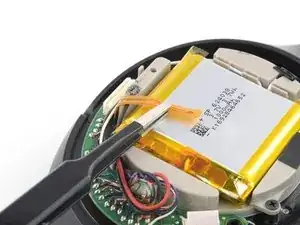
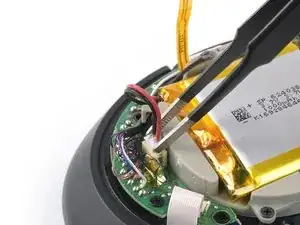
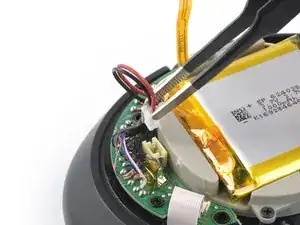
    • Utilizza una pinzetta per staccare con attenzione l'adesivo protettivo in schiuma dalla batteria e dal sensore termico.

    The foam became detached from the adhesive on the battery, a small amount of rubbing alcohol helped soften the adhesive and a small spudger helped pull the temperature sensor free

    Ronald Mitchev -

  9. nD2lJRJjYcitOnuJ
    nD2lJRJjYcitOnuJ
    PyX26jAlHRWDpcEC
    AqxvCLiwu6Pn2JAU
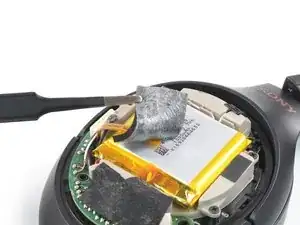
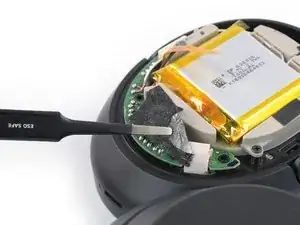
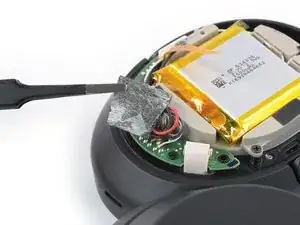
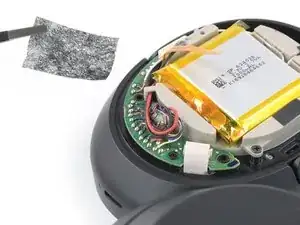
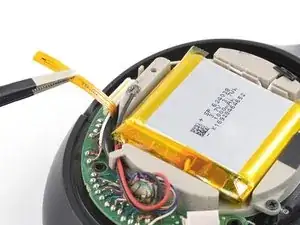
    • Utilizza una pinzetta o le dita per rimuovere con attenzione l'adesivo protettivo in tessuto.

    Be very careful here, the sticker covers some very thin wires and some of the wires may become stuck to the sticker. It helped to use the tweezers to hold the wire steady while I pulled the sticker free with my fingers

    Ronald Mitchev -

  10. dACTyJCHYX1WBJpI
    dACTyJCHYX1WBJpI
    T42eLhGJL14ZVLSH
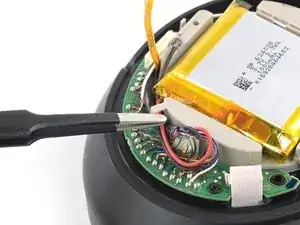
    • Utilizza una pinzetta per piegare con attenzione il sensore termico lateralmente per ottenere libero accesso alla batteria.

  11. iTvjC3dntFATIOHB
    iTvjC3dntFATIOHB
    rQDxeOvEHFKivHTP
    • I cavi nero e rosso della batteria sono instradati sotto un piccolo gancio in plastica sulla struttura della batteria.

    • Utilizza una pinzetta per liberare con attenzione i cavi della batteria.

    while these two photos make it seem like you can magically pull the battery cables through the tan piece of plastic, it's actually a bit tricky getting them out while keeping the other black cable in place

    AviC -

  12. rWtSOrSBKgCiVApA
    rWtSOrSBKgCiVApA
    AOcdqwwPTDPSArHD
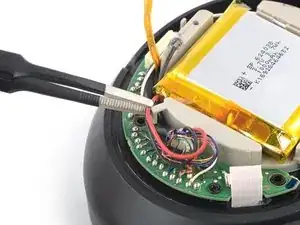
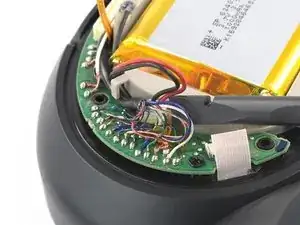
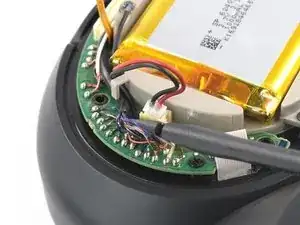
    • Utilizza l'estremità piatta di uno spudger o di un plettro di apertura per piegare con attenzione i cavi che bloccano il connettore della batteria verso il lato fino a ottenere libero accesso al connettore.

  13. HqpIuWuVBSiaVJSc
    HqpIuWuVBSiaVJSc
    M1pIUUuKCwyDWJIC
    • Utilizza una pinzetta con punta smussata per afferrare i lati del connettore della batteria.

    • Tira il connettore su e fuori dalla sua presa, muovendolo delicatamente avanti e indietro per allentare le clip che lo fissano.

    • Tira sempre i cavi per i loro connettori e non per i fili stessi.

    It was helpful to use a credit card to gain some leverage to pry out the connector

    AviC -

  14. YHSfCIREBDMVXETT
    YHSfCIREBDMVXETT
    WQJAegJBaeoRpRNf
    DsxJpKL2xWTMEFKR
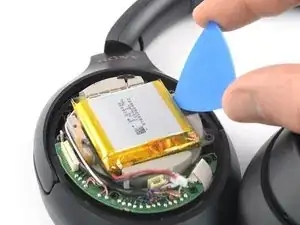
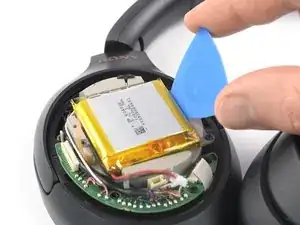
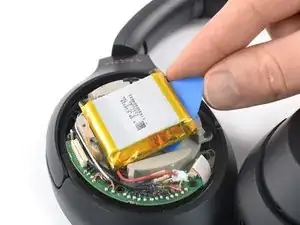
    • Inserisci la punta di un plettro di apertura nello spazio tra il bordo destro della batteria e il suo alloggiamento.

    • Ruota il plettro di apertura per inserire uno dei suoi bordi lunghi nello spazio.

    A credit card works fine

    AviC -

    Thanks! I was struggling to get the battery up, as the pick I had was too thick

    A old credit/debit card worked a treat, jumped when the battery came out though, as it sounded like something snapped/popped.

    Toastery -

    Can you provide the make and model for the battery replacement?

    Rod Talingting -

    1-853-710-12 is the part # for mine purchased in the US mo # wh-1000xm3

    phillip -

  15. QPhhRw61FAeoHPNS
    QPhhRw61FAeoHPNS
    162SUMWVKB16nnxe
    eBoBePLp6ao462HB
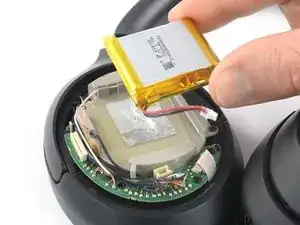
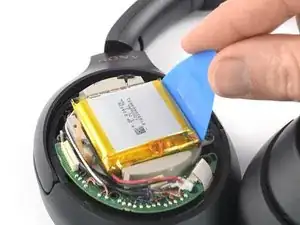
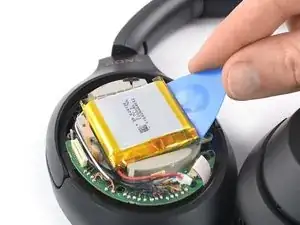
    • Fai scorrere il plettro di apertura sotto la batteria.

    • Solleva a intermittenza la batteria per staccarla dal suo adesivo.

  16. HttmWGYP6CC2SaPF
    HttmWGYP6CC2SaPF
    aL2kZCPrEUbeaELc
    MAAesxJTBApyorva
    • Rimuovi la batteria.

    • Non riutilizzare la batteria dopo averla rimossa, poiché farlo rappresenta un potenziale pericolo per la sicurezza. Sostituiscila con una nuova batteria.

    • Rimuovi i vecchi supporti adesivi prima di installare il nuovo adesivo e pulisci le aree pertinenti con alcool isopropilico (>90%).

    • Se la tua batteria di ricambio non include un nuovo adesivo, fissa la nuova batteria con adesivo pre-tagliato o nastro biadesivo. Per posizionarlo correttamente, applica il nuovo adesivo nel dispositivo nel punto in cui si trovava il vecchio adesivo, non direttamente sulla batteria. Premi saldamente la nuova batteria in posizione.

Conclusione

Se possibile, accendi il dispositivo e testa la riparazione prima di installare un nuovo adesivo e risigillarlo.

Per prestazioni ottimali, calibra la batteria appena installata: caricala fino al 100% e continua a caricarla per almeno altre 2 ore. Quindi utilizza il dispositivo fino a quando non si spegne a causa della batteria scarica. Infine, caricalo ininterrottamente fino al 100%.

Per riassemblare il dispositivo, segui le istruzioni in ordine inverso.

Porta i tuoi rifiuti elettronici in un riciclatore certificato R2 o e-Stewards.

La riparazione non è andata come previsto? Prova delle soluzioni ai problemi di base, oppure chiedi alla nostra comunità Risposte per trovare aiuto.

Dominik Schnabelrauch

Membro da: 23/11/16

200708 Reputazione

13 commenti

Thank you! This is a very detailed and helpful guide. I especially appreciated the battery calibration tip at the end of it! The battery removal was probably the most difficult part, as the adhesive was strong. Slowly working the opening pick under the battery as directed did the trick, though.

Brady Eisert -

Thank you! This is a very detailed and helpful guide. I especially appreciated the battery calibration tip at the end of it! The battery removal was probably the most difficult part, as the adhesive was strong. Slowly working the opening pick under the battery as directed did the trick, though.

Raul Roos -

Thank you very much. This gonna help me out. Draining the battery now and gonna give it a shot later today. I love this headphones and I didn't want to get rid of them.

vectorracer -

Hola. Aparte de cambiar la bateria de estos auriculares, no sabria usted donde puedo comprar para cambiarla la toma del puerto de carga de estos auriculares. Porque parece que se dañó de alguna forma. No me entra el cable , me lo hecha para atras. Tengo que apretarlo con mucha fuerza para que cargue, aun así me lo despide para atras y no carga. Gracias si pudiera ayudarme.

francisco-tiscar@hotmail.com

Francisco Garcia Pérez -

The batterie replacement was very easy. The guide described everything perfectly. Well done and thanks! I already tried to do the calibration once, but it seems it has not worked yet as the software gave me, for instance, 80% first and 5 minutes later it has dropped down to 30% and then very quickly to 10%. I have these 10% now for more than 8 hours. So it seems it is not calibrated. Any ideas? I also tried to reset the headphones. It not really worked.

Michael -

What third party battery have people used here? I see a lot of batteries on the typical Chinese shop, but I doubt those will be as good as the original one. Unfortunately Sony nor iFixit sell the original themselves.

Mathijs Groothuis -

THX you are a life saver! C

Christoph Lepka -

If anyone is looking for the replacement battery and other similar parts, check out this page. It appears to have contracts with the OEMs that let the company sell the original parts.

https://sony.encompass.com/model/SONWH10...

Benjamin Wever -

Thanks alot for this tutorial, helped me to change out the battery in my headphones after not using them for 18 or so months. Used a cheap eBay battery suitable for application.

Thanks again.

CLEM Vacchio -

Thank you Dominik! That was an excellent guide.

If anyone else had trouble with the battery cable connector - my tweezers were a little weak - I used a pair of quality thin-nosed pliers. Did the job very easily.

the_ilhan -

I greatly appreciate these instructions! There is a couple of times along the way where you go "should I really be hearing a snap?" or "should I really be applying that much force?" This great guide gave me the confidence to forge on - was quick and mostly painless.

Sune Hansen -

Good instructions! I didn't see any reason to pull out the ribbon cable though and managed to do it all with it attached.

Kaspar Kuldkepp -

Thank you. Perfect guide, replacement worked fine. Instead of tweezers I used my fingers and finger nails :) Now I'm curious how the battery calibration will work out.

Heinz Ketschab -