Introduzione

Segui questa guida per sostituire la batteria di un controller Sony DualSense della PlayStation 5.

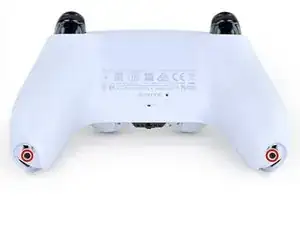
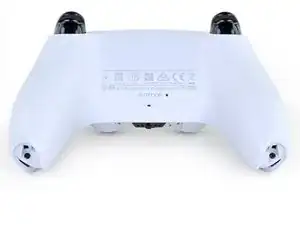
Nota: Questa guida è per i controller DualSense con un FCC ID che finisce con 1. Controlla il retro del tuo controller per verificare il tuo modello. Se il tuo finisce con A, ci saranno delle differenze nel design interno, ma puoi utilizzare ugualmente questa guida.

Se la tua batteria è gonfia, prendi le precauzioni appropriate.

Per prestazioni ottimali, dopo aver completato la procedura, calibra la tua nuova batteria appena installata.

  1. GTfsKVIR12U1WTFu
    GTfsKVIR12U1WTFu
    ePrmMhAFKkXiSkSe
    • Scollega e spegni il controller prima di iniziare.

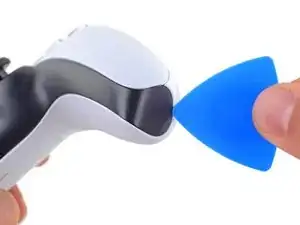
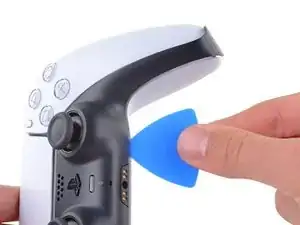
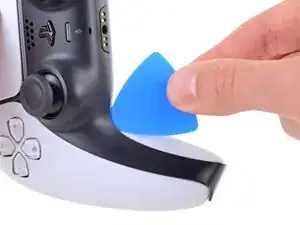
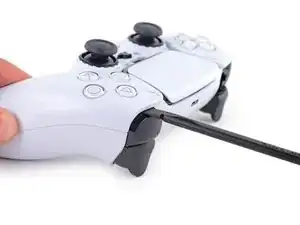
    • Inserisci un plettro al di sotto del rivestimento centrale nell'angolo in basso a destra per rilasciare le clip che lo attaccano alla scocca.

  2. Rjcu3KDZixCT6wVc
    Rjcu3KDZixCT6wVc
    PTiPbZOkfusF5DVG
    TciAM3EXVAG6wM3E
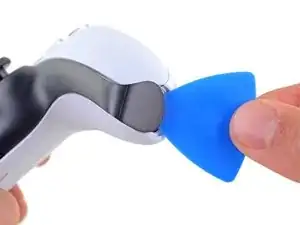
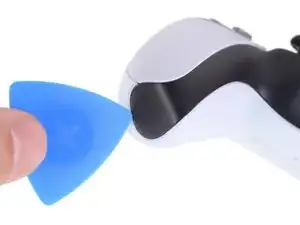
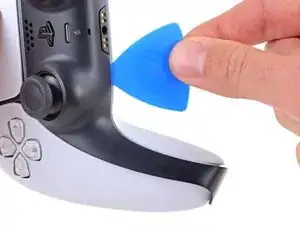
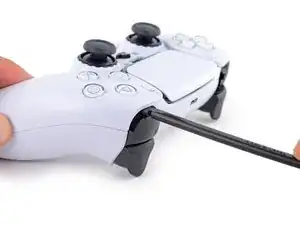
    • Fai scorrere il plettro attraverso il bordo in basso a destra del rivestimento centrale per rilasciare le clip che lo attaccano alla scocca.

  3. d5bIXVWhYD6NuHtO
    d5bIXVWhYD6NuHtO
    VnUyqAC2gatYKPwY
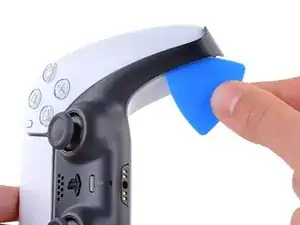
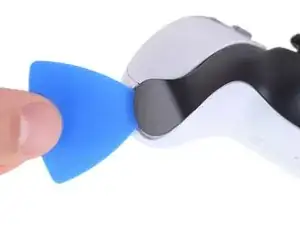
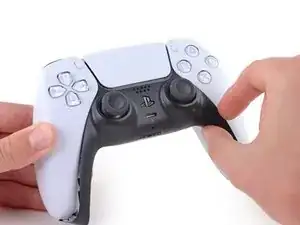
    • Inserisci un plettro sotto il rivestimento centrale nell'angolo in basso a sinistra per rilasciare le clip che lo attaccano alla scocca.

  4. e5VLpDCSJZrCTHZr
    e5VLpDCSJZrCTHZr
    Vmn4XCtKxVVpYw1i
    uGRXgEGmKq2IKNvT
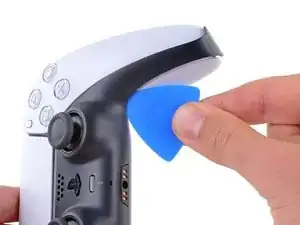
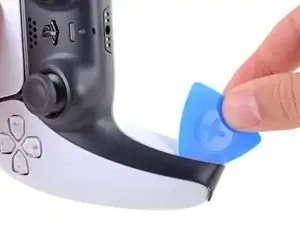
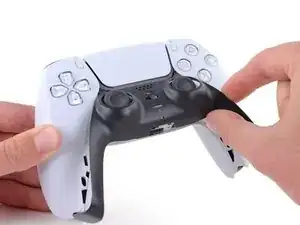
    • Fai scorrere il plettro attraverso il bordo in basso a sinistra del rivestimento centrale per rilasciare le clip che lo attaccano alla scocca.

  5. bQYOnlI5CkoEepwG
    bQYOnlI5CkoEepwG
    FnfBCacKEAvKripH
    MIN3JWiK5kicsBCd
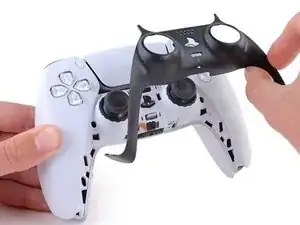
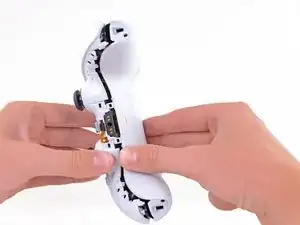
    • Usa le dita per sollevare il bordo inferiore del rivestimento centrale per rilasciare le clip rimanenti.

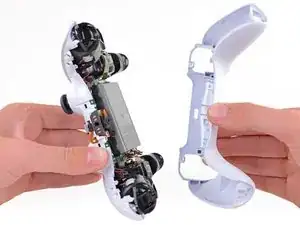
    • Solleva il rivestimento centrale sopra i joystick per rimuoverlo.

  6. 5ReUfeCrCvT1oJRI
    5ReUfeCrCvT1oJRI
    3WpjIcSsYp21SxKj
    gHDW61gAMVPVZgHk
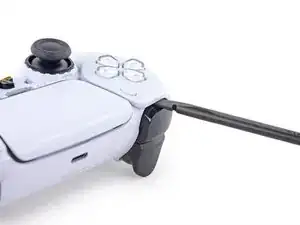
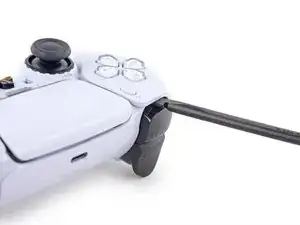
    • Inserisci la parte piatta dello spudger all'interno della fessura sopra il pulsante L1.

    • Copri il pulsante con il pollice per evitare che salti via dall'altra parte della stanza.

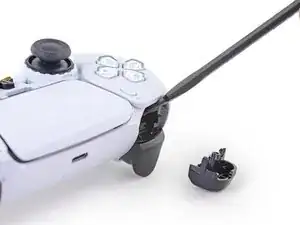
    • Fai leva verso l'alto e rimuovi il pulsante L1.

    Tried prying from the front of the buttons as pictured and my spudger broke off in the gap. A video I watched showed them being pried off from the back (between the R1/R2 and L1/L2 buttons) which seemed much easier.

    Lora Singleton -

    Agree with Lora's comment above. I was able to use an old credit card to take L1/R1 out this way. I pressed down the L2/R2 button to create space to work in, then came in from between L1/L2 and R1/R2. It's easy to pop one of the outer corners first then you can work the credit card around the top and the rest falls out.

    darkstar448 -

    Man, if I'd just read the thumb part...

    caldugen -

  7. HCYXqmKm54w4y6aL
    HCYXqmKm54w4y6aL
    pXUHXLrS3R1rQahC
    NOocJ2nMtBXZlsgH
    • Inserisci la parte piatta dello spudger all'interno della fessura sopra il pulsante R1.

    • Copri il pulsante con il pollice per evitare che salti via dall'altra parte della stanza.

    • Fai leva verso l'alto e rimuovi il pulsante R1.

    to save a few bucks, the L1 and R1 buttons can be removed without the use of the spudger tool by using any thin prying tool and just pry the buttons from the bottom instead of the top

    Alan Peng -

    What I didn't see addressed anywhere (here or in other similar articles) is that replacement R1 / L1 buttons can be differ enough to be un-usable depending on which model your ps5 controller is. The ones I ordered don't fit and now I can't find a way to be sure I get the right ones because few know there's even a difference.

    Walt Mather -

    Did you already figured it out? The version the we need yo use?, We are in the same situation here.

    Gerald Ross Rodriguez -

    Tried prying from the front of the buttons as pictured and my spudger broke off in the gap. A video I watched showed them being pried off from the back (between the R1/R2 and L1/L2 buttons) which seemed much easier.

    Lora Singleton -

  8. RTMdTIsvXlDMMLCE
    RTMdTIsvXlDMMLCE
    3xBGQ3AXp52YbXKM
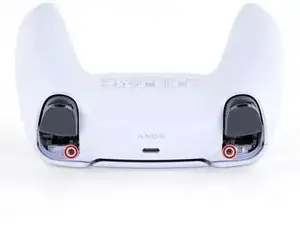
    • Usa un cacciavite a croce Phillips per svitare le due viti da 6,4 mm che tengono fermi gli angoli in basso della copertura inferiore.

  9. rkti2BnvDAh1TREh
    rkti2BnvDAh1TREh
    YyonYJBpMSo32LBL
    • Usa un cacciavite a croce Phillips per svitare le due viti da 6,4 mm dietro i tasti L1 ed R1.

  10. Xc1l4aJ6u6BGp5RP
    Xc1l4aJ6u6BGp5RP
    LjguKaIMMeWPUAgo
    dItxRHYBJkALcAlp
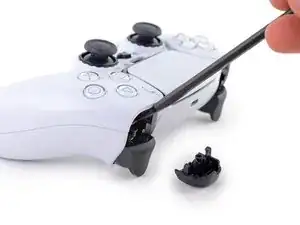
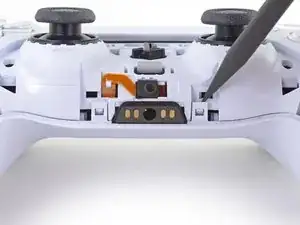
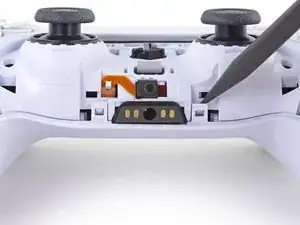
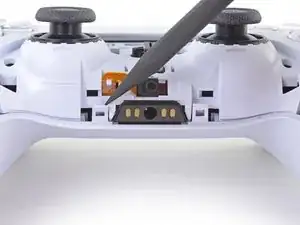
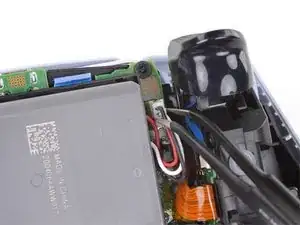
    • Usa la punta di uno spudger per rilasciare i due ganci su entrambi i lati della presa jack.

    If these are similar in nature to the DS4’s clips, don’t use too much force so you don’t end up breaking them

    Strings Cat -

    there is a clip that holds the rear cover in place located in R1 and L1

    Zargruzski nakamura -

    Is there a clip in R1 and there's another in L1? Any way to see where exactly? The part of the back cover near L1 and R2 is that one that's not coming off. I can't seem to pull it off easily the way it looks in Step 11.

    tofu -

    For those wondering where the bumper clip is located, it's ~1cm inwards from the end of the back shell where the bumpers are. Take a spudger in that spot and lift it upwards carefully, it should disconnect the clips if they aren't already

    Franz Rolfsvaag -

  11. VZLGleYqNCLAPnRD
    VZLGleYqNCLAPnRD
    OVo1ia2tIbXUTgfA
    • Rimuovi la copertura posteriore.

    • Su alcune versioni, il case posteriore è fissato con altre due clip vicino ai trigger precedentemente rimossi. Se il case posteriore non si apre senza forzature, verifica la presenza di queste clip.

    There are four more clips/hooks hidden in the seams along the outer sides of the handles. If you pull open the controller as shown in this step, then you will shear off the two tiny clips which are right next to the R1 and L1 buttons.

    Therefore, you should first release those clips by prying the seams open sideways.

    I noticed this with the updated design of the controller, not sure whether the hooks are present on the first version.

    The hooks are not critical for the integrity of the controller as the two halves are held together by the screws hidden under the buttons. The damage does show that the controller has been taken apart.

    Nick -

    Thought I'd clarify: The clips next to the L1 and R1 are on the outer side from the L1 and R1 buttons, I'd suggest zooming in on the picture to see them. They're quite easy to break, but also easy to remove using the plastic spudger along the seam, bending the bottom cover outwards

    Franz Rolfsvaag -

    I am still strugling to find the clips. Could someone point them out in the image with a screen shot or something like that.

    aGingerThing -

    I keep getting stuck at this step too with the new DualSense CFI-ZCT1WA revision. The top and bottom shells seem like they are fused together next to L1/R1 but I can't seem to be able to find where these hidden clips are located. My controller is still in warranty so I don't want to break them in case I can't fix my issue.

    but also easy to remove using the plastic spudger along the seam, bending the bottom cover outwards

    I tried this but it seems that the you need a lot of force and I ended up bending the tip of my spudger. Are you sure it's not the top cover that you need to pry away? The bottom cover has a ridge to make sure it's under the top cover so it's not easy to bend outwards.

    @samomio I think there needs to be a step added for these new clips.

    robplease -

    Ok, not seeing a lot of motion on this request, so I've uploaded photos of the hooks to imgur.

    Here ya go: https://imgur.io/a/7NWmQi5

    Sean Murphy -

    Life save Sean. Appreciate the image.

    Vili -

    This guide really needs an update on this. I had a really hard time getting the forward clips to release even after referring to the comments above. Pretty sure I broke them in the end. No big deal but would be great if the iFixit experts could work out a good method for releasing them.

    Marcus Harvey -

    I finally figure it out!!

    The hidden clip is very tricky but once you understand how it works it is easy to remove.

    Use Sean's picture: https://imgur.io/a/7NWmQi5

    What sean is showing, is actually the bottom shell of the seam.

    To disassemble

    1. Use the flat side of the spudger, pry the bottom seam OUTWARDS near the R1/L1 button hole.

    2. (most important) While prying the bottom shell seam outwards, push your thumb on the upper shell and push outward as well (you can do this by applying pressure from the removed R1/L1 button hole towards the seam. And then it will disassemble automatically

    And that's it!

    Penn -

    updated instruction:

    I finally figure it out!!

    The hidden clip is very tricky but once you understand how it works it is easy to remove.

    Use Sean's picture: https://imgur.io/a/7NWmQi5

    What sean is showing, is actually the bottom shell of the seam.

    To disassemble

    1. Use the flat side of the spudger, pry the bottom seam OUTWARDS near the R1/L1 button hole.

    2. (most important) While prying the bottom shell seam outwards, hold your thumb on the upper shell as anchor and then use your other finger to pry the bottom edge of the controller up away from the shell. If you are doing the first step, then don't worry about breaking the clip, just force it open. And then it will disassemble automatically

    And that's it!

    Penn -

    I managed to do it just by pulling harder than what I was already doing. And I don't think I broke anything. So, for me at least, the technique described in this guide worked.

    Riedweg Guillaume -

  12. y641KJMcsYBEboOS
    y641KJMcsYBEboOS
    E6YeMuX4VK4rKsAg
    • Usa un paio di pinzette o le tue dita per scollegare la batteria dalla scheda madre.

    • Fai presa sul connettore, non sui fili, mentre lo stai scollegando.

    Tweezers aren't gonna grip that the way you need.

    Leif DeWolf -

    For those having trouble using tweezers to pull out the connector, you can grab below the lip of the connector and use the controller as a lever to pull it up as seen here DualSense Controller v2 Battery Replacement

    This little trick helped me so much and I believe it should be shown on this guide as well.

    Ezra Worthington -

    Tweezers is too weak for this. I use my finger nails after removing the battery from the slot, straighten the cable lines and slowly wiggle it out.

    Penn -

  13. ONKEXniLxYyiAMwP
    ONKEXniLxYyiAMwP
    OU1aauS5WB3RXnNv
    • Solleva la batteria dal suo supporto.

Conclusione

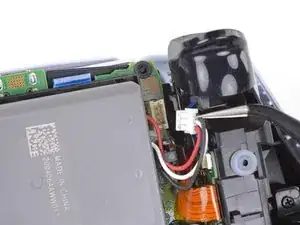
Per rimontare il tuo dispositivo, segui le istruzioni in ordine inverso.

Porta i tuoi rifiuti elettronici a un riciclatore certificato R2 o e-Stewards.

La riparazione non è andata come previsto? Prova delle soluzioni di base ai problemi, oppure rivolgiti alla nostra comunità Risposte per trovare aiuto.

Sam Omiotek

Membro da: 25/02/19

71915 Reputazione

9 commenti

Is there a better battery that can be used rather than the standard battery? This controller dies so fast that I don’t bother disconnecting it ever. I’m pretty sure that’s bad, but It’s frustrating having it die midgame in my second game.

Anthony Ramirez -

Yes. You can purchase a 2000mah battery replacement. It’s not much of a difference, but lowering your led settings and controller vibration also works wonders for prolonging the battery life.

John Jevitz -

Any chance you could figure out why the %#*@ thing won't work USB powered with no battery? I shouldn't have to keep replacing a battery when I don't actually want to play wireless.

NoLife -

@NoLife

If you bridge the pins for the red and white battery wires, the controller will power on properly without a battery. This will be easiest with a soldering iron.

Amboy Scout -

I need a new battery for my Dualsense controller, Sony is saying to just buy a new one while I'm not gonna take broken for a answer. So if anyone knows a reliable site where I can get a battery replacement for my dualsense, do recommend

Diaper Fixer 360 -

This!!!! I have been searching for a new OEM battery for so long.

Parker Schless -

I replaced all my PS5 controller batteries with these: https://www.amazon.com/dp/B0C5GZCDZ9?psc...
I get a $@$* ton more battery life out of them. Highly recommend.

Nathaniel Gray -

Amazon.com has an immense amount of options for OEM spec battery replacement as well as higher-performing options.

Thomas Kegley -

Does anyone know how to shop among the immense amount of options for OEM spec battery replacements that are guaranteed safe, contain safe, reliable battery management systems, and are not counterfeit products? I would love to replace my batteries with true OEM, but that seems to be near impossible to track down. Burning down my house with inferior products is just not an option.

Homer T. Nacho Cheese -