Introduzione
Avvertenza: la sostituzione della batteria può essere pericolosa! Presta estrema attenzione quando segui questa guida!
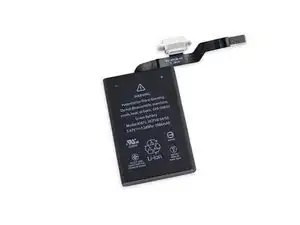
Scarica la batteria al di sotto del 25% per evitare l'esaurimento termico della batteria.
Strumenti
Ricambi
-
-
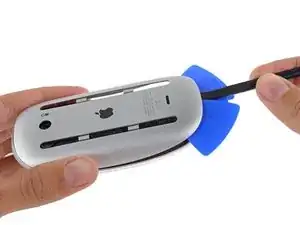
Inserisci degli spudger e dei plettri tra l'acrilico ed il fondo inferiore in metallo/plastica.
-
-
-
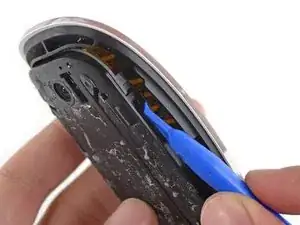
Usa uno strumento a leva o uno spudger per sbloccare le quattro clip di plastica intorno al perimetro dello scomparto interno
-
-
-
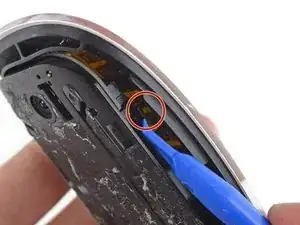
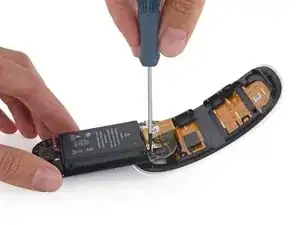
Rimuovi le due viti Torx T5 che tengono la parte metallica sopra il cavo connettore.
-
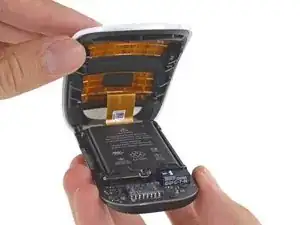
Disconnetti il cavo dalla scheda logica e metti la metà superiore del mouse da parte.
-
-
-
Indossa occhiali di protezione mentre sei a contatto con il liquido. (Gli occhiali di protezione dovrebbero essere inclusi nel kit).
-
Per proteggersi da irritazioni cutanee si possono indossare dei guanti il lattice. (Anche questi dovrebbero essere inclusi nel kit).
-
-
-
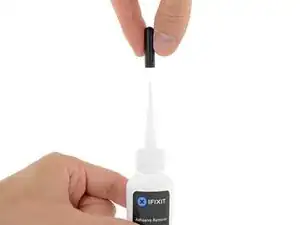
Rimuovi la copertura nera in gomma dalla bottiglia del solvente per adesivo.
-
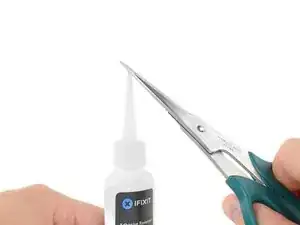
Usa delle forbici per tagliare la punta dell’applicatore.
-
-
-
Metti due gocce di solvente per adesivo uniformemente.
-
Aspetta 2-3 minuti per permettere al liquido di penetrare sotto la batteria.
-
-
-
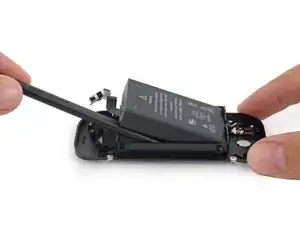
Fai leva da sotto la batteria con uno spudger per separarla dalla colla.
-
Rimuovi la porta di ricarica.
-


Per rimontare il tuo dispositivo, segui queste istruzioni in ordine inverso.
Porta i tuoi rifiuti elettronici a un riciclatore certificato R2 o e-Stewards.

11 commenti
I may be wrong because I don’t own this device, but from what I’ve read from other tutorials, it does not look like it’s necessary to do steps 1 and 2. The tutorials I’ve read just split the mouse in 2 without messing with the bottom of the mouse. Doing so means they don’t need to worry about damaging the bottom or working with the adhesive.
I have fixed it!
Thanks for the note!
Die Anleitung ist leider sehr unvollständig.
Nachdem das Maus Kabel und das Batterie Kabel entfernt wurde, ALLE Schrauben entfernen (4er und 5er Torx), die Platine, den Schalter und die Metall Spange demontieren. Den Ladestecker abschrauben, Achtung! darunter befindet sich eine Metallhülse / Führung für den Ladestecker, gleich mit entfernen.
Jetzt darf nur noch die Batterie zu sehen sein.... Ab in den Backofen und auf 50 Grad Celsius erwärmen, das reicht aus, um die Batterie ohne Schaden am Gehäuse zu entfernen. Die Klebestreifen befinden sich links und rechts auf den langen Seiten. Diese im warmen Zustand sofort ablösen und auf die neue Batterie kleben.
Beim Zusammenbau darauf achten, die etwas längeren Schrauben gehören zum Schalter! Die Stecker vorsichtig ohne Gewalt einstecken, wenn alles richtig ist, gehen sie ganz leicht herein.
So, ich hoffe das ich nichts vergessen habe, Viel Glück
Translation:
Unfortunately, the instructions are very incomplete.
After the mouse cable and the battery cable have been removed, remove ALL screws (4 and 5 Torx), dismantle the board, switch and metal clasps. Unscrew the charging plug, attention! Below it is a metal sleeve / guide for the charging plug, immediately remove it.
Now only the battery can be seen.... Put it in the oven and heat it up to 50 degrees Celsius, that's enough to remove the battery without damaging the housing. The adhesive strips are located on the left and right on the long sides. Remove them immediately when warm and stick them to the new battery.
When assembling, make sure that the slightly longer screws belong to the switch! Gently plug in the plugs without force, if everything is correct, they go in very easily.
So, I hope I haven't forgotten anything, good luck
Thank you very much! This is absolutely correct.
English translation by Google:
Unfortunately, the instructions are very incomplete.
After removing the mouse cable and the battery cable, remove ALL screws (4 and 5 Torx), disassemble the circuit board, the switch and the metal clasp. Unscrew the charging plug, caution! underneath is a metal sleeve / guide for the charging connector, remove it at the same time.
Now only the battery should be visible... Put it in the oven and heat it up to 50 degrees Celsius, that's enough to remove the battery without damaging the housing. The adhesive strips are on the left and right of the long sides. Remove this immediately when warm and stick it on the new battery.
When assembling, make sure that the slightly longer screws belong to the switch! Insert the plugs carefully without force, if everything is correct they will go in quite easily.
Well, I hope I haven't forgotten anything, good luck
Lol we posted the same thing at the time
I did first and passed out