Introduzione
Sostituire il case superiore richiede la rimozione di quasi ogni componente del tuo MacBook Pro. Dovrai anche trasferire il trackpad originale sul tuo nuovo case superiore.
Ricambi
-
-
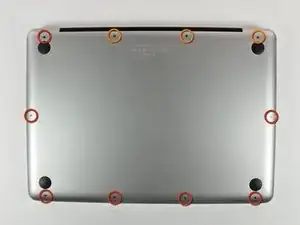
Rimuovi le dieci viti seguenti, che fissano il case inferiore al MacBook Pro Unibody da 13":
-
Sette viti con testa a croce da 3 mm.
-
Tre viti con testa a croce da 13,5 mm.
-
-
-
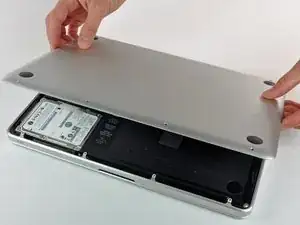
Solleva leggermente il case inferiore e spingilo verso la parte posteriore del computer per liberare le linguette di montaggio.
-
-
-
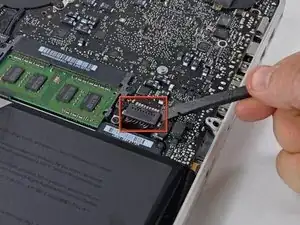
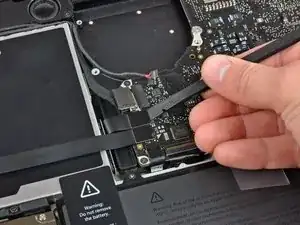
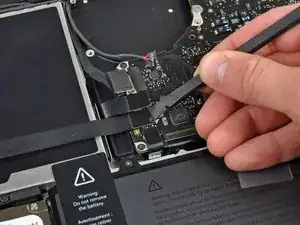
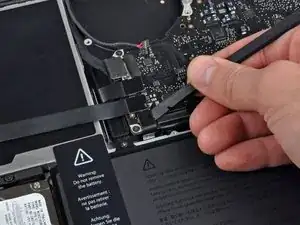
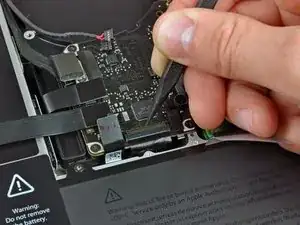
Mediante l'estremità piatta di uno spudger, sollevare il connettore del cavo della batteria dal connettore femmina sulla scheda logica staccandolo da questa.
-
-
-
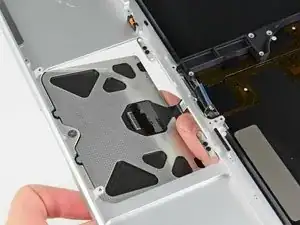
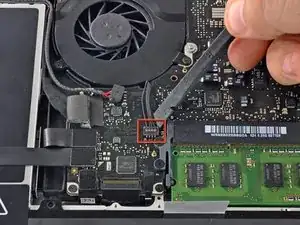
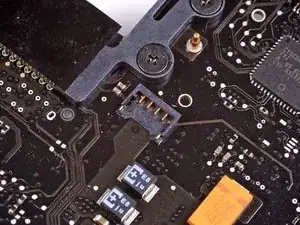
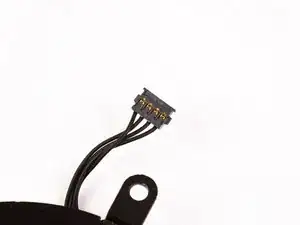
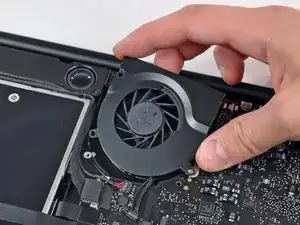
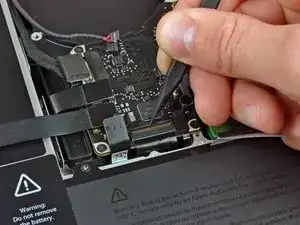
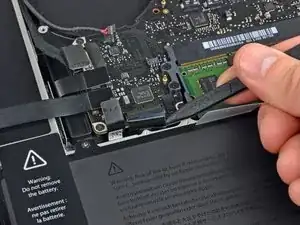
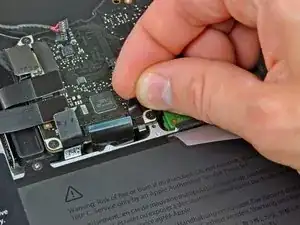
Usa uno spudger per scollegare il connettore della ventola dalla sua presa sollevandolo dalla scheda madre.
-
-
-
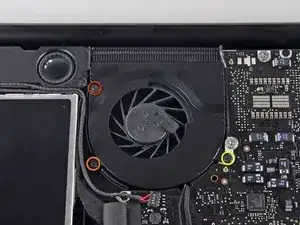
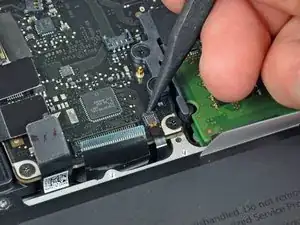
Svita le seguenti tre viti che fissano la ventola al case superiore:
-
Una vite a croce Phillips da 6,5 mm
-
Una vite a croce Phillips da 5,5 mm
-
Una vite a croce Phillips da 4,5 mm
-
-
-
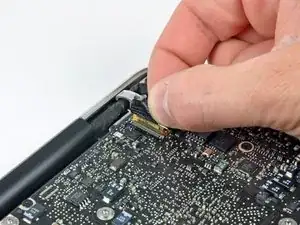
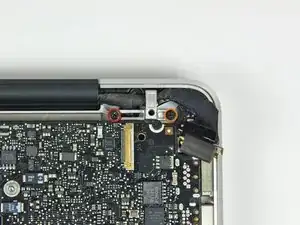
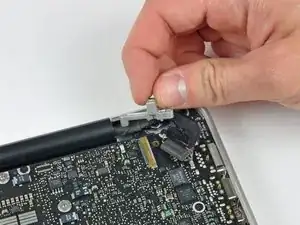
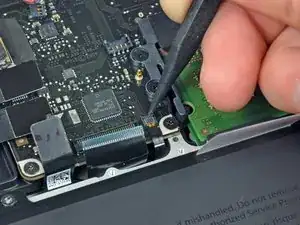
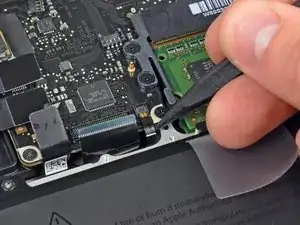
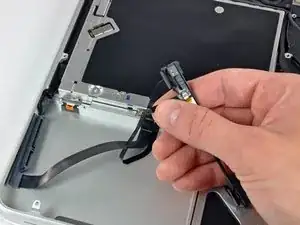
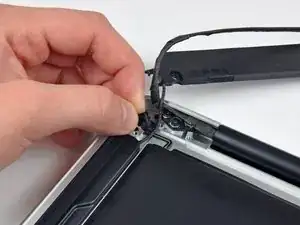
Prendi l'aletta in plastica fissata al blocco del cavo dati dello schermo e ruotala verso l'ingresso DC del portatile.
-
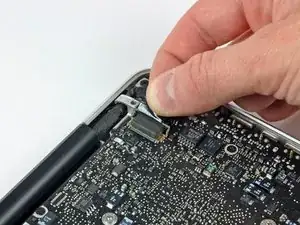
Sfila il cavo dati dello schermo dalla sua presa, verso l'ingresso DC del portatile.
-
-
-
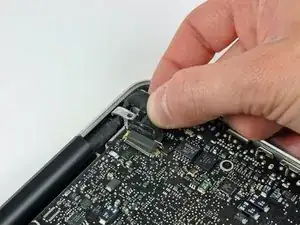
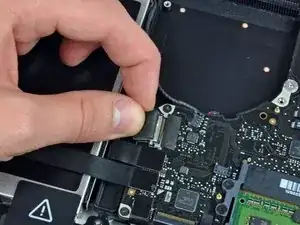
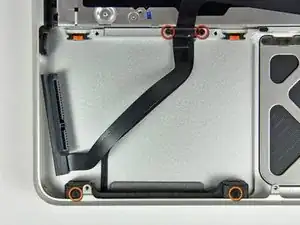
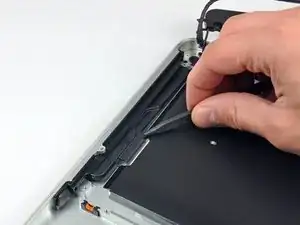
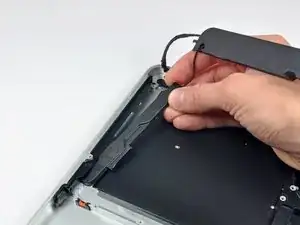
Svita le seguenti due viti che fissano la staffa del cavo dati dello schermo al case superiore:
-
Una vite a croce Phillips da 7 mm
-
Una vite a croce Phillips da 5 mm
-
Solleva la staffa del cavo dati dello schermo dal case superiore.
-
-
-
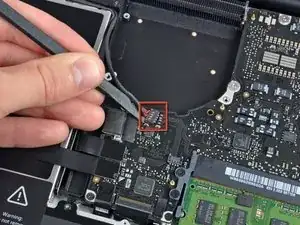
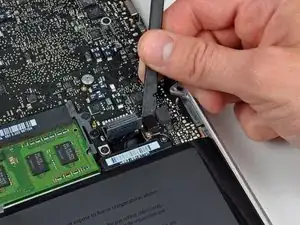
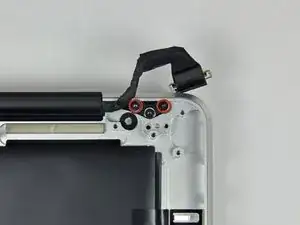
Usa la parte piatta di uno spudger per scollegare il connettore del subwoofer e speaker destro dalla scheda madre.
-
-
-
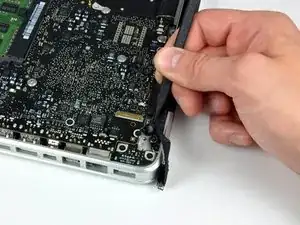
Usa la parte piatta di uno spudger per scollegare i connettori dei cavi del lettore CD, del disco rigido e del trackpad dalla scheda madre.
-
-
-
Usa un'unghia o la punta di uno spudger per ruotare verso l'alto l'aletta di bloccaggio sul connettore ZIF del cavo della tastiera.
-
Usa lo spudger per sfilare il cavo della tastiera dalla sua presa.
-
-
-
Rimuovi la piccola striscia di nastro nero dalla presa del cavo a nastro della retroilluminazione della tastiera.
-
-
-
Usa la punta di uno spudger per ruotare verso l'alto l'aletta di bloccaggio sul connettore ZIF del cavo della retroilluminazione della tastiera.
-
Usa lo spudger per sfilare il cavo a nastro della retroilluminazione della tastiera dalla sua presa.
-
-
-
Usa la parte piatta di uno spudger scollegare il connettore dell'indicatore della batteria sollevandolo dalla sua presa sulla scheda madre.
-
-
-
Usa la punta di uno spudger per rimuovere il microfono dall'adesivo che lo fissa alla scocca superiore.
-
-
-
Svita le seguenti viti:
-
Cinque viti a croce Phillips da 3,1 mm
-
Due viti a croce Phillips da 3,9 mm
-
Due viti a croce Phillips da 7 mm dalla scheda d'ingresso DC.
-
-
-
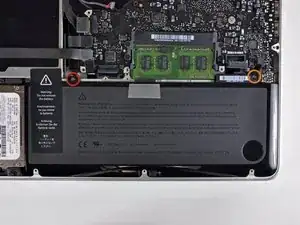
Svita le seguenti viti Tri-point che fissano la batteria al case superiore:
-
Una vite Tri-point da 5,5 mm
-
Una vite Tri-point da 13,5 mm
-
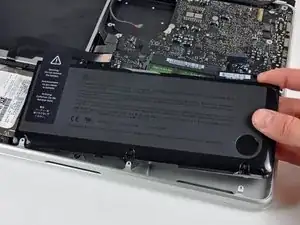
Solleva la batteria dal case superiore.
-
-
-
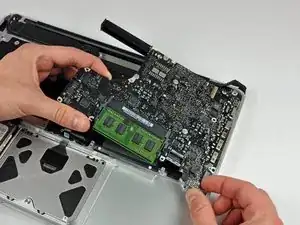
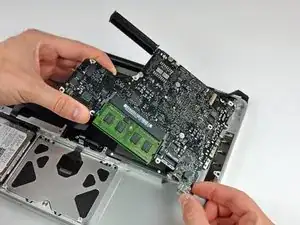
Solleva la scheda madre dal suo bordo sinistro e continua finché le porte non escono dal lato del case superiore.
-
Tira la schema madre lontano dal bordo del case superiore e rimuovila, stando attento alla scheda d'ingresso DC che potrebbe impigliarsi.
-
-
-
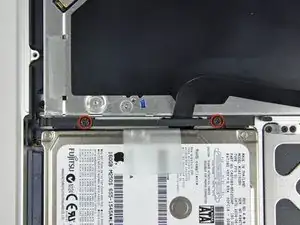
Svita le due viti a croce Phillips che fissano la staffa del disco rigido al case superiore.
-
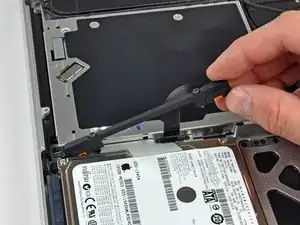
Solleva la staffa del disco rigido dal case superiore.
-
-
-
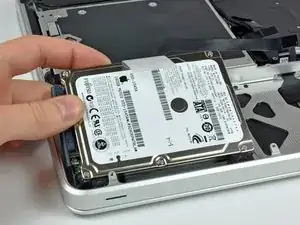
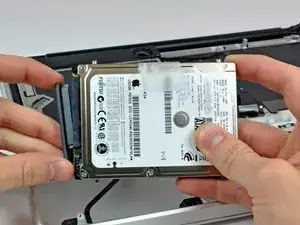
Solleva il disco rigido dal suo bordo libero e tiralo fuori dal case, stando attento al cavo che lo collega al portatile.
-
-
-
Svita le seguenti quattro viti che fissano il cavo del disco rigido e del sensore IR al case superiore:
-
Due viti a croce Phillips da 1,5 mm
-
Due viti a croce Phillips da 4 mm
-
Sfila la staffa del disco rigido e del sensore IR dal bordo del case superiore.
-
Separa attentamente il cavo del disco rigido e del sensore IR dal case superiore.
-
-
-
Svita le due viti a croce Phillips che fissano il subwoofer al case superiore.
-
Solleva il subwoofer dal lettore CD ed appoggialo sopra il portatile.
-
-
-
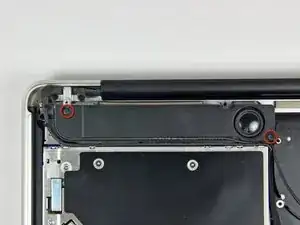
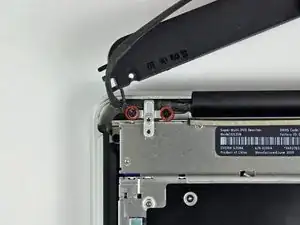
Svita le due viti a croce Phillips da 9,2 mm che fissano la staffa del cavo della fotocamera al case superiore.
-
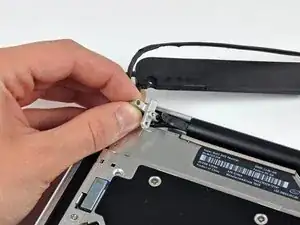
Solleva la staffa del cavo della fotocamera dal case superiore.
-
-
-
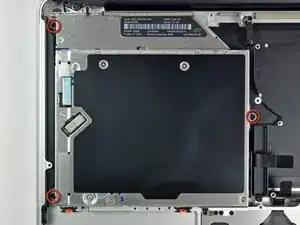
Svita le tre viti a croce Phillips da 2,5 mm che fissano il lettore CD al case superiore.
-
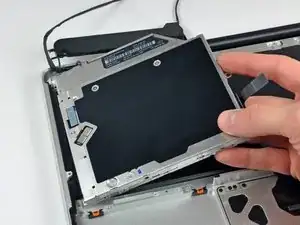
Solleva il lettore CD dal bordo destro e rimuovilo dal portatile.
-
-
-
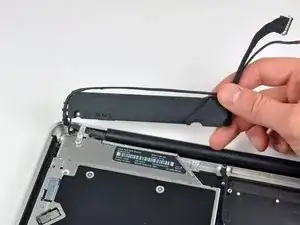
Usa la punta di uno spudger per sollevare lo speaker destro dall'adesivo che lo fissa al case superiore.
-
-
-
Svita le due viti Torx T8 esterne da 6 mm che fissano entrambi i lati dello schermo al case superiore (4 viti in totale).
-
-
-
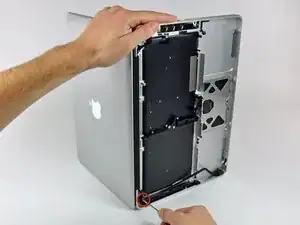
Apri il tuo MacBook Pro in modo che lo schermo sia perpendicolare al case superiore.
-
Appoggia il tup MacBook Pro aperto come mostato.
-
Mentre tieni insieme lo schermo e il case superiore insieme con la mano sinistra, svita la vite Torx da 6 mm restante dalla staffa inferiore dello schermo.
-
-
-
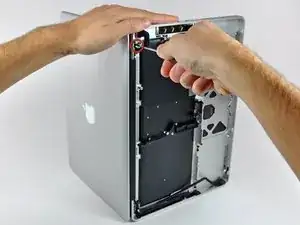
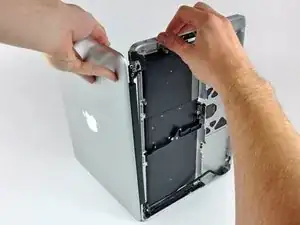
Prendi il case superiore con la mano destra e ruotalo leggermente verso il bordo superiore dello schermo in modo che la staffa superiore dello schermo superi il bordo del case superiore.
-
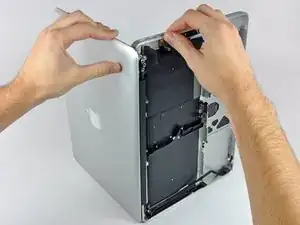
Ruota leggermente lo schermo lontano dal case superiore.
-
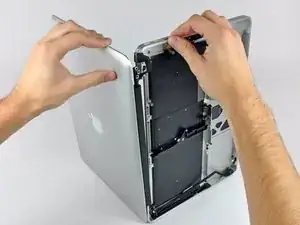
Solleva lo schermo ed allontanalo dal case superiore, stando attento ad ogni staffa o cavo che potrebbe impigliarsi.
-
-
-
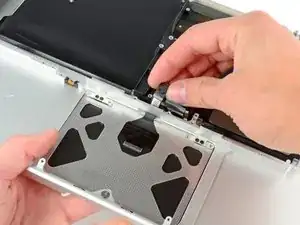
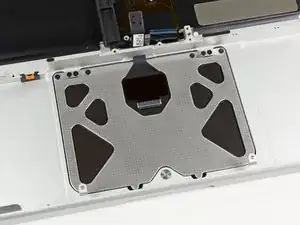
Stacca attentamente il bordo del trackpad più vicino alla tastiera dal suo alloggio nel case superiore spingendolo via dalle staffe attaccate al case superiore.
-
Sfila il cavo del trackpad dalla sua apertura nel case superiore.
-
-
-
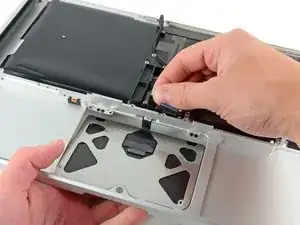
Tira via il trackpad dal bordo esterno del case superiore.
-
Rimuovi il trackpad e mettilo da parte.
-
-
-
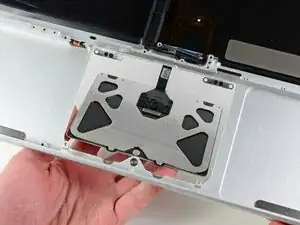
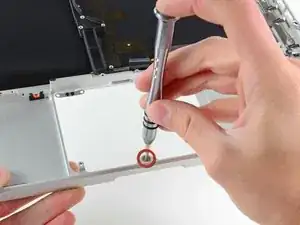
Usa un cacciavite Torx T6 per avvitare appena la vite da 1,1 mm inclusa con il tuo nuovo case superiore nel foro vicino al centro dell'apertura del tackpad.
-
-
-
Infila attentamente il cavo del tackpad originale nella sua fessura nel tuo nuovo case superiore.
-
Usa una mano per tenere fermo il cavo del trackpad mentre infili le due alette di bloccaggio nel bordo esterno del trackpad sotto il coperchio del case superiore.
-
Tira il cavo del trackpad mentre lo appoggi nel suo alloggio nel tuo nuovo case superiore.
-
-
-
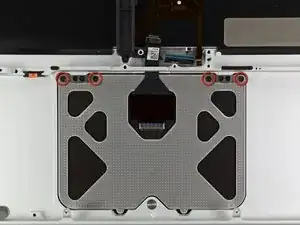
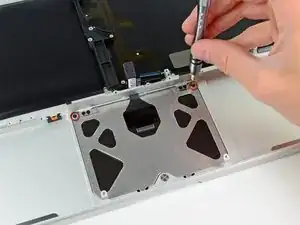
Avvita una vite a croce Phillips da 1,2 mm in ogni foro esterno del trackpad (due viti in totale).
-
-
-
Mentre continui a provare a cliccare il trackpad, avvita delicatamente la vite Torx T6 finché il click ti sembra tornato come prima di smontarlo.
-
-
-
Ora gira il case superiore in modo che la tastiera sia rivolta verso l'alto.
-
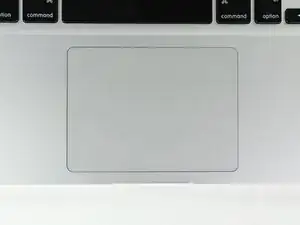
Allinea il trackpad in modo che sia centrato nella sua apertura nel case superiore.
-
-
-
Stingi le due viti esterne sul bordo interno del trackpad e controlla l'allineamento sull'esterno del case superiore.
-
Se l'allineamento ti sembra buono, avvita il resto delle viti a croce Phillips sul bordo inferno del trackpad.
-
Prima di rimontare la tua macchina, controlla che la vite centrale sia ancora avvitata in una posizione che faccia cliccare il trackpad correttamente.
-


Per rimontare il tuo dispositivo, segui le istruzioni in ordine inverso.

2 commenti
Very good tutorial. Guide was 100% accurate. As mentioned, make sure you have good quality tools, and follow the guide to be certain the right get tool is used for certain screws, I did strip one screw head, in my opinion not bad considering all the tiny screws! But now my MacBook works, and save me having to spend on a new MacBook!
Gabriel -
Outstanding level of detail!!! Spot on directions.
Dan Coy -
Compare the short screws carefully before reinstalling them. The shouldered screws go in the holes on the front edge.
David Kilbridge -
Before I started removing any screws I took a piece of paper and drew the bottom of the laptop and put a piece of double-sided tape in the spot where each screw goes. That way when I took out the screws, I could put them on the tape so I knew exactly which screw went in which spot. I did the same thing for dismantling the inside on another sheet of paper, then a third sheet for the screen after getting the front glass off.
mastover -
I use a similar technique: I print out the iFixit manual for the job, and Scotch-tape down the screws/brackets/cables I remove at each step next to the component descriptions. That way, when I'm reassembling, the bits are taped right next to the photo of where they came from.
adlerpe -
That's exactly what I do for all my repairs! It's the best way to keep track of all of the parts ' original location and to make sure that you don't miss any parts during reassembly.
joyitsjennie -
Great idea and one I use often
Thomas Overstreet -
Excellent idea! Thanks for sharing it here.
Laura Sharkey -
I used a 00 that fit but the screws were very tight so I used a tiny paintbrush with some wd40 on it and put it around the edges of the screws. Worked like a charm
valentinedhdh -
I use a magnetic mat and place the screws in order on that :)
Cary B -