Introduzione
Guida prerequisita interna.
Strumenti
-
-
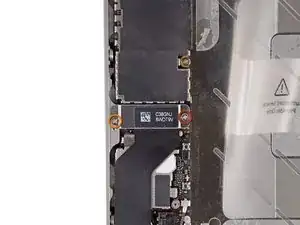
Rimuovi le seguenti viti che fissano alla scheda logica la copertura del cavo del connettore del dock:
-
Una vite Phillips da 1,5 mm
-
Una vite Phillips da 1,2 mm
-
Rimuovi la copertura metallica del cavo del connettore del dock.
-
-
-
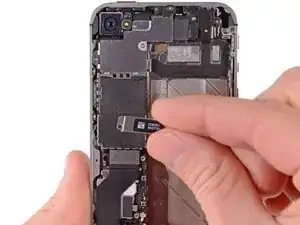
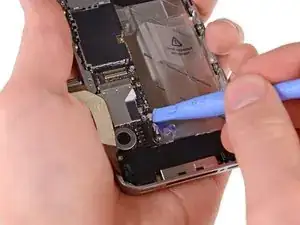
Usa l'estremità di uno strumento di apertura in plastica per staccare il cavo del dock dal suo zoccolo sulla scheda logica.
-
-
-
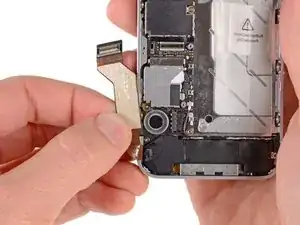
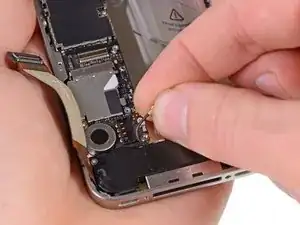
Stacca il cavo del connettore del dock dall'adesivo che lo fissa alla scheda logica e al fianco del gruppo altoparlante.
-
-
-
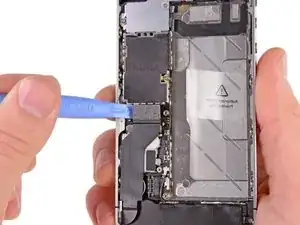
Usa l'estremità di uno strumento di apertura in plastica per staccare il cavo dell'antenna cellulare dalla sua sede sulla scheda logica.
-
Sfila il cavo dell'antenna cellulare da sotto i passaggi metallici attaccati alla scheda logica.
-
Per rimontare il tuo dispositivo, segui queste istruzioni in ordine inverso.

Un commento
tres belle c'est manifique
Are the screw sizes switche up by any chance? A 4S i have here has the left hole bigger and one of the screws didn't want to go into the right hole when it went nicely into the left one.
primozresman -
Fabulous tutorial! Many thanks! i have now a working iPhone back after display crash and glass brake!
In Step 8 I think the colors of the screws are inverted. The larger screw is at the left (near the sideboard) and the smaller is in the middle, near the battery (iPhone 4S).
Markus -
Was trying to fix guide but accidently messed some things up in formatting and I too also believe the picture is incorrectly displaying the 1.5mm(which is the left screw) and the 1.2mm(which is the right screw.
Mars Starcruiser -
I believe the guide is correct, but be careful as the screws are not the same as the other 1.2mm screws from later on. Length is the same, but the diameter is not... just keep them all separate.
Dave -
Organizer: tape cheap duct tape tacky side up to a tray. Get a ball point or roller ball pen. For every screw, write step number and a letter for color (R, O, Y, etc.) then stick the screw there. I bumped the table and nothing moved. Also use a big white towel as a work surface: nothing bounces away if you drop it. This helped re-assembly
griffn -
Also remove 4 screws holding metal cover plate adjacent to camera lens, remove plate to expose camera plug. when removing the rear facing camera, be careful not to loose the small grounding finger mentioned in step 21
Robin -
Same for me as for various other posters here: the bigger screw goes on the left, the smaller on the right. Doesn’t fit the other way.
jack.jansen -
Switch the position of the screws, it’s incorrect in the pic.
laurenzano.alex -