Introduzione

Se il tuo GameBoy Advance SP AGS-001 o AGS-101 ha una copertura deteriorata, o se vuoi personalizzarlo, segui questa guida per sostituire la copertura.

Prima di iniziare questa procedura carica la tua console per qualche minuto. Se la batteria è troppo vecchia, potrebbe iniziare ad espandersi e esplodere. Se inizia a gonfiarsi, dovrai prenderne una di ricambio, che puoi trovare a questo link.

Prima di iniziare la procedura, spegni la tua console e scollegala dall'alimentatore se è in carica.

  1. SkEV2ReKxqTqWyJp
    SkEV2ReKxqTqWyJp
    fXPoACPeZkIMhIbv
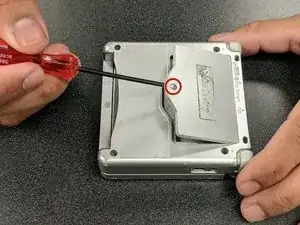
    • Svita la vite sul comparto della batteria con un cacciavite a croce Phillips #00.

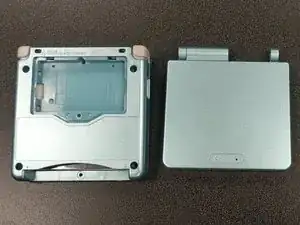
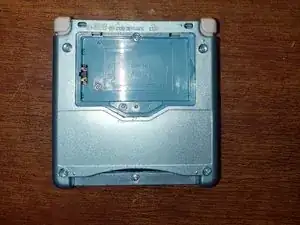
    • Apri il comparto della batteria e rimuovi la batteria.

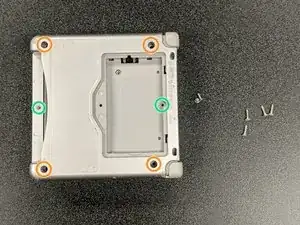
    • Svita le quattro viti Tri-Point Y00 da 6,45 mm dagli angoli del dispositivo.

    • Svita le due viti Tri-Point Y00 da 4,6 mm nei comparti della batteria e delle cartucce di gioco.

  2. JsNnPmkqq4ZjFUUM
    JsNnPmkqq4ZjFUUM
    rPREXYeaynCrp2lN
    3L1NNjJeegrWOQfk
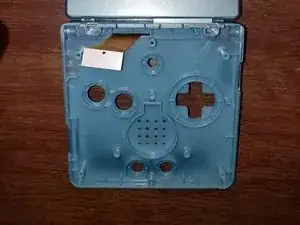
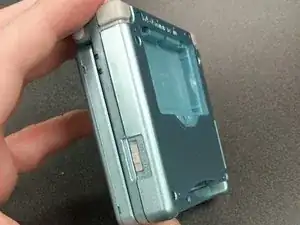
    • Solleva la copertura inferiore per accedere alla scheda madre.

    • Se necessario, usa dell'alcool isopropilico per pulire gli interruttori dell'accensione e del volume.

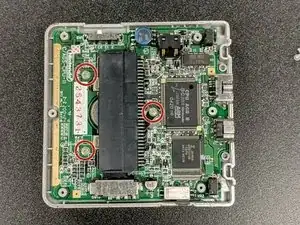
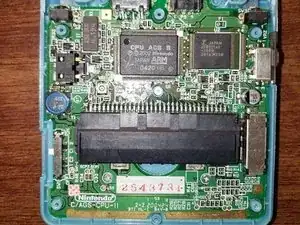
    • Svita lee tre viti a croce Phillips #00 da 4mm sulla scheda madre.

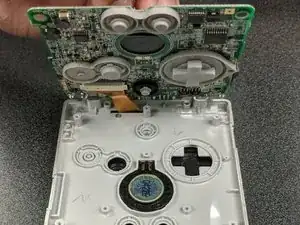
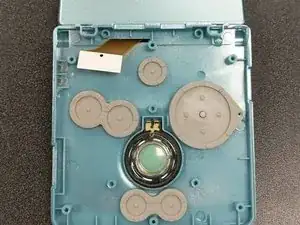
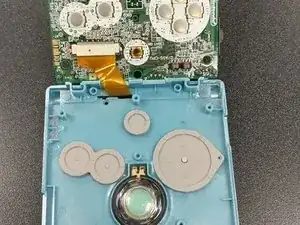
    • Solleva delicatamente la scheda madre e scollega il cavo a nastro tirando i due ganci sui lati del connettore verso il cavo.

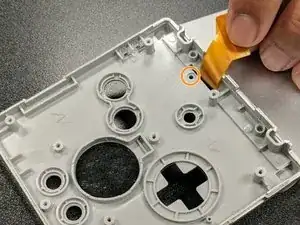
    • Svita la piccola vite a croce Phillips #00 nascosta sotto il cavo a nastro. Questa vite tiene insieme la copertura cerniera dello schermo.

  3. 5NanxmbYjgbPmIsY
    5NanxmbYjgbPmIsY
    YYAFNVWUoMIXG6Rr
    • Apri il GMA SP e usa la punta di uno spudger per rimuovere i gommini sulla cornice dello schermo.

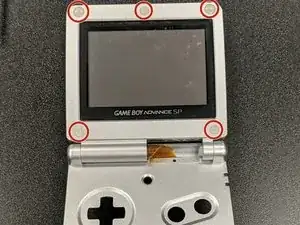
    • Svita le cinque viti Tri-Point Y00 nascoste sotto i gommini.

    • Rimuovi la cornice dallo schermo con uno spudger.

    • Stai attento a non tirare il cavo a nastro mentre rimuovi la cornice.

    are all 5 screws the same size?

    scott lindquist -

  4. GFieZtPwdUqJcNR2
    GFieZtPwdUqJcNR2
    h2v1LCvu1f5riO3B
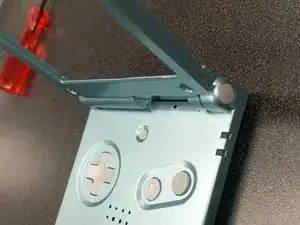
    • Rimuovi la cerniera dalla copertura originale. Questo è il passaggio più difficile, in quanto richiede molta forza per essere rimossa.

    • Fai pressione con la punta di uno spudger dall'interno, spingendo verso l'esterna con tutta la forza necessaria. La cernierà probabilmente volerà via di qualche decimetro: è normale che succeda.

    • Una volta rimossa la cerniera, Rimuovi i due cappucci alle estremità della steessa.

    • Stai attento con lo spudger. Spingere via la cerniera richiede molta forza, e potresti ferirti la mano se non presti molta attenzione.

    Extremely careful here with the position of your hands as you’re pushing the hinges out. I managed to severely injure myself from the sudden jolt scraping my fingers on the case when the hinges gave in. Preferrably, position your hand and screwdriver around 30 degrees from the horizontal of the case to avoid this and press the case firmly against a table.

    Hector Carrera -

    the easier way to do this is to stand the case on it’s side on the edge of something, I just used my desk mat at the edge of my desk, place your spudger on the inner metal part and tap with a small hammer or something, I used a pair of pliers. Way less likely to hurt your hand because you don’t have to grip the case as hard or push as hard. Work smarter

    Kira -

    Interestingly enough, I found that, if you don't plan to use the old shell for anything else, it may be easier in some cases to cut the plastic around the hinges, which I did with a model kit cutting tool (the old shell was very brittle and broke apart into pieces too small for me to push the hinges out of). Eye protection is recommended.

    Nicholas -

  5. O5jv6yQLDojehilu
    O5jv6yQLDojehilu
    IPNsmvVoyDY1ZJwT
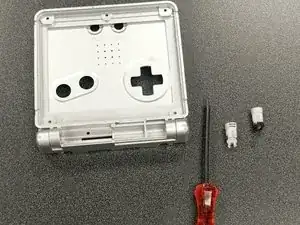
    • Prepara la tua copertura di ricambio.

    • Infila la cerniera dalla copertura originale nell'alloggio della nuova per circa metà mentre la copertura è chiusa.

    • Quindi apri la copertura e infilala del tutto nel suo alloggio.

    The hinges will need to be slotted into your new end caps before being pushed in

    Peter DeVita -

  6. e2v1XYeoKIg3SaiJ
    e2v1XYeoKIg3SaiJ
    QnhHSVxO6cgaRiCw
    mEqxERI5jJgtnKbE
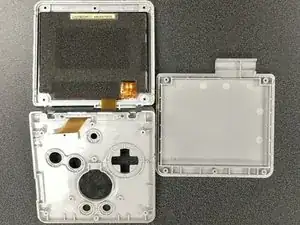
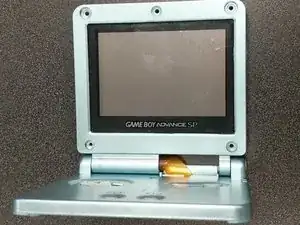
    • Posiziona lo schermo nella nuova copertura e chiudilo fissando la cornice. Il cavo a nastro dovrebbe passare nella fessura come prima.

    • La copertura dovrebbe scattare in posizione in modo da restare unita anche senza viti. Ci può essere anche un piccolo spazio tra la copertura superiore e quella inferiore, in quanto è una cosa comune nelle coperture non originali.

    • Riavvita le cinque viti Tri-Point Y00 attorno allo schermo.

    • Reinstalla lo speaker, i tasti e i pad in silicone nella copertura inferiore.

    I found it easier to reattach the screen ribbon cable before adding the buttons and speaker. Additionally, you’ll want to reattach the small half hinge part before the buttons too.

    Peter DeVita -

  7. aFAGoZFKjiMjacxR
    aFAGoZFKjiMjacxR
    OBHZ4Vvgcov6rFrw
    MYKYKJb3DCbxOykB
    • Ricollega il cavo a nastro sulla scheda madre e bloccalo nella presa.

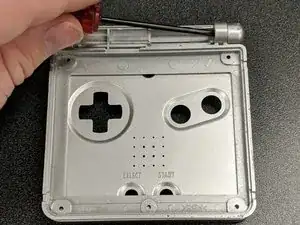
    • Posiziona la scheda madre nella nuova copertura e avvitala con le tre viti a croce Phillips #00 da 4 mm.

    • Infila la rondella quadrata filettata sulla copertura inferiore. Questo è il pezzo dove si avvita la vite del compartimento della batteria, quindi è importante!

    There’s no mention of reinstalling the top hinge cover with that hidden little screw! It was important to do this before screwing the motherboard back down.

    Justin Gagnon -

    That’s exactly what I was going to comment. I had to go back and undo it all once I realised that I had left out the hinge cover. I might also suggest hooking in the ribbon before you put in the buttons. Mine fell out anyway. Also… make sure you put the speaker in the correct way. Trust me.

    Jiu Kyung -

  8. nbUvZZAkwIh23bOC
    nbUvZZAkwIh23bOC
    enYKJDoG14PaLTZ6
    EnyDTifANdFElSvS
    • Assicurati che gli interruttori del volume e dell'accensione siano posizionati correttamente prima di reinstallare la copertura inferiore.

    • Posiziona la copertura inferiore e spingi le due parti una contro l'altra.

    • Avvita le due coperture insieme con lee quattro viti Tri-Point Y00 da 6,45 mm e le due viti Tri-Point Y00 da 4,6 mm, quindi reinstalla la batteria.

  9. LxuhILpjd632nCE1
    LxuhILpjd632nCE1
    fqXwNDeSrAFBK4vR
    • Reinstalla i gommini sulla cornice dello schermo (evitano che lo copertura superiore e inferiore si graffino quando il dispositivo è chiuso).

    • Trova l'etichetta adesiva del logo "Nintendo" e incollala in posizione.

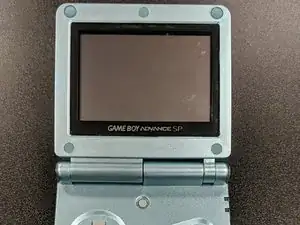
    • Prova la console e verifica che funzioni correttamente!

    Removing the hinge doesn’t have to be as much of a struggle if you orient the screen correctly to remove it. The remove lock the screen into the open position, then push the hinge out. To push the hinge back in , push it in halfway while the screen is closed , then open the what would be the locked open position and the hinge should be able to more easily slide into final position.

    Wesley -

Conclusione

Cambiare la copertura al tuo GBA SP può essere un progetto divertente! non richiede molto tempo, e una volta terminato potrai divertirti con una console personalizzata! La semplicità e la possibilità di esprimere la tua personalità rendono questo progetto degno del tempo speso.

Rocko Bishop

Membro da: 01/10/20

582 Reputazione

6 commenti

Excellent guide thank you! My GBA is looking great now :)

Justin Gagnon -

Hello this guide is great but it has some flaws (missing some steps) but I used an eXtremeRate GBA SP shell and they are the best ones to go with because they have It molded in a way to remove the Nintendo logo sticker and so you can put in a ips screen with out needing to trim and it is made out of a high quality plastic and it better than other third party shell and I used purple/blue color

dead -

Thanks for the helpful guide! A couple things of note that I noticed along the way:


If you're replacing the screen lens, make sure you line it up properly so the end result isn't crooked.

Make sure to organize your screws, a mismatched screw can poke a hole through the shell.

Be gentle but firm when tightening a screw. I definitely messed up a screw or two being too forceful.

(I might be stupid) keep an eye on the battery lid screw hole. Mine ended up warping so I had to duct tape the lid to the shell.

If you're doing a button replacement too, be careful with the triggers.

Noah -

Der einzige Grund, warum ein schlechtes Spiel so viel Aufmerksamkeit erhält, ist sein Thema, obwohl es eine wirklich schöne Handlung hat. Das Abheben Ihres Geldes, nachdem Sie einen bedeutenden Jackpot oder einen saftigen Bonus geknackt haben, ist einer der schönsten Aspekte des Spielens in einem Online-Casino. Besuchen Sie https://casinotop.at/schnelle-auszahlung... um mehr über Online Casino Schnelle Auszahlung in Österreich zu erfahren. Aber zuerst müssen Sie den Auszahlungsprozess durchlaufen, um Ihr neu erworbenes Vermögen zu nutzen. Anfänger werden die Vielfalt der verfügbaren Auszahlungsoptionen für die schnellsten Auszahlungen zu schätzen wissen.

Norman GDrum -

Excelent guide, just a quick detail: you forgot to add the part when you put the screw under the screen ribbon, the one that afix the hinge in place. The rest was amazing, thank you very much.

Daniel -

If you have a GameBoy Advance SP AGS-001 or AGS-101 with a deteriorating shell, or if you want to customize it, you can follow this guide to replace the shell. However, before you start, make sure to plug in your console and charge it for a few minutes. By choosing this 토토사이트추천, you can rest assur If the battery is too old, it may start to expand and could potentially explode. If you notice any swelling, it's important to order a replacement battery. You can find replacement batteries online or at electronics stores. It's important to take the time to properly align the screen lens to avoid it being crooked. Keeping track of screws and their placement is also crucial to avoid any mishaps, and being gentle when tightening them is a good practice to prevent damaging the shell or the device. It's also worth noting that the battery lid screw hole can warp over time, so it's important to keep an eye on it during the replacement process. In case of warping, a temporary solution such as duct tape may be necessary.


Crest Pak -