Introduzione

Per poter riparare qualsiasi componente interna dell'Ecovacs Deebot 900, la copertura inferiore deve essere rimossa. Questo sarà un passaggio richiesto per riparare qualsiasi cosa all'interno del robot e deve essere eseguito per primo, quindi segui questa guida per aprire l'Ecovacs 900 Deebot.

  1. VHK2cONFvHuigp3j
    • Rimuovi tutte le spazzole dal Deebot.

  2. ZoLK3UZkhrKpFVgt
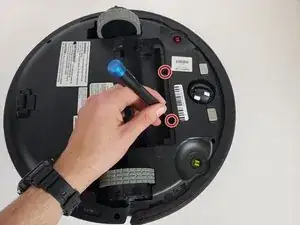
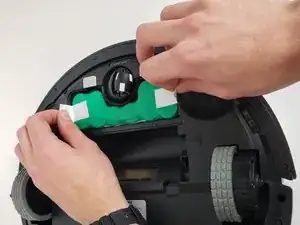
    • Usando un cacciavite a croce Phillips #0, svita le due viti da 12,25 mm che tengono ferma la copertura della batteria.

  3. K2VZcVAmgKmvvij3
    • Rimuovi la copertura della batteria.

    Anyone know where I can buy the battery for the Deebot 900. Evovacs is saying they won’t/dont sell them.

    Mike -

  4. S6j5WVJvdw3KwRYR
    • Usando le due alette bianche sui lati della batteria, rimuovila delicatamente.

    • Stai attento a non strappare il cavo della batteria.

  5. wqInpF4eQPGaQJHN
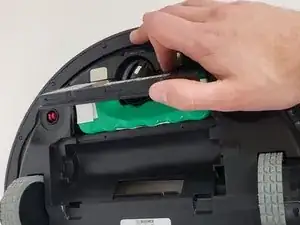
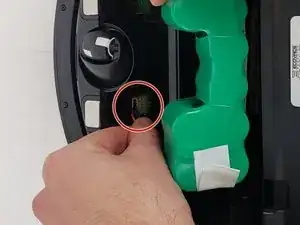
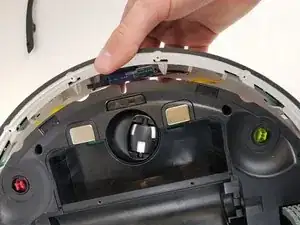
    • Scollega attentamente il cavo della batteria tirandolo da vicino al connettore in fondo al compartimento della batteria.

    I have two issues with these instructions.

    Title is Ecovacs Deebot 900 Battery Replacement. The battery was never replaced the device was reassembled.

    For battery replacement you need a battery it would be nice to have the replacement battery part number as well.

    Rick Sargent -

    I’d like some more info on part numbers, too. I have a Deebot 901 with a battery that, already after 2 years, has deteriorated significantly. Deebot 901 is also called “DE5G.10” in Europe, and it’s existing Battery back has model number ZJ1517-HFR, on which I can find almost no info, let a lone a compatible part somewhere in The Netherlands.

    eymert -

  6. cVHXroOd2QmmmIEx
    cVHXroOd2QmmmIEx
    jQQCtdUFVFH2RmuG
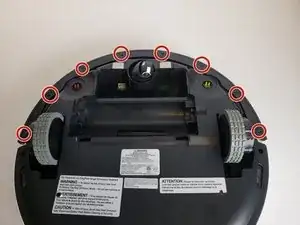
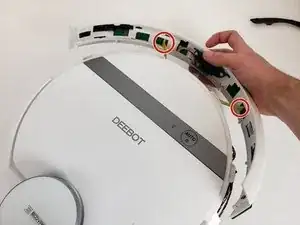
    • Usando un cacciavite a croce Phillips #00, svita le otto viti dal bordo inferiore del paraurti.

  7. H5AgGyvq6XChQPRe
    • Rimuovi la striscia nera sotto il paraurti.

  8. SGHYMJJexfLtrLKY
    SGHYMJJexfLtrLKY
    yoOpbKOnP3As2264
    • Solleva attentamente il paraurti finché non scatta via dalla sua posizione.

  9. UADkZUE2gmBgncyG
    UADkZUE2gmBgncyG
    vMeA13dOwNNT1xUY
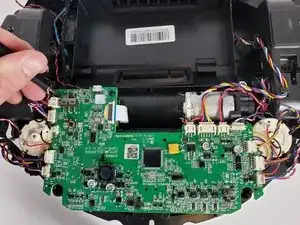
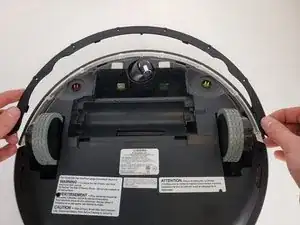
    • Scollega i due cavi che collegano il paraurti al corpo del Deebot.

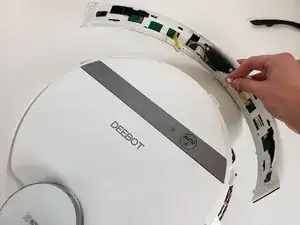
    • Rimuovi il paraurti anteriore dal dispositivo.

  10. sSRjWadmhwVKaPMQ
    sSRjWadmhwVKaPMQ
    UKy3duFTkfKPFL6X
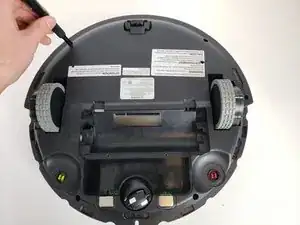
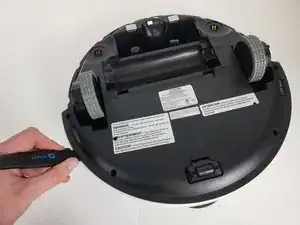
    • Usando un cacciavite a croce Phillips #00, svita le sei viti lungo il perimetro della copertura inferiore.

    This was actually to toughest part. I have a Deebot T9+ and it is slightly different (not much) and it is always a bit scary when you have to remove "plastic fixeners"

    RobinB -

  11. xSlyamjTv56DOfZe
    xSlyamjTv56DOfZe
    dREJOmWpALY52D5N
    • Infila un Jimmy nella fessura e fallo scorrere attorno a tutto il robot.

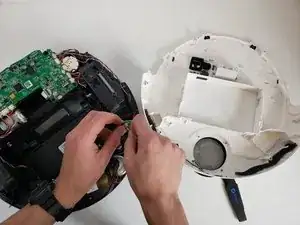
    • Scollega i due cavi e rimuovi la copertura inferiore dal dispositivo.

    Thank you for your work on this guide!

    Dominick Borrego -

    Im not able to remove the bottom case. I have a Deebot 711

    rocksmum -

Conclusione

Per rimontare il tuo dispositivo, segui le istruzioni in ordine inverso.

Christina Corliss

Membro da: 16/01/20

730 Reputazione

0 commenti