
Introduzione
Segui questa guida per rimuovere la cover posteriore dovendo sostituirla oppure per accedere alle parti interne del Galaxy S10.
-
-
Scollega il telefono e spegnilo prima di iniziare.
-
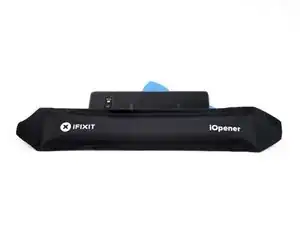
Riscalda un iOpener e applicalo sul bordo destro della cover posteriore per due minuti.
-
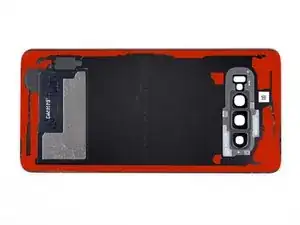
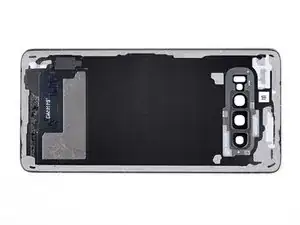
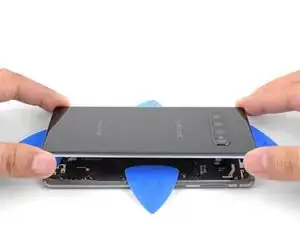
Mentre aspetti, dai un'occhiata all'immagine della cover posteriore già rimossa e prendi nota della disposizione dell'adesivo.
-
-
-
Posa il lato destro riscaldato del telefono su qualcosa che abbia uno spessore di 10-15 mm. Si crea così un angolo sufficiente per poter usare lo strumento di apertura.
-
Immobilizza con le dita il lato sinistro del telefono in modo che non possa scivolare via. Tira la ventosa con un'azione decisa e costante.
-
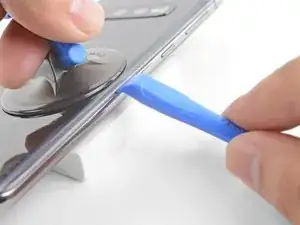
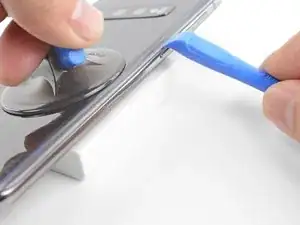
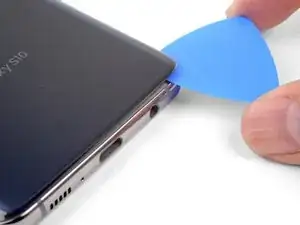
Premi il bordo di uno strumento di apertura nella divisione tra la cover posteriore e la scocca.
-
Con lo strumento di apertura posizionato nella divisione, fallo scorrere avanti e indietro per smuovere la cover posteriore.
-
-
-
Scalda un iOpener e applicalo per due minuti sullo stesso bordo del telefono.
-
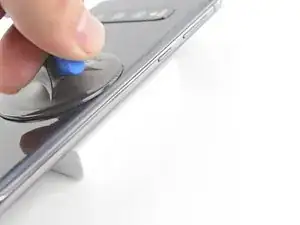
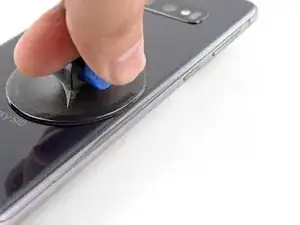
Applica una ventosa al retro del telefono, il più vicino possibile al centro del bordo destro (dove la superficie incollata è più stretta).
-
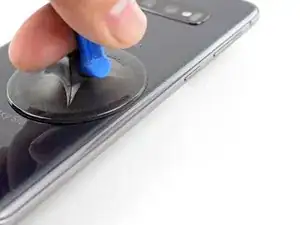
Tira la ventosa con forza costante per creare una fessura tra la cover posteriore e il telaio.
-
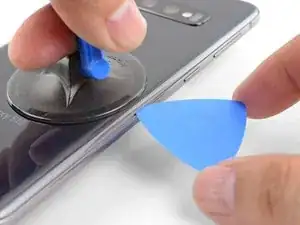
Inserisci la punta di un plettro di apertura nella fessura.
-
Se hai dei problemi a creare la fessura, la soluzione migliore è di applicare dell'altro calore sul bordo e provare di nuovo il passo precedente. Il vetro è scaldato al punto giusto quando è leggermente troppo caldo per essere toccato.
-
Puoi cercare di far colare nella fessura poche gocce di alcol isopropilico ad alta concentrazione (oltre il 90%) per ammorbidire ancora l'adesivo.
-
-
-
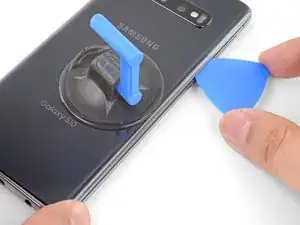
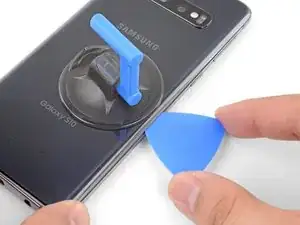
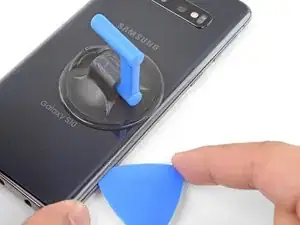
Fai scorrere il plettro di apertura lungo il bordo del telefono, tagliando nel contempo l'adesivo.
-
Lascia un plettro di apertura nella fessura per impedire che l'adesivo si riattacchi.
-
-
-
Applica un iOpener riscaldato al bordo inferiore del telefono per due minuti.
-
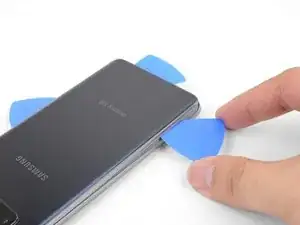
Inserisci un plettro di apertura nel bordo destro vicino all'angolo inferiore destro.
-
Fai scorrere con attenzione il plettro attorno all'angolo. Continua a tagliare lungo il bordo inferiore e attorno all'angolo inferiore sinistro.
-
Lascia un plettro di apertura nella fessura per impedire che l'adesivo si riattacchi.
-
-
-
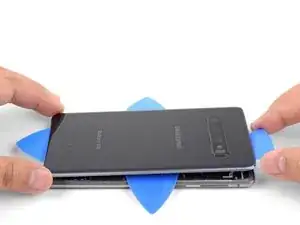
Una volta tagliata la colla tutto attorno al telefono, torci un plettro di apertura in uno dei bordi per favorire il distacco della cover posteriore dalla scocca.
-
Solleva lentamente la cover posteriore. Usa dei plettri di apertura per tagliare tutto l'adesivo rimasto.
-
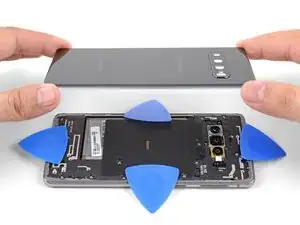
Rimuovi la cover posteriore.
-


Per rimontare il tuo dispositivo, segui queste istruzioni in ordine inverso.
Dopo aver completato la riparazione, segui questa guida per vedere se funziona.

11 commenti
Will this ruin the waterproofing?
Håkon -
Hi Håkon,
Yes, opening the S10 will compromise its water resistance.
So to fix this issue and retain water proofing I should send it back to Samsung for them to repair/replace?
Håkon -
That is an option. You can also try their authorized repair centers, or independent repair centers. Note that even if they say they will restore water resistance with the repair, they will most likely not guarantee it. That is because the IP68 water resistance rating test is verified on brand new phones. As the phone ages, it loses water resistance because the seals and adhesives break down.
What about using a epoxy resin? it is only a small crack on the back, nothing major. I'll check out a service center as well.
Sorry for all the question!
Håkon -
Good luck on your repairs!
My Gallexy 5 is easier. Pop off the plastic back, the battery falls out. Drop in a new battery.
Lifetime replacement batteries, from batteries plus.
Glad you can find one at our stores, Rick.
OK Great, I have the back cover off. Where are the steps or links to to remove old adhesive, put the new adhesive on and install the back? Otherwise rename procedure to remove back cover vs replace back cover ;-)
Drew -
Hi Drew! Please follow the link in step 7, which has detailed instructions on how to do exactly that.
I think we should mention that the glass needs to be barely too hot to touch to determine when it's hot enough that a pick can be slid underneath.
Or we can mention a thermometer temperature, but most diy people probably don't have a thermometer to check.
A lot of people seem to have issues using the iopener to unglue phone parts like back glass (can Google it), likely because the glue didn't get hot enough, so mentioning the desired touch temperature can be helpful for DIYers to ensure that their glue is sufficiently weakened and they can begin working off the part.
(Just being hot isn't enough for glue to weaken, as you can probably attest to if you've ever had your phone get really hot but the back cover never came loose)
A X -