Introduzione
Usa questa guida per rimuovere o sostituire la cover posteriore in vetro di un Samsung Galaxy S10e.
-
-
Spegni del tutto il tuo telefono prima di iniziare questa riparazione.
-
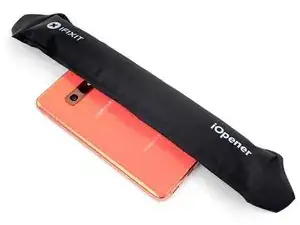
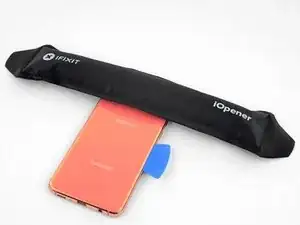
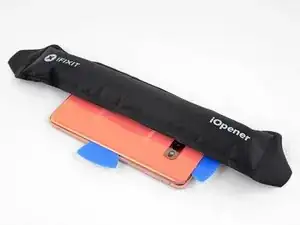
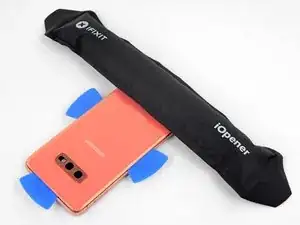
Prepara un iOpener e applicalo sul retro del telefono lungo il suo bordo destro per circa due minuti. In questo modo si ammorbidirà l'adesivo che fissa la cover posteriore.
-
-
-
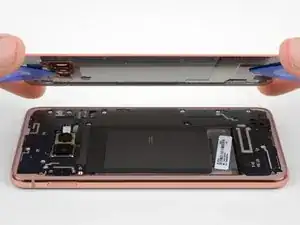
Nei passi seguenti, taglierai l'adesivo che fissa la cover posteriore.
-
Nella vista dall'esterno del telefono, taglierai l'adesivo nelle aree evidenziate.
-
L'adesivo ha il suo spessore minimo sul lato destro del telefono, appena sotto il pulsante Bixby.
-
-
-
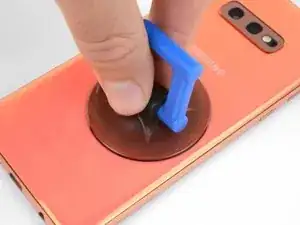
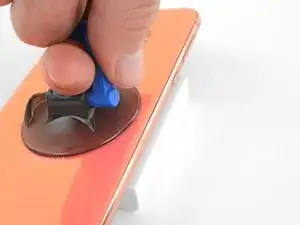
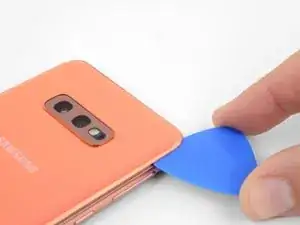
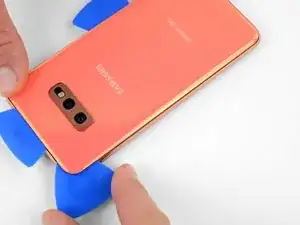
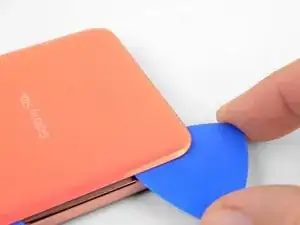
Fissa una ventosa sulla cover posteriore, il più possibile vicino al bordo riscaldato, appena sotto il pulsante Bixby dove l'adesivo è più sottile.
-
-
-
Appoggia il bordo riscaldato del telefono su qualcosa che abbia uno spessore di 10-15 mm per poter angolare il dispositivo semplificando così l'inserimento dello strumento di apertura.
-
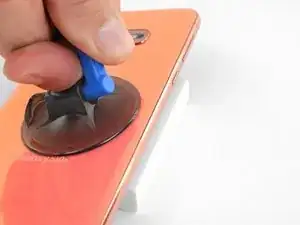
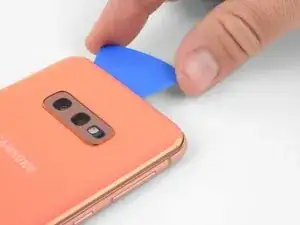
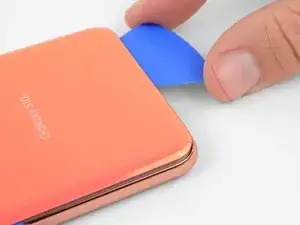
Solleva con la ventosa il bordo destro della cover posteriore per aprire una stretta fessura tra la cover stessa e la scocca.
-
Questa operazione può richiedere una certa forza. Se hai dei problemi nell'apertura, applica dell'altro calore per ammorbidire ancora l'adesivo e prova di nuovo. La colla si raffredda molto rapidamente, quindi può essere necessario scaldarla ripetutamente.
-
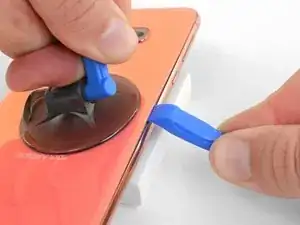
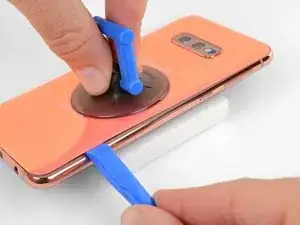
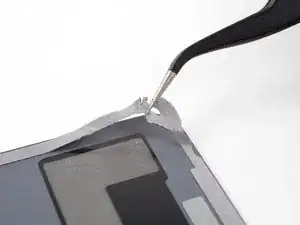
Premi il bordo di uno strumento di apertura nella fessura.
-
-
-
Fai scorrere lo strumento di apertura lungo il bordo destro del telefono per tagliare l'adesivo che blocca la cover posteriore.
-
-
-
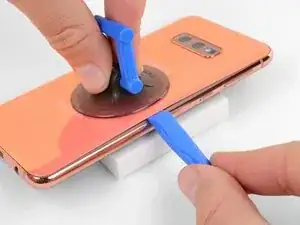
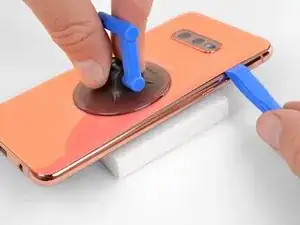
Inserisci un plettro di apertura nel bordo, vicino allo strumento di apertura. Lascialo sul posto per evitare che l'adesivo si possa riattaccare.
-
-
-
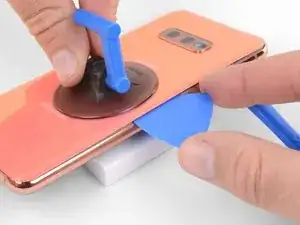
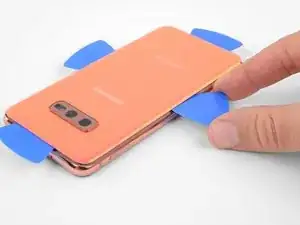
Inserisci un plettro di apertura vicino all'angolo superiore destro del telefono e fallo scorrere attorno all'angolo e attraverso tutto il bordo superiore del telefono.
-
Lascia il plettro di apertura in posizione per evitare che l'adesivo si possa riattaccare.
-
-
-
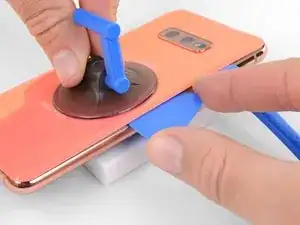
Inserisci un nuovo plettro di apertura vicino all'angolo superiore sinistro e fallo scorrere lungo il bordo destro del telefono.
-
Anche questa volta, lascia il plettro di apertura in posizione nel bordo sinistro del telefono per impedire che la colla possa riattaccarsi.
-
-
-
Inserisci un plettro di apertura vicino a uno degli angoli inferiori del telefono e fallo scorrere lungo il bordo inferiore per staccare l'adesivo presente.
-
-
-
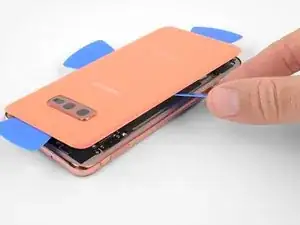
Facendo leva con grande delicatezza con i plettri di apertura, solleva la cover posteriore.
-
Se la cover oppone resistenza, smetti di far leva e usa un plettro di apertura per tagliare tutto l'adesivo rimasto.
-
Rimuovi la cover posteriore.
-


Per rimontare il dispositivo, segui queste istruzioni in ordine inverso.
Porta i tuoi rifiuti elettronici a un riciclatore certificato R2 o e-Stewards.
Dopo aver completato la riparazione, segui questa guida per testare la tua riparazione.
La riparazione non è andata secondo i piani? Vai sulla nostra comunità Risposte per trovare aiuto nella risoluzione dei problemi.

5 commenti
I just replaced the lens today. I discovered you actually don't even have to remove the back of the phone IF all you're doing is replacing the glass.
L'écran OLED et la la batterie
Isidore LECHAT -
My s10e is 4 years old now and I found glue had weakend and heating was uneccissary.
ervan.hady -
I purchased my S10e refurbished, so the exact age and prior repairs are unknown. I believe it had ~200 charge cycles. After 2.5 years, the side adhesive started to fail and there was a noticeable slit under the rear cover. It was unclear if the lithium battery was starting to swell, which would have been a more dangerous thing. As such, 3 out of the 4 sides were easy to open just with sliding the pick.
I heated the iOpeners for 30s in my 1000W microwave and it reached a temp of 180oF. I placed this on the final corner and it released fairly easily.
WL1 -
Is 180 degrees a good temperature to set the air temperature to if a heat gun is used?
Gee Foe -
Mine released without heat, just caught the edge with a fingernail and was able to work it free without any tools.
Gee Foe -
I would definitely NOT use a heat gun; the iOpener is the right thing to use. I've repaired many devices and I have lots of heat guns, but a heat gun puts out a tremendous amount of heat, and spreads it everywhere instead of in a controlled manner. The iOpener is about 150 F -- just getting uncomfortable to touch -- and the heat is all in a thin strip. You want to gently heat the edges of the cover, not cook the battery and electronics. Smart phones are expensive and the iFixit tools are cheap. Don't risk your phone to save a few bucks.
MikeT-NYC -