Introduzione

Solo prerequisito, per cavo audio

  1. WrtLTouKH3aT13Wt
    WrtLTouKH3aT13Wt
    BtvUpMVtv44DfgRK
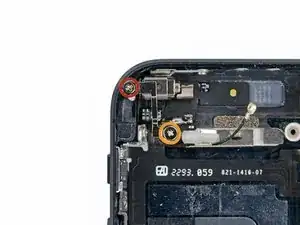
    • Rimuovete tre viti chi assicurano il vibratore e il supporto del vibratore presso la faccia posteriore.

    • Una vite Phillips di 2.3 mm

    • Una vite Phillips di 1.7 mm

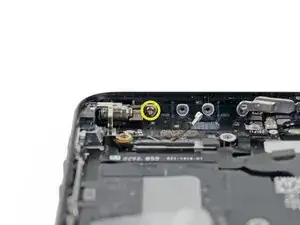
    • Una vite Phillips di 1.6 mm chi assicura il vibratore dentro e in testa della faccia posteriore.

    How do I remove the 1.6mm screw?

    Alexei -

  2. TmaAKfqXSKnIKayB
    • Rimuovete il vibratore e il supporto del vibratore della faccia posteriore.

    Make sure you have removed all 3 screws connected to the vibrator since the bracket is welded on the motor house.

    Johnny -

  3. YLxXeldKE4Qfpf6t
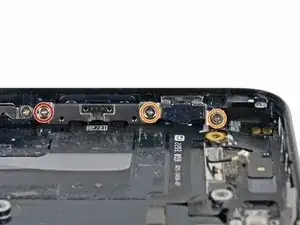
    • Rimuovete le seguenti viti che fissano il pulsante del volume e il tasto della suoneria al lato della base del telefono:

    • Una vite Phillips da 1.5 mm

    • Due viti Phillips da 1.8 mm

    The middle one 1,8 = 1,2 mm

    Daniel Mone -

    yes, it is like you say

    [Ados Production] -

    I can't remove the top screw for some reason, should it be any different from the rest?

    arnaudjb -

    When reassembled I noticed that when I firmly tightened these two screws tagged with orange circle , my ringer switch was stuck and didn't move. So I left these two screws little loose and ringer switch worked fine. Now I have used my phone couple weeks and there has been no problem with these loose screws.

    Asko Pesola -

    on my device the red circled screw is completely different. Under my magnifying glass the head is round. Don’t know how to unscrew. There is no fitting bit in my ifixit Pro Tech Toolkit. :(

    Michael Kühnen -

    When re-assembling these parts, make sure that the volume bracket is inserted UNDERNEATH the ringer switch bracket, or the + volume button will not make positive contact with the switch on the cable.

    tinkertoy -

  4. qffQvhnPTDwQryFB
    qffQvhnPTDwQryFB
    ASfMXbMt16ZXZCLv
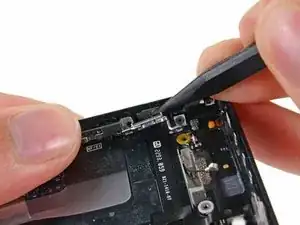
    • Usate l'estremità di uno spudger per fare leva sul supporto del pulsante della suoneria dal pannello posteriore.

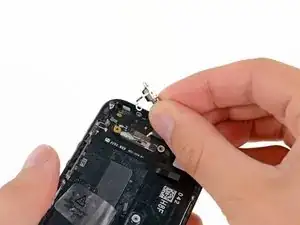
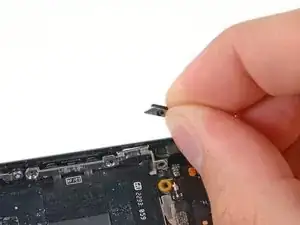
    • Rimuovete il pulsante della suoneria.

    I didn't see mention of it, but I found the ringer switch button would slide down to OFF during reassembly, so I made sure the new ringer switch was also set to OFF before screwing all back together.

    Dean M -

    I found removing the hinge that secures the power button to require more force than I thought necessary. Seemed to be the most difficult part of the repair. When installing the new AC/PB cable, i started with this assembly and worked backwards. Would have been helpful to include a good set of tweezers in the repair kits for those with fat fingers like mine or who don't have a pair at home.

    aroclobama -

  5. Tt6RUrhIHHbcRBfo
    Tt6RUrhIHHbcRBfo
    HFe4PV6D3eNqfsT6
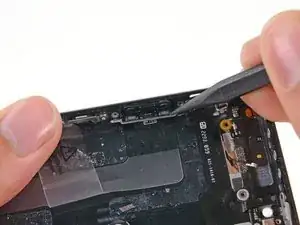
    • Usate uno spudger per sollevare il supporto del pulsante del volume dal lato del pannello posteriore.

    • Rimuovete il pulsante del volume.

Conclusione

To reassemble your device, follow these instructions in reverse order.

Andrew Optimus Goldheart

Membro da: 17/10/09

502162 Reputazione

0 commenti