Introduzione

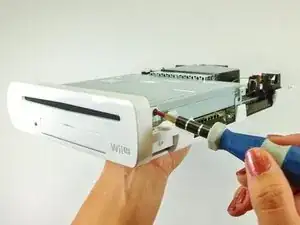
Segui questa guida per installare un nuovo pannello frontale per la Nintendo Wii U.

  1. JCHLhn5MYdDxfPrg
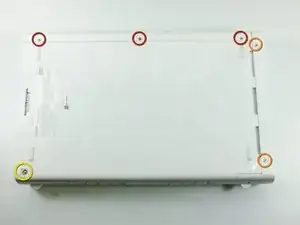
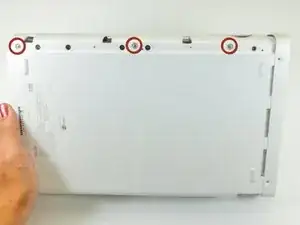
    • Con la parte inferiore della console rivolta verso l'alto, rimuovi le seguenti 6 viti nascoste sotto agli adesivi bianchi e quadrati:

    • Tre viti a croce Phillips #000 lunghe 5,1 mm

    • Due viti Tri-wing Y0 lunghe 6,1 mm

    • Una vite Tri-wing Y1 da 13,2 mm

  2. aigP65yoJHPSGAir
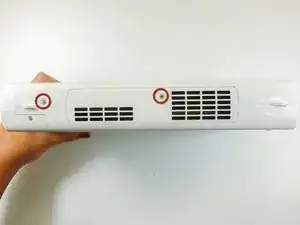
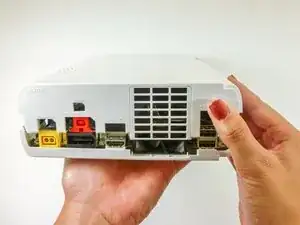
    • Ruota la console di 180 gradi così le bocchette di ventilazione sono rivolte verso di te.

    • Rimuovi le due viti a croce Phillips #00 lunghe 7,1 mm.

    Both screws are not “7.1mm” in length, only the one to the right is (center of the console’s side). The left one (towards the front of the console) is 5.1mm.

    LogicalMadman -

    There’s a third screw to remove bottom-left corner of this picture. On step 9 it’s already been removed, and you need it to be removed in order to remove the metal casing in step 13.

    Pascal Dagenais -

  3. 1Iyrqx4nOFBdCJ2h
    1Iyrqx4nOFBdCJ2h
    2NCIyw2H2DATp1Mk
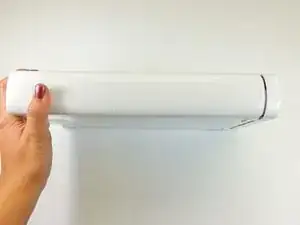
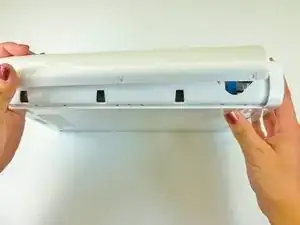
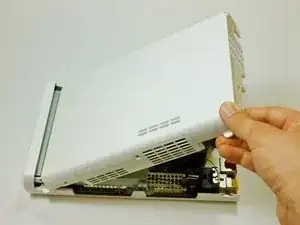
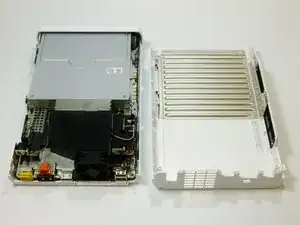
    • Sul lato opposto delle bocchette di ventilazione, fai scorrere la cover del pannello frontale all'indietro e tirala verso l'alto per toglierla.

  4. BgtQWjfJFCI2Obtg
    • Sul fondo della console, sotto alla copertura frontale rimossa precedentemente, rimuovi le tre viti Tri-wing Y1 da 13,2 mm.

  5. SFXFKigB4FgwXNHW
    SFXFKigB4FgwXNHW
    emE6ahHlKSKLyLVG
    XXLXP25j5OJr3Cu5
    • Sul retro della console, solleva e rimuovi la cover superiore principale.

    The front portion of the side of the cover with the vents was kind of stuck on mine. There’s a little rubber piece in there that was the cause of this. But that same rubber piece also makes up the little handle-shaped nub that sticks out of the side there. (There’s also one at the back of the same side, but that one didn’t stick for me.) Lifting also using the little handle made it easy to remove the cover.

    Nicholas Halderman -

  6. QANVbARsH6IjOTQI
    QANVbARsH6IjOTQI
    sPaqjSSEr66bZ6hX
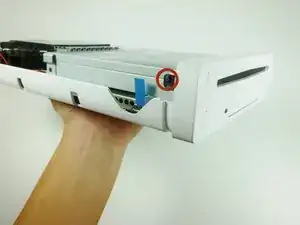
    • Ruota il dispositivo in modo che il pannello frontale sia rivolto verso di te.

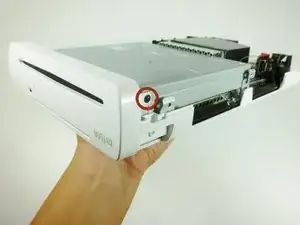
    • Su ogni lato della console, rimuovi la vite a croce Phillips #0 da 3,5 mm che collega il lettore DVD al pannello frontale.

    My screw won't come out, and I feel as if my screw was screwed in too tight when they made the wii u, or the 3.5 #0 is too big. I have tried other screws and I think the screw might be done for because the metal is coming off of the top and deforming the shape. I am very lost and if anyone could help me, that would be amazing.

    Elijah Travers -

    Those #0 screws might be tight and they’re easy to strip. Put some force on the screwdriver to make sure you start unscrewing them and not stripping them.

    Pascal Dagenais -

    One of the screws started to deform instead of unscrewing. I used a bigger Philips screwdriver (size 1), added a rubberband between it and the screw and used more force to avoid stripping it more and make sure it would start unscrewing. It worked hopefully ! But I wasn’t sure it would.

    Pascal Dagenais -

  7. FGbMK3dG2BpKU2bJ
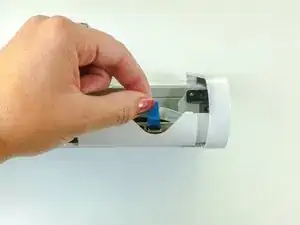
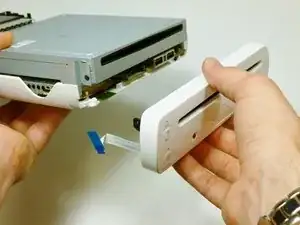
    • Ruota il dispositivo in modo che il pannello frontale sia sul lato destro e il cavo a nastro sia visibile.

    • Il cavo a nastro è collegato al sistema da una leva che trattiene la linguetta blu. Solleva questa leva verso l'alto per sbloccarla.

    • Solleva verso l'alto sulla linguetta blu per rilasciare il cavo a nastro.

    There is a step to do before to "lift up on the blue tab in order to release the ribbon cable". We must lift up the connector who maintain the ribbon cable. By default, his position his locked and in order to unlock it, must put it in his top position.

    Frederic Morelli -

  8. K23ibnjRbkeVBBoW
    • Rimuovi il pannello frontale.

Conclusione

Per rimontare il tuo dispositivo, segui queste istruzioni in ordine inverso.

Kim Arre

Membro da: 11/01/13

4888 Reputazione

4 commenti

Great guide. I was able to fix the front USB door on my Wii u! Thanks guys!

Matt Jones -

My ribbon seems to work but the little connection it plugs into on the circuit board in the console broke off. Not just the black clip but the whole little circuit. Seems like a clean break. Can I solder it back on? If I push it back on and hold the ribbon in the red light comes on and blinks. Occasionally I can get the white light to come on for like a second but I never hear fans spinning/more of the unit coming to life before it shuts itself off.

Thoughts on how to fix it?

Gutzin Fish -

My daughter shoved change into my disc slot of my Wii I. I thought I got out all pulling through the faceplate dvd slot but now when I put in a game disc it won’t catcalls accept it. It pulls in, sounds like it turns a little bit and then ejects the disc. Could change still be stuck in the reader or do I need to replace it now?

Melissa -

Bit sad that it doesn't show how to re-insert the little ribbon cable. The tiny black latch came off, and there's no way to refix the latch back to the connector.

Regards,

Adrie

Adrie Lute -