Introduzione
-
-
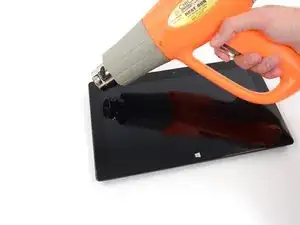
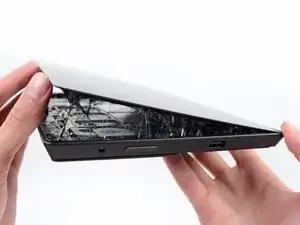
Utilizzate un iOpener o un phon per sciogliere la colla.
-
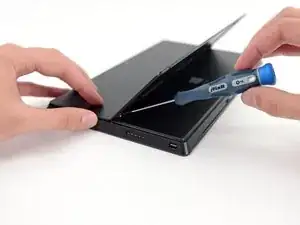
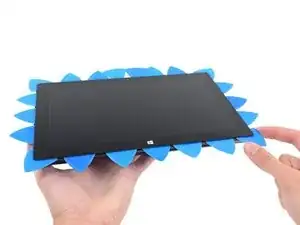
Inserite 21 plettri di apertura sotto al display.
-
Sollevate delicatamente il display.
-
-
-
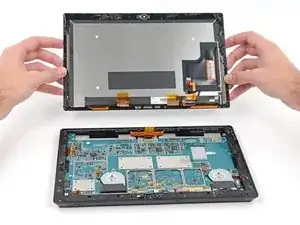
Scollegate i quattro cavi piatti che vanno alla scheda madre aiutandovi con una leva in plastica.
-
Svitate le 52 viti che fissano la scheda madre alla piastra metallica e alla cornice di plastica.
-
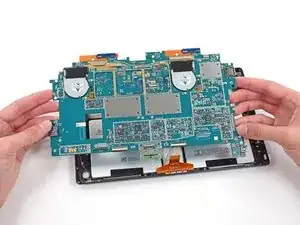
Sollevate la scheda madre.
-
-
-
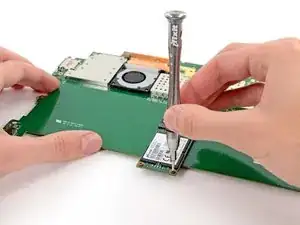
Svitate le due viti del SSD mSATA e rimuovetelo (Nota bene: questa foto è di un Surface Pro di prima generazione, ma è la stessa cosa).
-
Per rimontare il vostro dispositivo seguite i passaggi in ordine inverso
13 commenti
How do you glue the back on? It looks like the adhesive that holds it on is messed up bad when it's removed.
Hi Nate,
Have you figured this out? I was wondering the same thing.
Adi V -
You have to use double sided tape for electronics. They sell it on amazon. Use 5mm or wider to make sure the screen doesn’t fall out. Heat after application to make sure the glue sets properly.
Wow, I have been contemplating one of these but after seeing that picture with the heat gun, it looks like you might as well consider it a sealed box.
Mark T -
Screen came off just fine using a hair dryer, but my Surface Pro 2 differs from these directions. Specifically, I got stuck not being able to remove the bezel because I don't have a T2 bit. My bezel screws are 5 x T5, 14 x T3, and 4 x T2. That doesn't match the photo shown here in step 3.
So have you been able to replace the SSD? I have multiple repair shops saying that none of the components can be replaced somehow
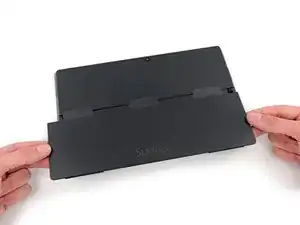
Is this really necessary? You will be working on the other side of the computer and I cannot see why this kickstand removal will help or hinder the main disassembly.
Dan Johnston -