Introduzione
Questa guida richiede una nuova calcolatrice e alcune saldature. Se non sei sicuro su come saldare visita la guida per la saldatura di iFixit.
Strumenti
-
-
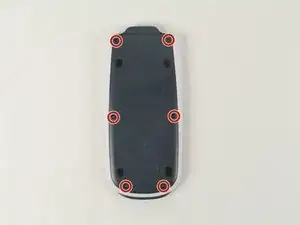
Usando un cacciavite a croce #00, svita le sei viti a croce Phillips da 6 mm.
-
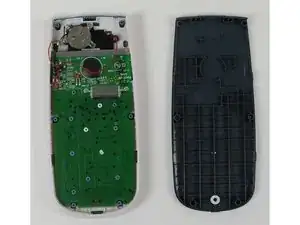
Usa lo spudger per fare leva nello spazio tra la copertura posteriore e il corpo bianco per rimuovere la copertura.
-
-
-
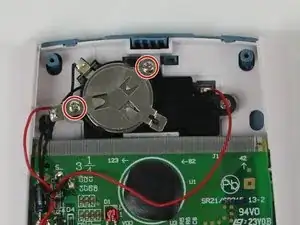
Usando un cacciavite a croce Phillips #00, svita le due viti da 3 mm posizionate vicino al bordo superiore della calcolatrice.
-
Solleva la copertura in metallo della batteria e mettila da parte.
-
-
-
Inserisci la nuova batteria CR2032. Non inserire mai una batteria diversa.
-
Rimonta seguendo i passi 2 e 1 al contrario.
-
-
-
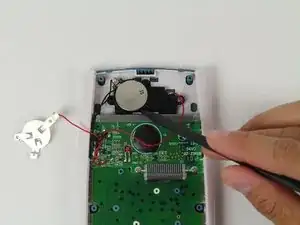
Usa il cacciavite con punta Philips #00 e rimuovi delicatamente le due viti da 3 mm che mantengono lo schermo in posizione.
-
-
-
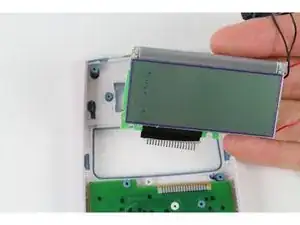
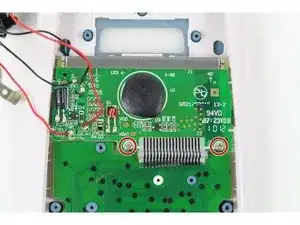
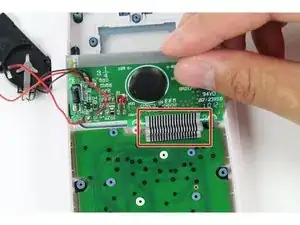
Sollevare delicatamente lo schermo dalla parte anteriore della calcolatrice, scollegando con attenzione il cavo a nastro dalla scheda verde più grande.
-
-
-
Una volta che lo schermo è stato rimosso, dovrebbe essere ancora collegato a tutti i fili di collegamento e al cavo a nastro.
-

Per riassemblare il dispositivo segui i passaggi al contrario.
4 commenti
dows soldering the ribbon cable back actually work?
IMO this does not appear to be a repairable or serviceable part. Upon removal, the soldered or self-adhered conductors on the ribbon cable usually separate and tear off the ribbon cable, and are left stuck on the board. Unless you very very very very carefully scrape them off or they can be de-soldered, there's no replacing the display. The same problem will occur in reverse when trying to remove a good screen from a donor calculator, which is almost as expensive as the actual calculator (10-15$ USD). It's possible... just not sure it's worth it.
I didn’t have a spudger but a flat 3/32” jeweler’s screwdriver worked just as well. Also, the battery slides out the side, nothing to undo. I slid it out using a jeweler’s screwdriver. (Don’t touch any electrical components or traces with the metal tip.) If you’re not sure the battery is good, turn the unit over and see if there is anything displaying, or run a test operation like 2 x 2 etc. to check before putting the back into place.
Therese S -