Introduzione
Il filtro emi è posizionato dentro il display e dietro alcune componenti. A causa di ciò è circondato da molti cavi che non fanno parte di questa specifica componente. Assicurati di seguire i cavi in modo da rimuovere solo le parti necessarie.
-
-
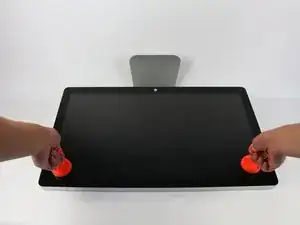
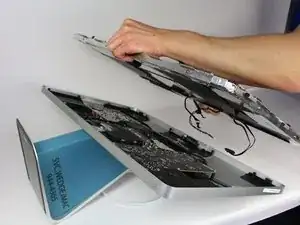
Appoggia il display con lo schermo rivolto verso l'alto.
-
Fai aderire 2 ventose, una per angolo del bordo superiore, e assicurati che abbiano una presa salda.
-
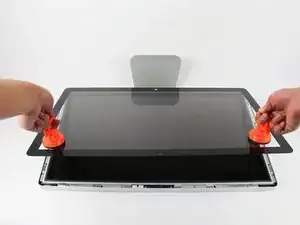
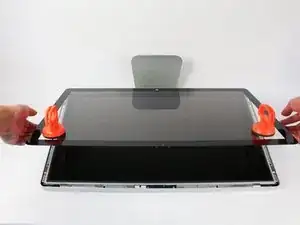
Il vetro è collegato al resto del display con dei piccoli magneti. Sollevalo lentamente e il vetro dovrebbe staccarsi da solo.
-
-
-
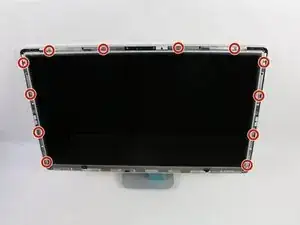
Svita le 12 viti lungo i bordi laterali e superiore del pannello LCD con un cacciavite TR 10.
-
-
-
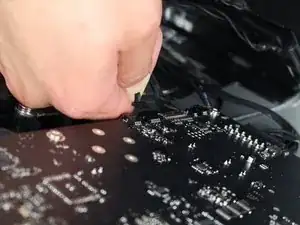
Per il primo cavo (quello più lontano dal cavo tenuto fermo da una vite) tira lentamente il connettore per scollegarlo.
-
-
-
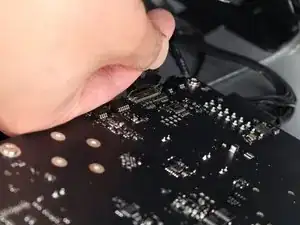
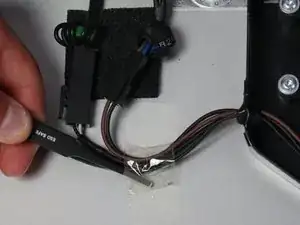
Per il prossimo cavo, che è accanto al precedente, troverai una striscia di nastro nero attaccata ad una staffa in metallo sul connettore.
-
Ruota la staffa per sbloccare il connettore, usando il nastro come manico.
-
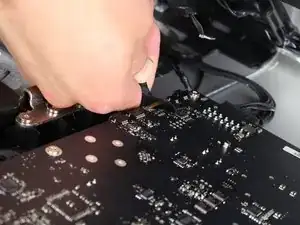
Quindi tira lentamente il connettore per scollegarlo dalla sua presa sulla scheda.
-
-
-
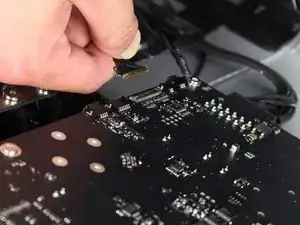
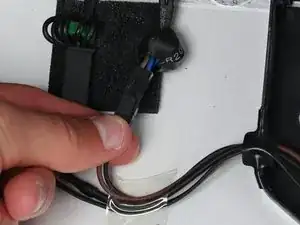
Per il cavo dall'altro lato della scheda, afferra il connettore da sotto e scollegalo attentamente dalla sua presa.
-
-
-
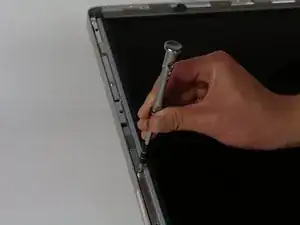
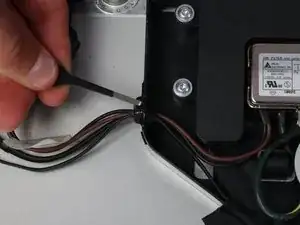
Per l'ultimo cavo che collega il pannello LCD, usa un cacciavite TR 10 per svitare la vite che lo tiene fermo.
-
-
-
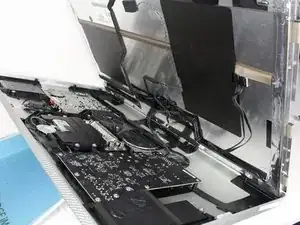
Il pannello LCD è ora completamente sconnesso dalla scocca e può essere riparato o sostituito.
-
-
-
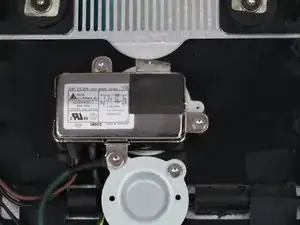
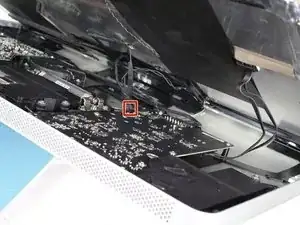
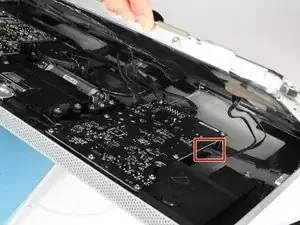
Dovresti vedere il filtro EMI al centro del dispositivo (anche se tenuto fermo da diverse componenti.)
-
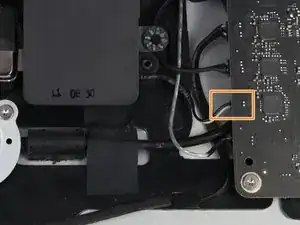
Segui i cavi che partono da sotto l'alimentatore a sinistra.
-
Usa un paio di pinzette per rimuovere il pezzo di nastro adesivo che fissa i cavi alla scocca.
-
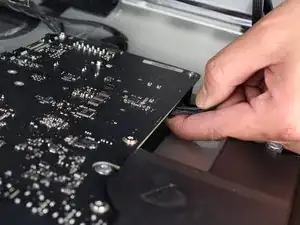
Solo un connettore deve essere rimosso (anche se ce ne sono 2, uno accanto all'altro!).
-
Prendi il connettore da sotto e tiralo attentamente fuori dalla sua presa.
-
-
-
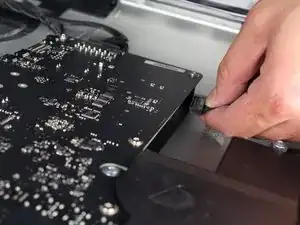
Quindi rimuovi il pezzo di nastro isolante che tiene fermi i cavi nella copertura che li collega all'alimentatore.
-
-
-
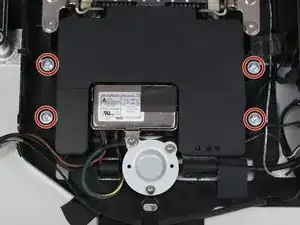
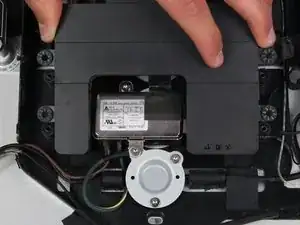
Le componenti dello speaker (la scatola nera) attorno all'ingresso dell'alimentazione vanno rimosse.
-
Usa un cacciavite TR 10 per svitare 4 viti.
-
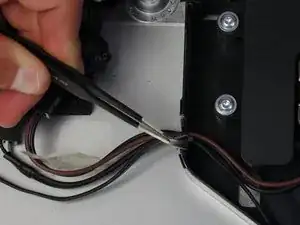
Scollega il cavo dello speaker sul retro della scheda tirando attentamente l'estremità in plastica del cavo.
-
Rimuovi lo speaker.
-
-
-
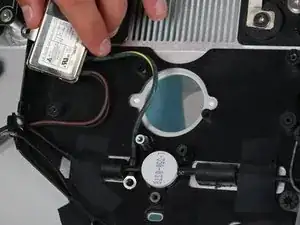
Ora che lo speaker centrale è stato rimosso, il filtro EMI è facilmente accessibile.
-
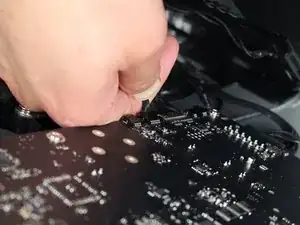
Usa un paio di pinzette per rimuovere il nastro argentato sopra il filtro.
-
-
-
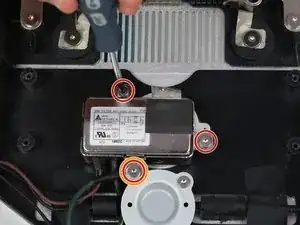
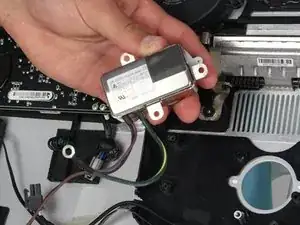
Il filtro EMI è tenuto fermo da 3 viti. Usa il cacciavite T10 per svitarle.
-
La vite che tiene fermi sia il filtro che un cavo ha delle dimensioni diverse e non va confusa con le altre 2.
-
Il cavo verde-giallo che era collegato dalla vite è nascosto dietro un'altra componente. Per rimuoverlo schiaccialo dietro il cavo nero e il filtro.
-


Per rimontare il dispositivo, segui le istruzioni in ordine inverso.
7 commenti
Power adapter? That's the AC EMI filter, right? My power supply looks like this:
http://www.dvwarehouse.com/661-6048-661-...
The EMI filter will never fail... well, maybe a direct lightning strike.
roger -
That is definitely just a filter. The power supply is the big PCB connected to it. One could say this is an EMI filter along with an IEC input connector...this guide is only useful if you want to replace the connector rather than the actual power supply.
Not sure if the EMI filter will NEVER fail as someone said above. Mine was buzzing and I replaced it and this fixed one of my displays that was buzzing. There are also other causes, including capacitors on the Power Supply board, worn out fan etc.
So are we saying that this is wrong? anyone? I really need to replace my power supply.
I replace the all in one lightning and charge cable but it has ended up that the lightning cable only works. I thought I connected everything up fine but which connector would stop the charge cable working?
Instead of $14 foam block, I used a full roll of paper towel and two pillows. While it worked, if I ever did this again, I would buy the block of foam. Since you’re removing a power cable, you need to be able thread it through and I think the foam block would make that easier.
Josh Miller -
You can also use a single handle, double cup floor lifting suction cup. Just place it in the centre of the screen near the camera and lift slowly.
Steve A -
I just used a toilet plunger to remove the screen and it worked like a charm!
Philip Jacob -
That’s what I call resourceful—made my day. I hope your repair was successful.
Tobias Isakeit -
Great idea, thanks a lot!
Yvan Sandoz -
The glass lifted off the magnets quite easily after just using my fingernails. No suction cups or toilet accessories needed.
Adrian Gropper -
I had the same problem and after removal of the fan and a bit of work with the vacuum, the fan is quiet. Thanks to ifixit for the great instructions that made this easy.
John Perser -
To keep the screen up, other soft objects might work, but it's important that the hole in the back isn't covered because you will need to thread the new Thunderbolt/MagSafe cable through it and it would be a hassle to do it after everything's been set up.
Thomas -
Anybody got any links to glass screen replacement supplier for the A1407 Thunderbolt Display? Im finding it impossible to find a replacement without it being crazy money.
Michael McMillan -
Instead of a wedge, I used 4 rolls of toiletpaper, one under each corner.
jnbruin -