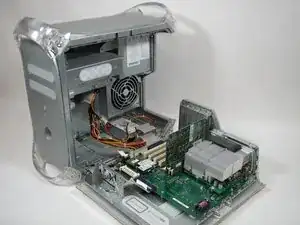
Introduzione

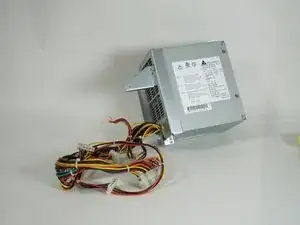
Rimozione dell'alimentatore da un PowerMac G4

  1. MI3MLXaxZt2N2WyU
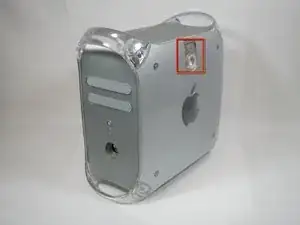
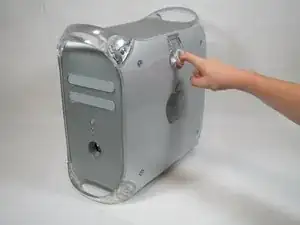
    • La maniglia da usare per aprire il computer si trova sulla parte in alto del pannello laterale destro.

  2. 2gTC6EkIwJDejnfC
    2gTC6EkIwJDejnfC
    2ucGgBJmyDkABGQ4
    • Afferrare la maniglia circolare e tirare

  3. Nm4mRELLtcYI4YYI
    • Il tuo computer è ora aperto e pronto per la riparazione.

  4. 4Vm2woXOMhSqUTNc
    • Il lettore CD/DVD si trova nella parte superiore sinistra del case.

  5. ILZJlcRZsHSiZPNp
    ILZJlcRZsHSiZPNp
    GopxwHxqDUxPrHRY
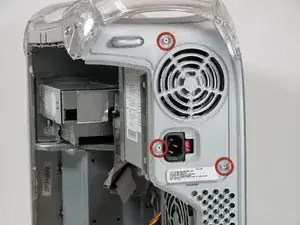
    • Vi sono 4 viti da rimuovere.

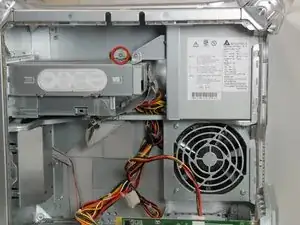
    • La prima vite può essere identificata in figura.

    • Le viti rimanenti sono indicate nelle immagini seguenti.

  6. k4eDYRPMPRPsPOWE
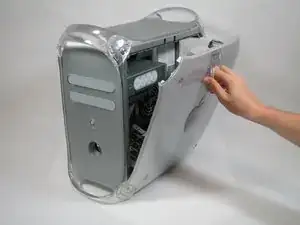
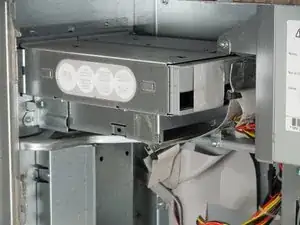
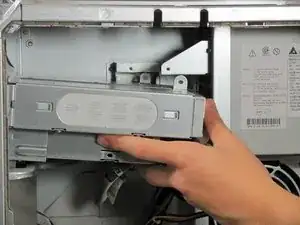
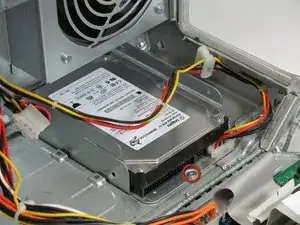
    • Rimuovere il vano contenente il lettore ottico (e l'eventuale lettore zip) dalla parte frontale del computer e quindi estrarlo.

    Had to detach the cables before I could slide the drive out because no space to slide back. My drive is about 10mm longer than that in the picture.

    Brains -

  7. DPiQwvFPOYvBTUak
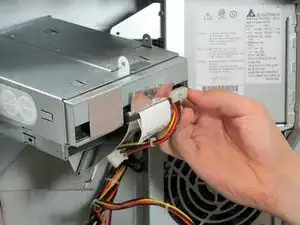
    • Staccare i due cavi connessi alla parte posteriore del lettore ottico (ripetere l'operazione per l'eventuale lettore zip eventualmente presente).

    • I cavi piatti possono essere rimossi tirando la linguetta argentata. Il cavo colorato (alimentazione) può essere rimosso afferrando la parte in plastica del connettore da ambo i lati e tirando con relativa forza.

  8. siQhN4cavRPNHbEs
    • Il disco rigido è collocato nella parte in basso a sinistra del case.

  9. jptKb6hb5eGAswAI
    • Rimuovere il cavo piatto tirando con relativa forza.

  10. lFMtgQCKOKYhutEx
    • Rimuovere la vite che mantiene il disco solidamente fermo nel case.

  11. ggAxXEKMaGCPphft
    • Sollevare il disco ed estrarlo dal computer.

  12. Pqm6vHpAonPMHwMM
    • Rimuovere il cavo colorato (alimentazione) afferrando il connettore in plastica su ambo i lati e tirando con relativa forza.

  13. JEGPAIRRnBtmIQga
    • L'alimentatore si trova nella parte superiore destra del case.

  14. bWYwaghyhySTVV6K
    bWYwaghyhySTVV6K
    QG6olS5SBBIkgDSt
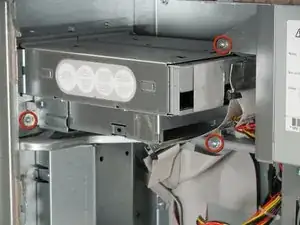
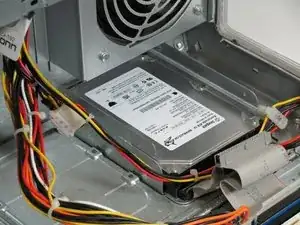
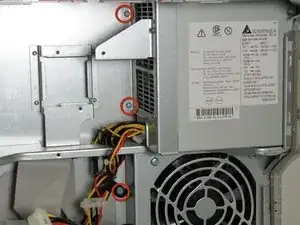
    • Vi è un totale di 4 viti da rimuovere.

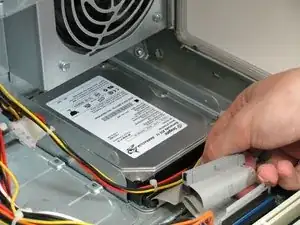
    • Le prime 3 viti sono identificabili nella prima foto.

    • L'ultima vite è mostrata nella seconda foto.

  15. EyywAASH3ONHidPP
    • Bisogna rimuovere altre 3 viti nella parte posteriore del computer (è richiesta una testa esagonale da 2.5mm)

    • Si possono usare punte diverse (come una T10): anche se sono un po' piccole possono funzionare ugualmente se usate con cautela.

  16. 1iAGDnoKtZUfXW3X
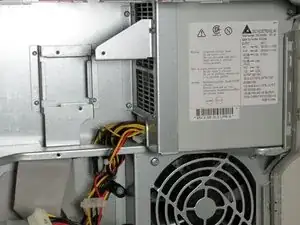
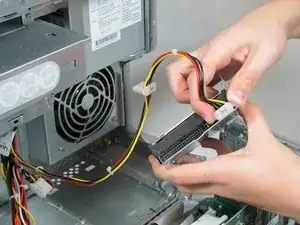
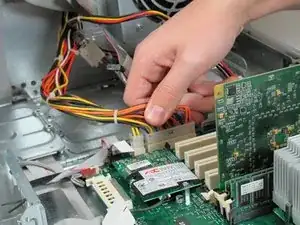
    • Scollegare il cavo di alimentazione dalla scheda madre premendo la linguetta sul connettore come mostrato in figura.

    This step can be done prior to Step 13.

    dec59us -

  17. 1an3JblIQeFSOunW
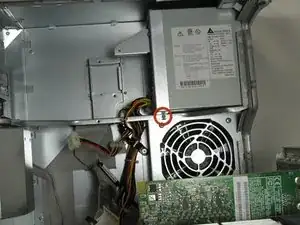
    • Prima di estrarre l'alimentatore assicurati di scollegare il cavo dalla ventola grande premendo la piccola linguetta nera sul retro del connettore nero!

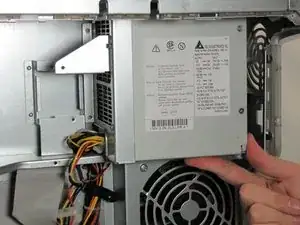
    • Far scorrere l'alimentatore dalla parte posteriore del computer per poi tirarlo fuori facendo attenzione a far scorrere i cavi nel foro metallico di supporto.

    Before sliding out the power supply make sure to disconnect the cable to the big fan by pressing in the small black tab on the back of the black connector!

    7design -

  18. mAnpJMO4ZsJXmPXN
    • L'alimentatore è ora libero e può essere sostituito.

Conclusione

Per riassemblare il dispositivo, seguire queste istruzioni in senso inverso.

Jacob Garcia

Membro da: 28/01/10

621 Reputazione

5 commenti

I hate to say this, but that is not fixing the power supply but replacing the power supply with a new unit. i was hoping to fix it as mine blew and was hoping to revive it, but not luck on this end by the look of it. :(

Yannick Docq -

Thanks for the clear instructions to replace the power supply. I got my part on eBay for $29 (other online stores are charging $100-200+ for it) to doctor up an old G4, and it works like a charm now.

Brenna Jue -

Thank you so very much for these instructions. On my 733 G4 the blue front panel had to be removed to allow the DVD drive to exit from the front of the machine. I also had to remove the fan to allow the wires to exit with the power supply.

John -

Yet another G4 QuickSilver saved from the electronics recycler! In tandem with an eBay-listed refurbisher of my defunct PSU, it was brought back to life. Instructions were very clear.

dec59us -

Is it normal that after installing a replacement power supply for the PowerMac Quicksilver 733MHZ one of the fans is still running? Not sure which one, but once everything is shut down completely, I just pull the plug to avoid that fan from running for ever. Any feedback is appreciated. That unit still runs under OSX 10.4.11 and Classic.

pjers.shastans -