
Introduzione
Usa questa guida per sostituire l'altoparlante sinistro.
-
-
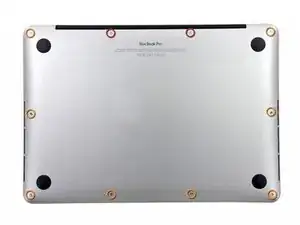
Rimuovi le 10 viti seguenti che fissano il coperchio inferiore al case superiore:
-
Due viti Pentalobe da 2,3 mm
-
Otto viti Pentalobe da 3,0 mm
-
-
-
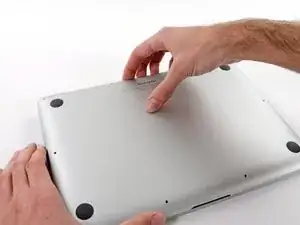
Infila le tue dita tra il case superiore e quello inferiore.
-
Con delicatezza, tira il coperchio inferiore per staccarlo da quello superiore.
-
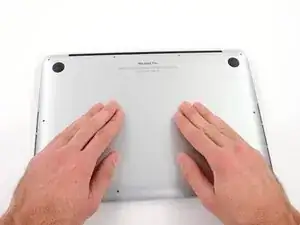
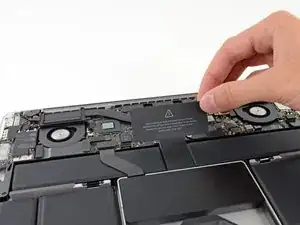
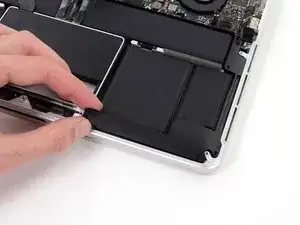
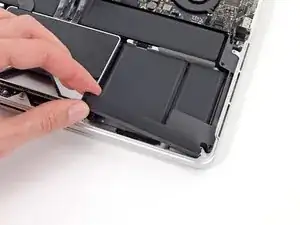
Rimuovi il case inferiore e mettilo da parte.
-
-
-
Il case inferiore è collegato a quello superiore con due clip di plastica in posizione centrale.
-
-
-
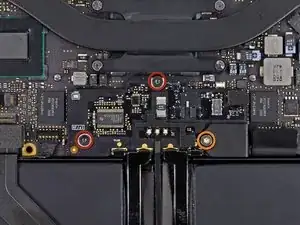
Rimuovi le seguenti viti che fissano la scheda del connettore della batteria alla scheda logica:
-
Due viti Torx T6 da 2,8 mm
-
Una vite a colletto Torx T6 da 7,0 mm
-
-
-
Usa delle pinzette per rimuovere il piccolo coperchio in plastica posizionato vicino alla parte inferiore destra della scheda del connettore della batteria.
-
-
-
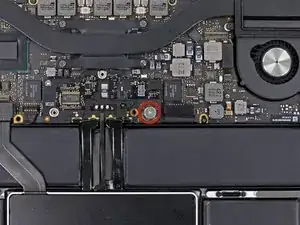
Rimuovi la vite a testa larga Torx T6 da 6,4 mm che fissa il connettore della batteria al gruppo della scheda logica.
-
-
-
Solleva con delicatezza dalla scheda logica la scheda del connettore della batteria.
-
Si raccomanda di piegare poco i cavi della batteria, quanto basta per tenere la scheda sospesa sopra alla scheda logica, dove non dà fastidio.
-
-
-
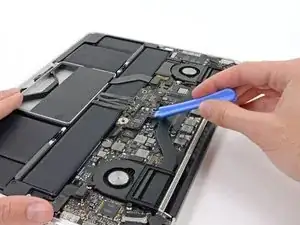
Afferra con delle pinzette l'interposer.
-
Solleval'interposer dalla scheda logica e rimuovilo.
-
-
-
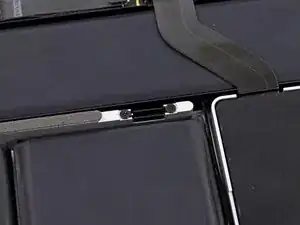
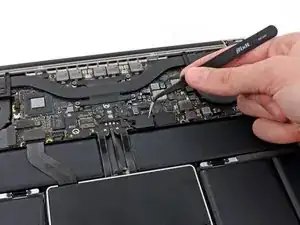
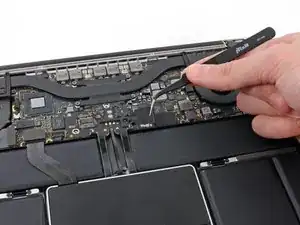
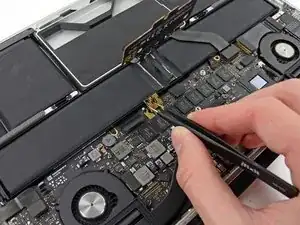
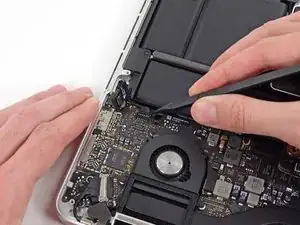
Inserisci l'estremità piatta di uno spudger per sollevare, staccandolo, il connettore del cavo del jack altoparlanti dal suo zoccolino sulla scheda logica.
-
-
-
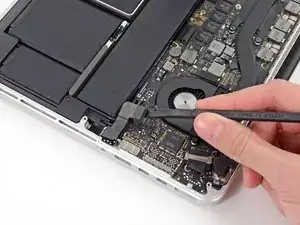
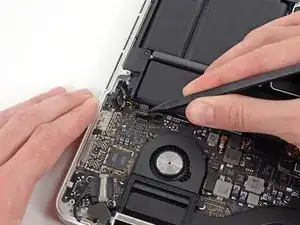
Infila la punta di uno spudger sotto il connettore del cavo dell'altoparlante di sinistra.
-
Fai leva delicatamente sul connettore del cavo dell'altoparlante di sinistra per staccarlo dal suo zoccolino sulla scheda logica.
-
-
-
Usa un cacciavite Torx T5 per rimuovere le seguenti viti che fissano l'altoparlante sinistro al case superiore:
-
Una vite nera da 6,8 mm
-
Una vite cromata da 6,3 mm
-
Una vite nera da 4,9 mm
-


Per rimontare il tuo dispositivo, segui queste istruzioni in ordine inverso.

5 commenti
Rats:
"Wedge the tip of a spudger beneath the left speaker cable connector.
Gently pry the left speaker cable connector up off from its socket on the logic board.
Be sure you are prying up on the connector, not the socket itself."
I accidentally pried up on the socket, which looks like it was soldered to the board. Left speaker doesn't work, of course. I assume there is no fix for this, other than replacing the board??
Thank you very much for the walkthrough. No problems to follow at all. Everything worked as a charm. Changed both speakers as per your other guide.
I was able to follow the steps exactly as described without damaging anything. Patience is the key.
Max Max -
If don’t have one of those neat project mats, then you can use small pieces of flattened blu-tack to hold the screws. If you arrange them in the shape of your mac book cover, and put the screws down methodically, you can get a one-to-one mapping of the screws to the correct screw holes.
Toby Thurston -
Or you can use an ice tray where you put the screws and the parts in separate bays in the same order as they come in the instructions.
timofej.se -
This is great! I used a small magnetic white board, and wrote on it to identify the parts as I went. This whole process, from the fast shipment to the great instructions to the complete, high quality, tool kit has been great. I’m typing this comment on my resurrected laptop. Thank you! Sue
Susan Greer -
It would be a good idea if people recorded in the comments which screws go where so that, if someone lost their screw positions, they could recover them from the comments.
Raymond Shpeley -