
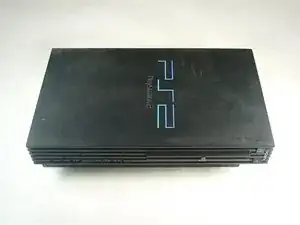
Introduzione
Sostituisci l'ottica laser dell'unità disco. La sostituzione del laser richiede di avere o acquistare un nuovo laser.
-
-
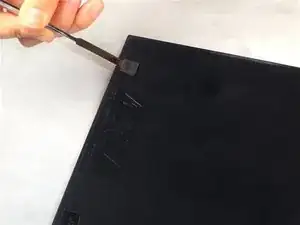
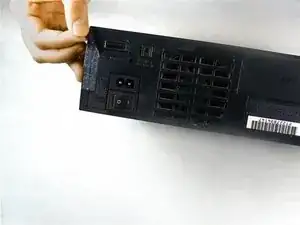
Utilizza il bordo piatto di uno spudger di metallo per estrarre i coperchi delle otto viti piatte.
-
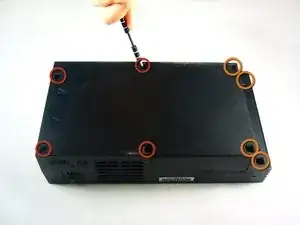
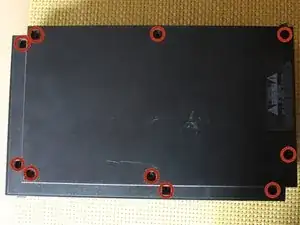
Rimuovi le seguenti otto viti che fissano il coperchio superiore alla cassa inferiore:
-
Quattro viti a croce da 55,4 mm
-
Quattro viti a croce da 18,0 mm
-
-
-
Alcuni modelli hanno un numero diverso di viti e piedini. Rimuovi tutti i piedini e le viti nella parte inferiore del case.
-
Il modello a 10 viti ha 6 viti nella parte più bassa e 4 nella parte superiore.
-
-
-
Stacca l'adesivo di garanzia (situato accanto all'interruttore principale di alimentazione) dal case.
-
-
-
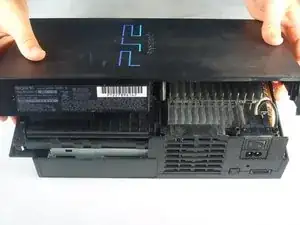
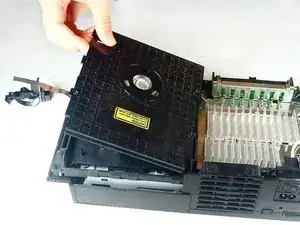
Separa sollevandolo il coperchio superiore dalla scocca.
-
Rimuovi con cautela il cavo di alimentazione che collega la metà superiore e quella inferiore scollegando il gruppo del cavo di alimentazione dalla scocca.
-
-
-
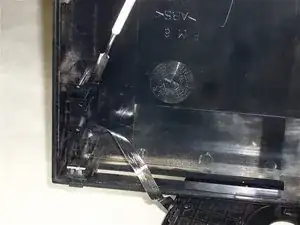
Rimuovi le quattro viti a croce da 6,4 mm che fissano il coperchio superiore dell'unità disco ottico.
-
Solleva e rimuovi il coperchio dall'unità disco ottico.
-
-
-
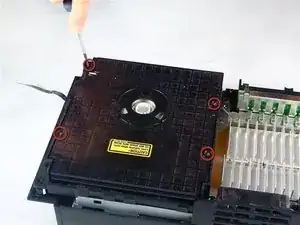
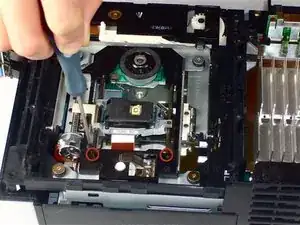
Rimuovi le due viti nere a croce da 7,2 mm che fissano le guide metalliche argentate che tengono il laser in posizione.
-
-
-
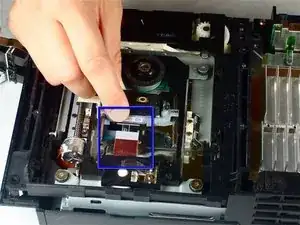
Utilizza l'unghia per sganciare il fermo che blocca in posizione il cavo a nastro del laser dell'unità disco.
-
Stacca il cavo a nastro del laser dell'unità disco e allontanalo dalla presa.
-
Per rimontare il dispositivo, segui queste istruzioni in ordine inverso.

8 commenti
just did the laser replacement, however the playstation still identifies "no data" when game is inserted. it says "reading disk" for a few seconds then nothing else happens. thought?
Have you removed the security solder blob? All new Lenses have this somewhere in the circuitry.
Number 1 Ifixit the class world,
Mohsen -
I noticed that many times when you replace a lens it throws of the rotary motor. Some ps2 consoles have only 1 hex adjustment yet others have 2. If you have the covers off and just replaced the lenses you should always plug it back in w/ the top off still and adjust it until you see the disc spinning rapidly and laser is moving back and forth. Another way for calibrating is to remove said disc and if lens and ribbon move all the way forward and all the way back 3 or more times then you are almost done. At that point plug in tv chord and place in a disc if the PlayStation 2 logo comes on and disappears in less than 3 seconds carefully replace all parts and your good to go.
Raymond -
Before proceeding to step 2, Take a look at your PS2, some PS2's have 10 screws (and screw covers) instead of 8 (i found them underneath the optical drive), these instructions have mislead me and i ended up breaking my top cover for my PS2.
Tristan -
Ich möchte daraufhin weisen, daß es bei der SCPH-50004 zwei verschiedene Schraubabdeckungen gibt.
4x Kreuzförmig 4x rechteckig
Sowie eine silberne schraube die sich an der unterseite aufhöhe des Reset-Knopfes befindet.
Christian Lehnhardt -