Introduzione
Questa guida illustra le modalità di sostituzione dell'unità SuperDrive del computer portatile (richiede un'unità SuperDrive SATA).
Strumenti
Ricambi
-
-
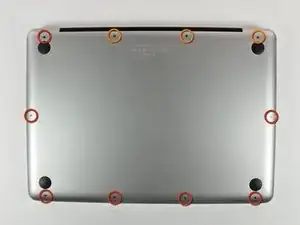
Rimuovi le dieci viti seguenti, che fissano il case inferiore al MacBook Pro Unibody da 13":
-
Sette viti con testa a croce da 3 mm.
-
Tre viti con testa a croce da 13,5 mm.
-
-
-
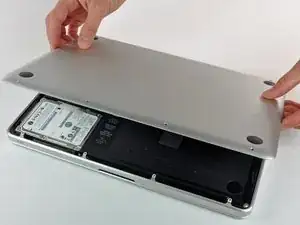
Solleva leggermente il case inferiore e spingilo verso la parte posteriore del computer per liberare le linguette di montaggio.
-
-
-
Mediante l'estremità piatta di uno spudger, sollevare il connettore del cavo della batteria dal connettore femmina sulla scheda logica staccandolo da questa.
-
-
-
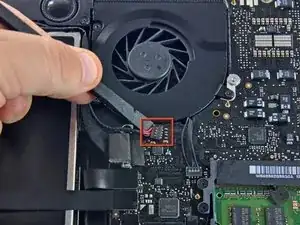
Usando l'estremità piatta di uno spudger, stacca delicatamente dalla scheda logica il connettore del cavo dell'altoparlante/subwoofer di destra. Stai attento a non sollevare la presa. Tira il connettore verso l'unità ottica.
-
-
-
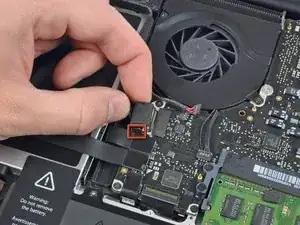
Tira il connettore del cavo della fotocamera in direzione dell'unità ottica per scollegarlo dalla scheda logica.
-
-
-
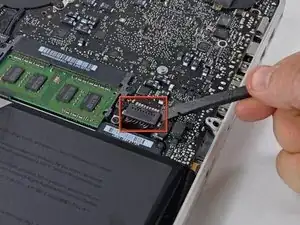
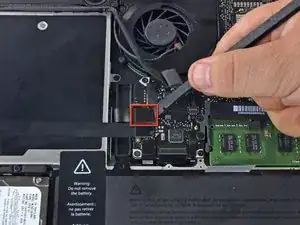
Usa l'estremità piatta di uno spudger per staccare il connettore dell'unità ottica dalla scheda logica.
-
-
-
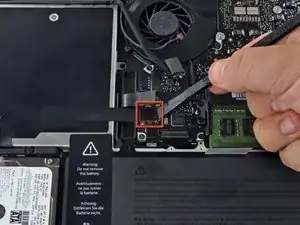
Usa l'estremità piatta di uno spudger per staccare il connettore del disco fisso dalla scheda logica.
-
-
-
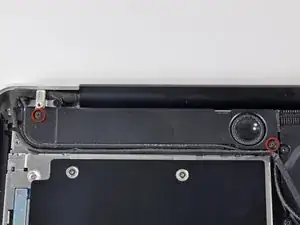
Rimuovi le due viti a croce Phillips che fissano il subwoofer al case superiore. Quella di destra è da 5 mm, quella di sinistra da 3,9 mm.
-
-
-
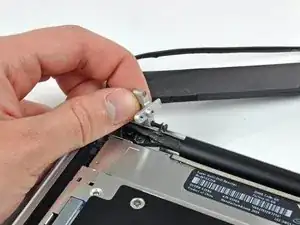
Rimuovi le due viti Phillips da 8,4 mm che fissano la staffa del cavo della fotocamera al case superiore.
-
Solleva dal case superiore la staffa del cavo della fotocamera.
-
-
-
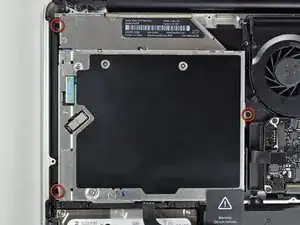
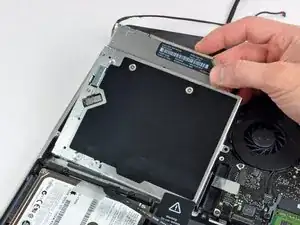
Rimuovi le tre vite a croce Phillips da 2,5 mm che fissano l'unità ottica al case superiore.
-
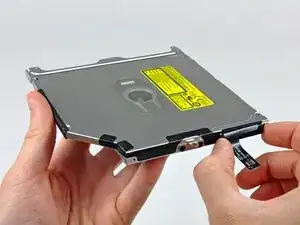
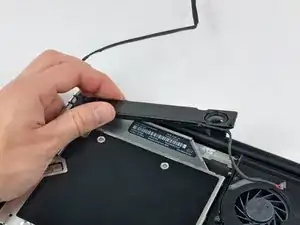
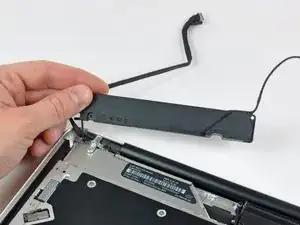
Solleva l'unità ottica dal suo bordo di destra e tirala via dal computer.
-
-
-
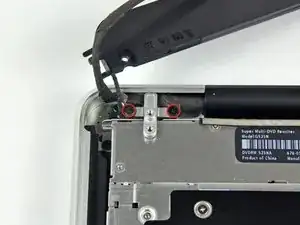
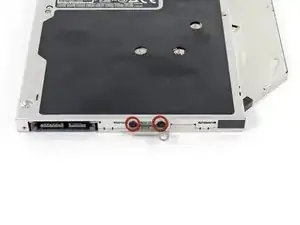
Remove the two black Phillips #0 screws securing the small metal mounting bracket. Transfer this bracket to your new optical drive or hard drive enclosure.
-
Per riassemblare il dispositivo, seguire queste istruzioni in ordine inverso.

2 commenti
iFixit rocks! Got a stuck CD out of my wife's superdrive this way. Many thanks!!!
I just took mine apart and found a piece of tape in it. Smh. Works perfect now.
Compare the short screws carefully before reinstalling them. The shouldered screws go in the holes on the front edge.
David Kilbridge -
Before I started removing any screws I took a piece of paper and drew the bottom of the laptop and put a piece of double-sided tape in the spot where each screw goes. That way when I took out the screws, I could put them on the tape so I knew exactly which screw went in which spot. I did the same thing for dismantling the inside on another sheet of paper, then a third sheet for the screen after getting the front glass off.
mastover -
I use a similar technique: I print out the iFixit manual for the job, and Scotch-tape down the screws/brackets/cables I remove at each step next to the component descriptions. That way, when I'm reassembling, the bits are taped right next to the photo of where they came from.
adlerpe -
That's exactly what I do for all my repairs! It's the best way to keep track of all of the parts ' original location and to make sure that you don't miss any parts during reassembly.
joyitsjennie -
Great idea and one I use often
Thomas Overstreet -
Excellent idea! Thanks for sharing it here.
Laura Sharkey -
I used a 00 that fit but the screws were very tight so I used a tiny paintbrush with some wd40 on it and put it around the edges of the screws. Worked like a charm
valentinedhdh -
I use a magnetic mat and place the screws in order on that :)
Cary B -