Introduzione

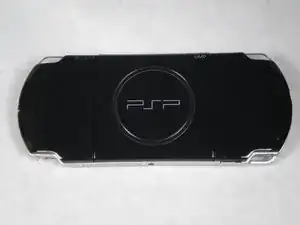
Passaggi per sostituire la scocca esterna di una Sony PSP-3000

  1. TrUmfMIuTdKnA1Cn
    TrUmfMIuTdKnA1Cn
    yJW4ra1RPAwB3mYP
    EGjqqfqlRcpevFHa
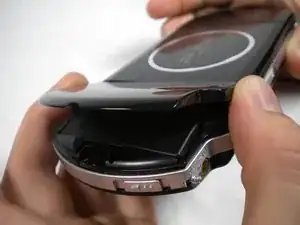
    • Posiziona la PSP a faccia in giù e individua il coperchio della batteria sul lato sinistro del dispositivo.

    • Solleva e rimuovi il coperchio della batteria per rivelare la batteria.

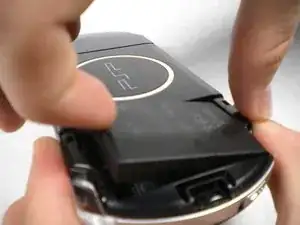
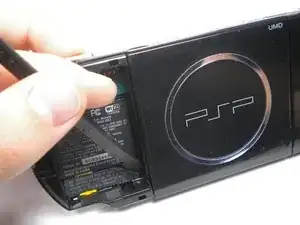
    • Rimuovi la batteria.

  2. WwNswCUCuutjhWcd
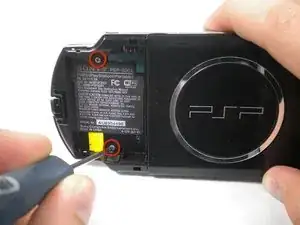
    • Stacca lo sticker di garanzia che si trova dietro la batteria con uno spudger o con l'unghia.

    This will end your warranty, so do it on your own risk!

    Paweł Kasztura -

    Even though warranties are long expired on these things.

    Vincent C. -

    “IF” your on this Site “I FIX IT(tm) to lean how to repair something on your own… you “Should NOT” be too concerned about warranty any longer, as if you were .. for your iPhone or Pad etc… you would have taken it to the supplier.. No??

    Barry Goian -

  3. 2jvKwbGyeHYdH5m1
    2jvKwbGyeHYdH5m1
    FJxVn2bSqXKi5LsX
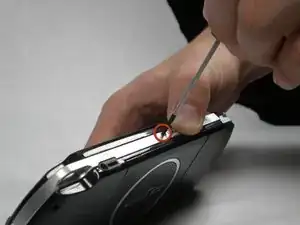
    • Svita tutte e quattro le viti sul retro della PSP con il cacciavite a croce Phillips #00.

    • Due si trovano dietro lo sticker di garanzia della batteria.

    • Due si trovano sul lato destro della PSP.

  4. FwFsxefOstRBZYIX
    • Successivamente, svita le due viti situate nella parte superiore della PSP.

  5. nfaMmtCKKxRYKXNX
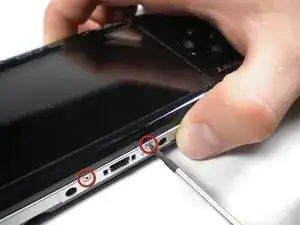
    • Quindi, rimuovi la singola vite dal bordo inferiore della PSP (posizionata accanto al codice a barre).

    “DON’T” forget to put your screws separately on a mag mat (Or sticky tape) so to 1) Not loose them & 2) Remember where they go as they may be of differing sizes. (Refer time the pictures also helps, but you can take a pic on your camera as you go to remind you also.

    Barry Goian -

  6. GTBGyfJfojtdYbvv
    GTBGyfJfojtdYbvv
    kKwEelLMbuDXtkYh
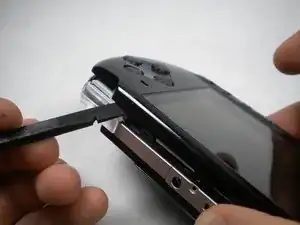
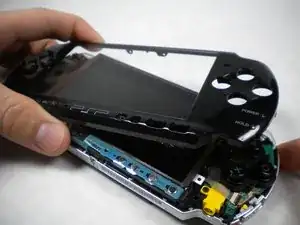
    • Inserisci lo spudger tra la scocca esterna della PSP, iniziando dal pulsante "R", e solleva delicatamente la scocca.

    • Rimuovi completamente la scocca anteriore.

    J’ai récemment fait cette réparation et le boîtier avant ne voulait pas venir à condition d’enlever les deux vis sur le boîtier arrière au niveau du joystick et de la croix directionnelle. Il manque donc selon moi une partie mais je peux me tromper !

    Valentin Boileau -

Conclusione

Per rimontare il tuo dispositivo, segui queste istruzioni in ordine inverso.

kbrunner

Membro da: 05/11/09

72 Reputazione

0 commenti