Introduzione
Guida di solo prerequisito per rimuovere la staffa di supporto inferiore di un iMac 4K 2017.
Strumenti
-
-
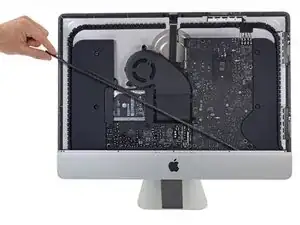
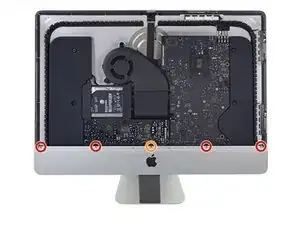
Svita le seguenti viti a croce Phillips che tengono ferma la staffa di supporto inferiore:
-
Quattro viti da 3,2 mm
-
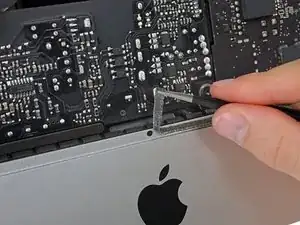
Una vite da 1,7 mm
-

Conclusione
Per riassemblare il tuo dispositivo segui questa guida in ordine inverso.

I would recommend that those trying this have the project tray to contain all of the screws.
Mikkif -
2 notes for reassembly, carful with screws not to strip the heads as they are really really small, make note to cut a gap in the the adhesive over the whole for the microphone.
I managed to strip the head of one of the screws when putting it back in. So be carful with them when putting in / taking out. If you strip it on the way out you will need to take a fine drill and rill it out. Going back in, well as long as you never need to strip it down again not a problem.
The second problem is a real pain, you need to make sure to cut a gap in the adhesive just to the right of Center at the button to allow for the microphone opening. If you don’t, the adhesive tape will stop any real pick up on the Mic, so you just need to cut a small gap in it before putting on the screen. Unfortunately I didn’t find this out (or do my checked before sticking it all back down, so have to pull screen back off and reapply new adhesive
witha cut out in it at an other time.Andrew Taylor -
Refer her for more info on the mic / adhesive work around —> Muffled Microphone - iMac 21.5" (mid 2017) - Following Adhesive Strips
Andrew Taylor -