Introduzione
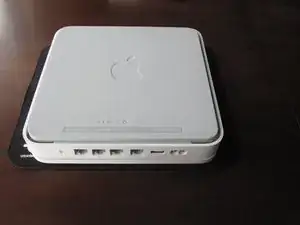
Segui questa guida per sostituire il discorigido nel tuo Apple Time Capsule modello A1302.
Strumenti
Ricambi
-
-
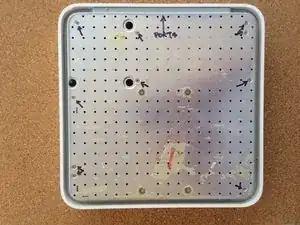
Apri il Time Capsule esponendo le viti che lo tengono insieme. Le viti sono nascoste dalla base in gomma, che è la faccia infeeriore del dispositivo.
-
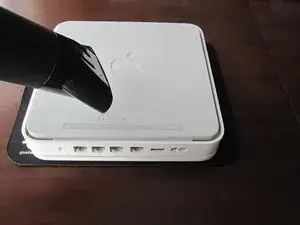
Usa una pistola termica o un asciugacapelli per scaldare la base in gomma, per ammorbidire l'adesivo che la tiene ferma.
-
Iniziando in un angolo, solleva attentamente la base in gomma evitando che si trappi. Puoi usare un plettro o un piccolo righello in plastica per separare la gomma dal metallo.
-
-
-
Una volta rimossa la base in gomma dal dispositivo, svita le 8 viti Philips PH00 che fissano la scocca inferiore in metallo alla scocca superiore in plastica.
-
-
-
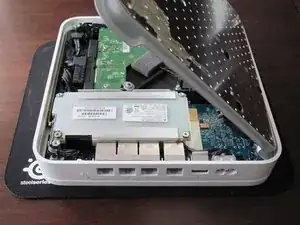
Solleva il bordo sinistro della scocca in metallo e ruotalo lentamente attorno al bordo destro del dispositivo.
-
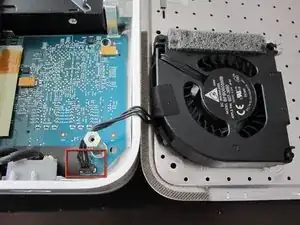
Poiché in molti hanno rotto il cavo della ventola, è consigliato NON fare leva sul connettore per scollegarlo. Sii MOLTO attento con questo connettore: è molto delicato. Se devi scollegare la ventola dalla scheda madre, usa uno spudger o delle pinzette stando MOLTO attento.
-
-
-
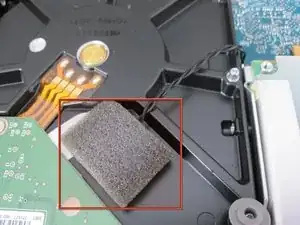
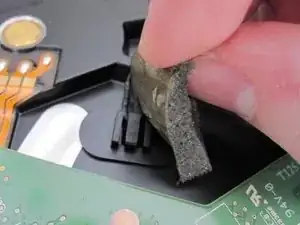
Rimuovi la schiuma e metti da parte il sensore. Sii delicato con la schiuma poiché dovrai riusarla per riattaccare il sensore all'HDD.
-
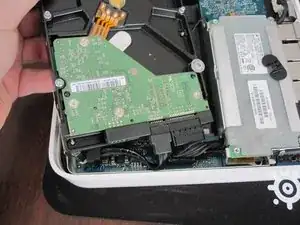
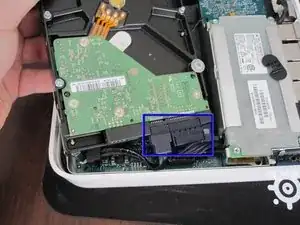
Solleva l'HDD dal dispositivo e scollega i due cavi SATA dall'HDD.
-
-
-
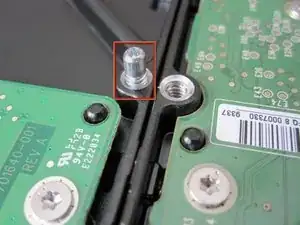
Usa un cacciavite Philips #00 per svitare i quattro distanziali dall'HDD originale e installarli nelle stesse posizioni su quello nuovo.
-
Posiziona il sensore della temperatura all'incirca nella stessa posizione dell'originale sul nuovo HDD. Copri il sensore con la schiuma, usando del nastro adesivo se ncessario.
-

Per rimontare il dispositivo, segui le istruzioni in ordine inverso.

68 commenti
Worked like a charm! Instructions were very thorough. Thank you
jlechuga -
I dislodged the fan connector from the logic board. How can I go about fixing this? Can I just solder the connector back onto the board? Thanks
Jon -
Yes. It says to follow the article bakcward so yes connecting correctly sshould work…
Success! I would get a flash of a green light after a factory reset then the flashing amber followed by a solid amber. No wifi signal or HD. Put my ear to the unit and heard the click of death. New hard drive per above and I was back up and running in 20 minutes.
Stuart -
Slowly start peeling at one corner... worked better than shown on the pictures.
Markus -
Slow down particularly near the bottom label where it is stiffer. Either that or I needed to give it more heat. Going too fast can risk tearing the rubber base if the adhesive is strong.
ElvinC -
If you are wondering if the Time Capsule will still work as a router if you remove the HDD and leave it out, the answer (according to another webpage I read) is YES, it will still work. Apparently, you get a warning with the AIrPort Utility about a missing HDD, but it still works. I wanted to keep and reuse the 1TB Hitachi HDD for offsite data backup.
CraigH -
Use an iron instead of a heating gun or hairdryer!
Gradually raise the temperature while checking for separation, while moving over the rubber. I first cleaned the rubber with some soap, to avoid scorching dust or grease. The setting for synthetic fabrics seemed to do the job with my Tefal iron; probably a little over 100 degrees centigrade. No steam off course!
Worked like a charm without leaving almost any residual glue.
Sticking the rubber sole back after the repair was also successful.
Frits de Bruijn -
Thanks for sharing this.
kenatkenichikato -
Adhesive tape used is Nitto No. 5015. I found a piece of a back-paper left underneath the rubber…
vesa -
Is there a possibility to change an already changed 2TB SATA to a bigger one? Mine is full. because I added another MacBook Pro, but I’d rather not buy a newer TimeCapsule
Bette Rose -
I have a heater plate from my beer fermenting days. Sat the router on this rubber side down for an hour or so and the rubber came off easily and cleanly. A pet bed heater may work just as nicely.
publiclee -