Introduzione
Il tuo computer inizia a essere lento, si blocca spesso, o mostra la "schermata blu della morte"? Se la risposta è sì, probabilmente il tuo disco rigido è danneggiato. Se il tuo disco rigido non è ancora morto, assicurati di creare una copia dei dati importanti PRIMA di sostituire il disco rigido.
-
-
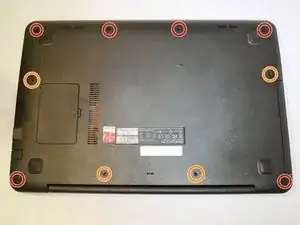
Rimuovi le seguenti viti Philips #0 dalla scocca inferiore:
-
Sei viti da 9 mm
-
Quattro viti da 11 mm
-
-
-
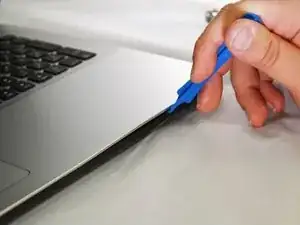
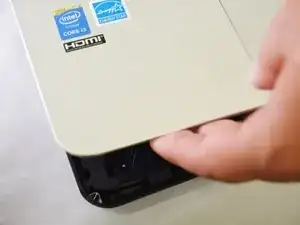
Usa lo strumento di apertura in plastica per separare la scocca inferiore e superiore.
-
Inizia inserendo lo strumento di estrazione tra scocca inferiore e superiore, dalla parte anteriore del portatile.
-
Continua passando lo strumento tra le due scocche così da disancorare quella frontale.
-
-
-
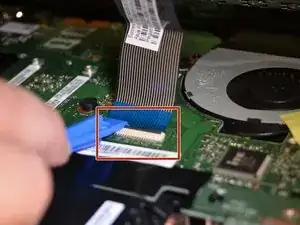
Per rilasciare il connettore ZIF, apri la piccola aletta bianca.
-
Tira il cavo a nastro bianco per estrarlo dalla presa e disconnetterlo.
-
-
-
Per aprire la linguetta ZIF che tiene fermo il cavo della tastiera, apri la linguetta grigia verso l'alto.
-
Estrai, esercitando poca forza, il cavo a nastro nero e blu dalla sua presa.
-
-
-
Ora puoi rimuovere la tastiera e la scocca superiore, così da accedere alle parti interne del portatile.
-
-
-
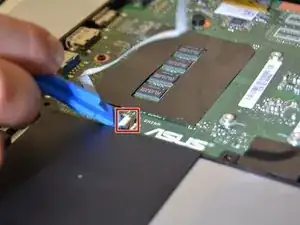
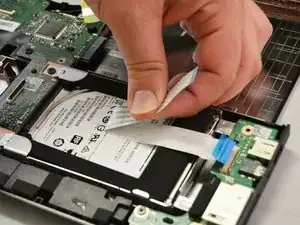
Apri la linguetta grigia sul connettore bianco con lo strumento in plastica, così da rilasciare i cavi a nastro.
-
Facendo attenzione, estrai il cavo a nastro mentre la linguetta grigia è sollevata.
-
Se noti che il cavo a nastro è incollato, rimuovilo così da staccarlo dal disco rigido.
-
-
-
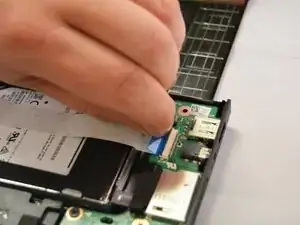
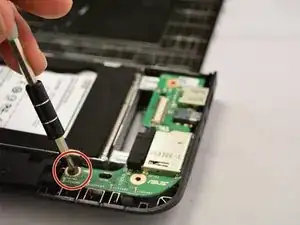
Svita la vite nera da 5 mm dalla scheda che alloggia il jack audio e una porta USB. Usa un cacciavite a croce Philips #0.
-
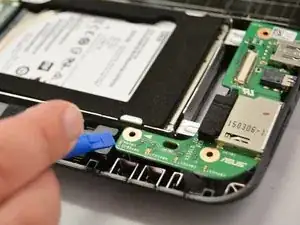
Rimuovi la scheda che alloggia il jack audio e una porta USB, utilizzando lo strumento di apertura in plastica.
-
-
-
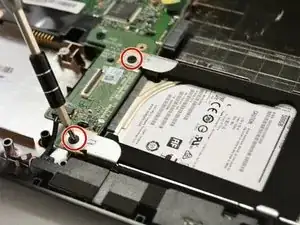
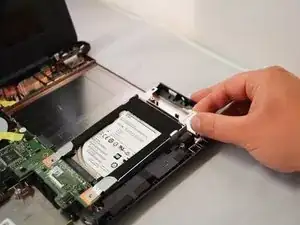
Svita le due viti nere da 5 mm posizionate agli angoli del disco rigido, utilizzando un cacciavite a croce Philips #0.
-
Solleva il disco rigido per estrarlo dalla scocca.
-
-
-
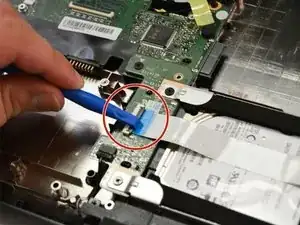
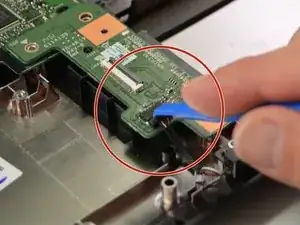
Scollega il connettore di alimentazione con uno strumento di apertura in plastica.
-
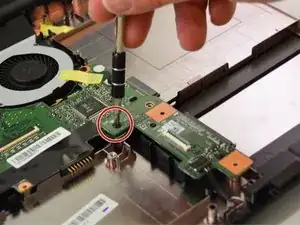
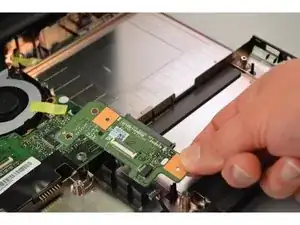
Svita la vite nera da 5 mm dalla scheda del controller del disco rigido, utilizzando un cacciavite a croce Philips #0.
-
Estrai il controller del disco rigido.
-
-
-
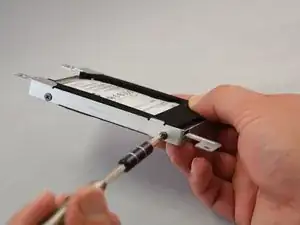
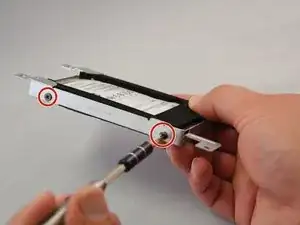
Svita le quattro viti nere da 3 mm dall'armatura del disco rigido, utilizzando un cacciavite a croce Philips #0.
-
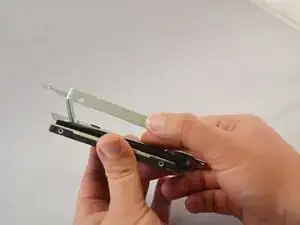
Rimuovi il disco rigido dall'armatura.
-
Stacca le tre strisce adesive in spugna dal disco rigido lentamente, per assicurarti che non si strappino.
-

Per riassemblare il tuo dispositivo, segui le istruzioni al contrario.
14 commenti
hi. i have the same laptop. the laptop bsod on me after i used it for a good 6 months. suddenly, when i start the laptop, it always boots me to the bios, the hard drive is change because i thought it is the problem (i just followed the solutions online which is a lot regarding the issue). my suspection is the hard drive connector to the motherboard pcb. is there any way i can replace with or where can i buy replacements for this same part? please help i really need the laptop for my school needs, and sorry for the bad english
I had the same problem. Sorry but its also too expensive to repair and the repair doesnt solve problem %100
AYG -
Im having the same issue. My HDD fails to start when my hand is over the hdd connector (just slight pressure). Any solutions?
ieg -
This is caused by the connection socket on the PCB between the little PCB that plugs into the HDD and the motherboard. Turns out that the great amount of flex in the (crappy) plastic body of these laptops causes too much strain on the socket (opening and closing the screen) and eventually the connector breaks. I had to order a replacement PCB on Ali-express.
Ettienne -
Great guide, thanks a lot. One thing to note, I found it wasn't necessary to remove the whole hard drive controller just to replace the HD. I was able to just remove the audio port board and then slide the drive away from the controller.
Thanks again!
‘90mm screws ‘ should be 9mm
Holy S -
Screws are 9mm instead of 90mm.
Also the 2 screws in the back corner (screen attachement side) have a slighlty bigger diameter (9mm in length as well) so they are not to be mixed with others 9mm lenght screws.
Laurent Potterat -
thank you, thank you for your comment. It's the only place on the entire www that makes that clarification.
river2438 -
are these screw sizes accurate. im looking for 9mm and 11mm screws for the asus x555la laptop also whats the M size of the screw ? cant seem to find the right screws online.
Matthew Bennett -
https://www.how-fixit.com/laptop-repair-...
says remove 10 screws (SCREW M2.5*8L, SCREW M2*12L, SCREW M2*9L) on the bottom case.
It looks like there was an image of which was which but it’s not showing for me!!
A base screw pack for Asus x555l laptop on eBay says: The pack contains 2x8mm 4x12mm 4x9mm !!
davidafloat -
Just wondering where is 11mm located? Is it on the middle? And the rest of 9mm are on the corners?
rudolphbarcellano -