
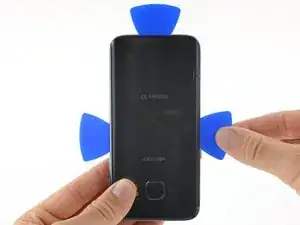
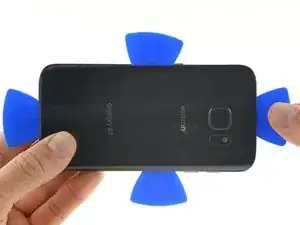
Introduzione
Segui questa guida per sostituire il display OLED crepato o difettoso del tuo Samsung Galaxy S7.
Tieni presente che la videoguida non corrisponde alla guida dettagliata qui sotto. È una versione più vecchia della guida.
La videoguida raccomanda di rimuovere la batteria, la scheda SIM e la scheda madre. Non è necessario ma diminuisce i rischi legati al riscaldamento del telefono. Raccomandiamo questa procedura solo se sostituisci insieme la batteria e il display.
La guida spiega come sostituire solo il display mentre lasci il telaio, la scheda madre e la batteria originali al loro posto. Nota: alcuni display di ricambio sono forniti preinstallati in un telaio (cioè chassis) nuovo. Questo richiede di trasferire tutti i componenti interni del tuo telefono e installare una nuova batteria. Assicurati di avere la parte giusta prima di seguire questa guida.
Se il telaio è danneggiato o deformato, bisogna sostituirlo. Altrimenti può essere che il nuovo display non si lasci montare correttamente o si danneggi a causa della pressione irregolare.
Di solito separare il display dal telaio distrugge il display, quindi non seguire questa guida a meno di voler sostituire il display.
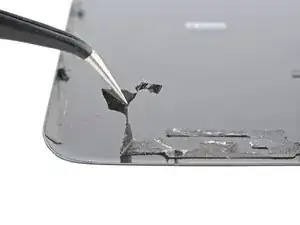
Se il tuo display è già a pezzi, indossa occhiali protettivi e copri il display con una pellicola di protezione o nastro adesivo per tenere insieme i frammenti di vetro.
-
-
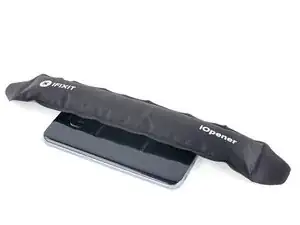
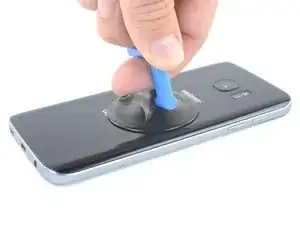
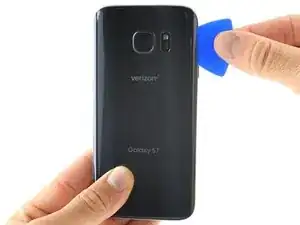
Quando il pannello posteriore è caldo al tatto, applicaci una ventosa, il più vicino possibile al bordo riscaldato ma evitando la parte incurvata.
-
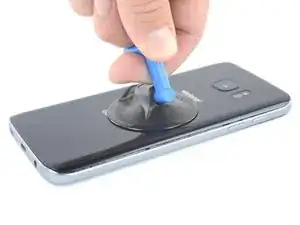
Solleva tirando con la ventosa e inserisci un plettro di apertura sotto il vetro posteriore.
-
-
-
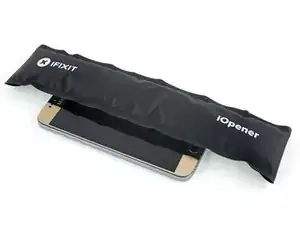
Quando il plettro è saldamente inserito sotto il vetro, riscalda e applica di nuovo l'iOpener per ammorbidire l'adesivo.
-
-
-
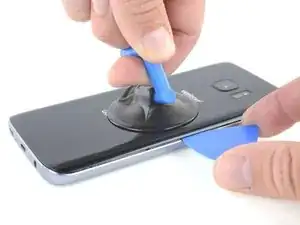
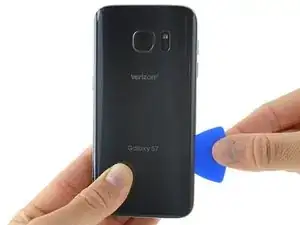
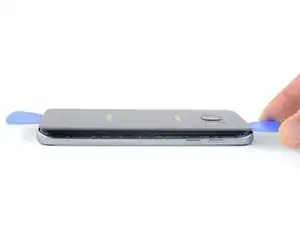
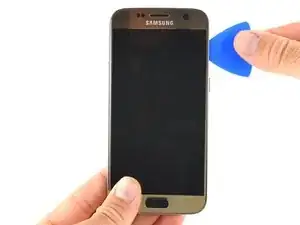
Fai scorrere il plettro di apertura lungo il bordo del telefono per tagliare l'adesivo.
-
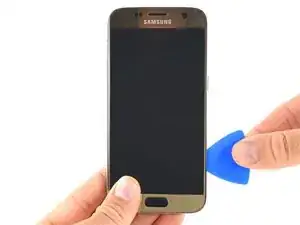
Lascia il plettro in posizione e prendine un altro per procedere al passo seguente. Lasciare inserito il plettro evita che l'adesivo appena tagliato aderisca di nuovo.
-
-
-
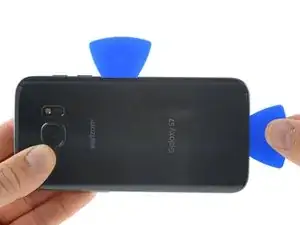
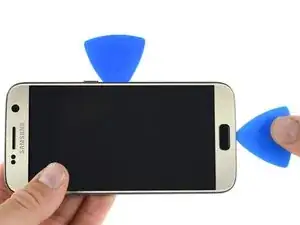
Ripeti la procedura precedente di riscaldamento e di taglio per gli altri tre bordi del telefono.
-
Lascia un plettro in ogni bordo del telefono mentre procedi con il successivo per evitare che l'adesivo aderisca di nuovo.
-
-
-
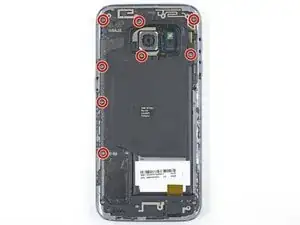
Svita le 8 viti a croce Phillips da 3,5 mm che fissano l'antenna NFC e la bobina per la ricarica wireless.
-
-
-
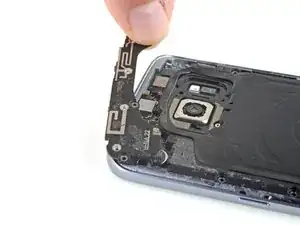
Inserisci la punta di uno spudger nella piccola fessura sul lato sinistro del gruppo antenna e solleva il gruppo verso l'alto e fuori dal telaio.
-
Rimuovi il gruppo antenna.
-
-
-
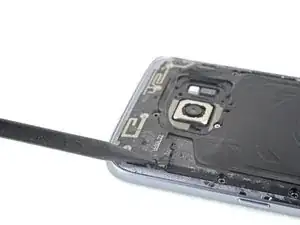
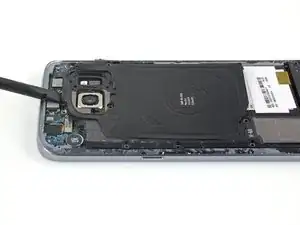
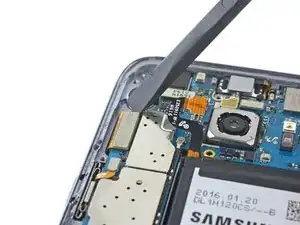
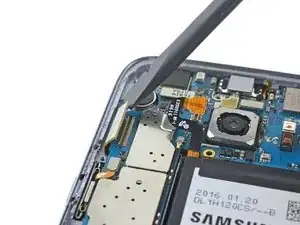
Usa l'estremità piatta di uno spudger per sollevare il gruppo bobina di ricarica dal telefono.
-
-
-
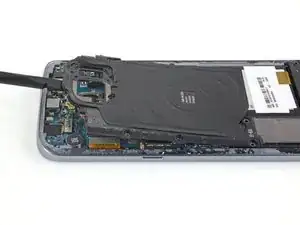
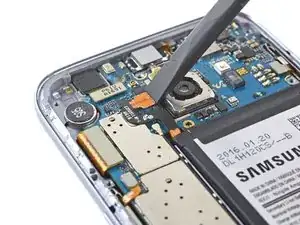
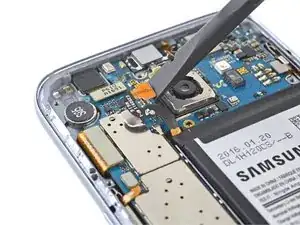
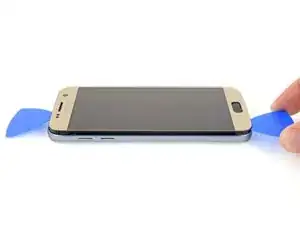
Usa l'estremità piatta di uno spudger per staccare il connettore del display e del digitizer.
-
-
-
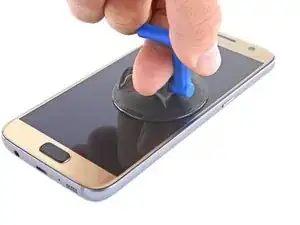
Quando lo schermo è caldo al tatto, applicaci una ventosa, il più vicino possibile al bordo riscaldato del telefono.
-
Solleva la ventosa e inserisci un plettro di apertura sotto il gruppo display.
-
-
-
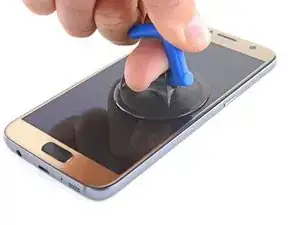
Fai scorrere il plettro di apertura lungo il bordo del telefono per tagliare l'adesivo.
-
Prosegui lentamente in modo che la punta non scivoli fuori dalla giuntura. Se hai delle difficoltà, riscalda e applica di nuovo l'iOpener.
-
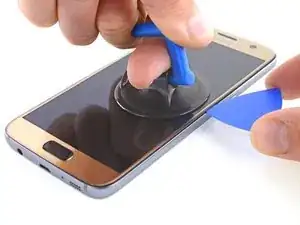
Lascia il plettro in posizione e prendine un altro per procedere al passo seguente. Lasciare il plettro in posizione evita che l'adesivo appena tagliato aderisca di nuovo.
-
-
-
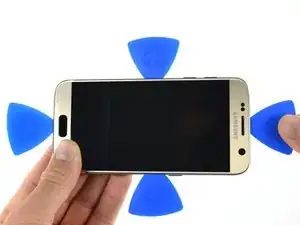
Ripeti la procedura precedente di riscaldamento e di taglio per i tre altri bordi del telefono.
-
Lascia un plettro in ogni bordo del telefono mentre procedi con il successivo per evitare che l'adesivo aderisca di nuovo.
-
-
-
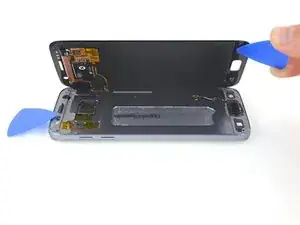
Solleva il display dal lato opposto al cavo del display in modo che il cavo funga da cerniera quando apri il telefono.
-
-
-
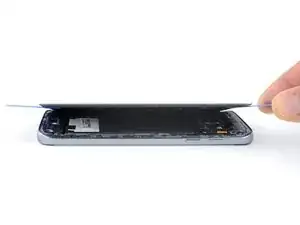
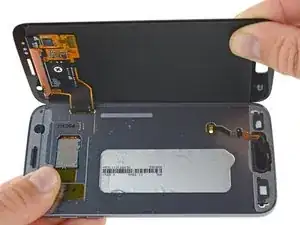
Allontana lo schermo dal telaio centrale con cautela, facendo delicatamente scorrere il connettore del display attraverso la cavità nel telaio centrale.
-
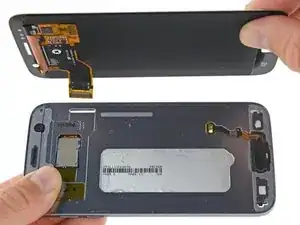
Rimuovi il display.
-
-
-
Dopo aver rimosso ogni residuo di colla e di vetro, pulisci le superfici di adesione con alcol isopropilico al 90% (o più) e un panno privo di pelucchi o un filtro per caffè americano. Pulisci in una direzione sola, non avanti e indietro.
-


Per rimontare il tuo dispositivo, applica dell'adesivo sulla cover posteriore e segui queste istruzioni in ordine inverso.

29 commenti
The screen replacement went smooth. I just wish it included the adhesive. I didn't see the note where the adhesive needed to be ordered in addition to the screen. Otherwise everything went well.
Thanks
Samsung s7 ekran değişimi orjinal parça satın aldığınız zaman bu kadar uğraşmanıza gerek yok.
Yapıştırıcı da sadece arka kapağı yapıştırmak için gerekli oluyor
For the price of the screen, I can replace it in a Samsung repair center...
I just need to replace the glass, not all of the AMOLED touch screen... :-( Sorry but this didn't help me.
Darky -
How much cost u paid to service centre for original display for samsung s7
You can not replace just the glass without special equipment (hot plate, laminator etc.)
I'm wanting to help my friend do this but I don't have a heat gun. Would a blow dryer work to loosen the glue or does it need to be hotter? He got a quote for 200 from a shop to fix it but they said it takes a month…lame! I've replaced screens in many tables and phones and I have all the necessary tools other than the heat gun and the replacement screen components obviously.
@Adam Bacon Heat guns are quite inexpensive. The model she uses in this video runs about $20 or less in most shops. A blow dryer may work, but it’s difficult to say for certain. The adhesive Samsung uses is pretty robust. If you find yourself fixing a lot of devices you should really consider investing in a heat gun.
E West -
I did this repair. A heat gun isn’t really hot enough to remove the screen without destroying it. A hair drying isn’t going to touch the glue.
armand -
Use a hair dryer and a spudger and a iSesamo to pop that bad boy off. No sense in buying a heat gun for one use.
It works great I got my Galaxy S7 apart within a hour using a hair dryer
I used a heat gun and heated it a little too much. The color of the rear glass is just a sticker on a clear cover. Due to this I tore the sticker off. Now the back cover is see through, which isn’t a bad thing but the repair was for a customer.
Kevin Bishop -
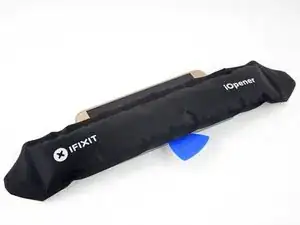
When using the iOpener, you may need more than 30 seconds, especially in compact or low wattage microwaves. Take this slowly, though, and be extremely careful, as it is easy to overheat your iOpener. Remember, you can always heat it up a tad more, but you cannot undo overheating it.
Jacob Pratt -
I used an adjustable heat gun and set it to 400 degrees (F). That was enough to seperate the glass without having to worry about exposure times of the heat. The front of the phone was just fine. Just be ready to use a bunch of picks to slide in between because they will be needed this way.
Ryan Schumerth -
I went from the bottom center up, using one ifixit tools, one suction cup and one pick.
Pick just popped in with some minor pressure.
Laid heat pack along base of phone 2 mins first and worked up slowly, rotating picks as I went. Had to heat iopener over several 30 second bursts
Lauren Burt -
This is useless because the phone does not recognize the new battery and will behave like on the old one
Search for “battery count xda"
Albert Einstein -
That is an interesting discovery! Thanks for pointing it out—I’ll have to look into it.
Even if this is true, replacing the battery should still give restore a significant amount of life, since the max voltage affects a minor amount of the battery’s capacity. If you charge a worn battery and a new battery to the same lower max voltage, the worn battery’s voltage will dip more under use and will be depleted faster.
Arthur Shi -
Thanks for the guide! It helped me replace a friend's battery with no problems!
Darren Crook -
I will never replace a screen again, and don’t recommend it. Not for phones nowadays. Once upon a time everything was screwed together, and you might even get the same quality or better screen when buying from eBay. And having the phone repaired was nearly the cost of the phone. Now, it’s the reverse. Removing the glued back and screen and cleaning off all the glue for a clean re-seal is an ordeal that takes multiple hours, AND, often the screen you buy on eBay is NOT OLED, but an LCD, and a blurry one at that. And the local phone repair store will replace the screen with an OLED, reliably, same day turn around, for not much more than the cost of an actual OLED screen, because they have the parts in bulk, and the tools and experience to do it quickly. Never again!
domarius -
have you ever had one that just wont open at all? i can not get mine to open to replace the battery i have heated with a heat gun and attached suction cup and it will not lift at all
Carla James -
Hi Carla,
I've definitely had that experience before. The adhesive is very strong, and the curved back makes getting the initial seam very difficult. I'd suggest focusing on one small area on the edge. Apply steady force when you pull, and repeat a few times to loosen the adhesive. Eventually it will give and present a small gap.
Arthur Shi -