
Introduzione
Segui questa guida per sostituire il dissipatore sulla console di gioco Nintendo Switch.
La Switch utilizza delle viti JIS, ma all'occorrenza puoi usare un cacciavite Phillips. Stai molto attento a non spanare le viti. Le punte Phillips di iFixit sono progettate per essere compatibili anche con le viti JIS.
Nota: Se rimuovi la piastra di schermatura, dovrai poi sostituire il materiale di conduzione del calore tra la piastra e il dissipatore. Dato che la normale pasta termica non è pensata per riempire grandi spessori, la pasta termica che più si avvicina a quella originale è la pasta termica viscosa K5 Pro. Per la CPU, invece, dovrai usare una normale pasta termica.
Nota: Questa guida, e le componenti che vendiamo, sono compatibili con la Nintendo Switch originale rilasciata nel 2017, e con i modelli aggiornati nel 2019 (numeri modello HAC-001 e HAC-001(-01), rispettivamente).
-
-
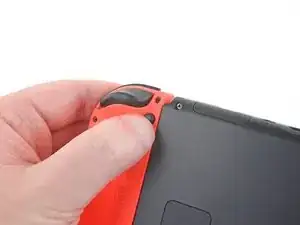
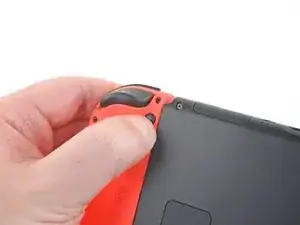
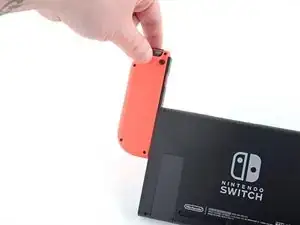
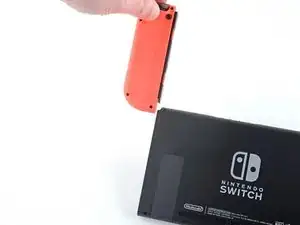
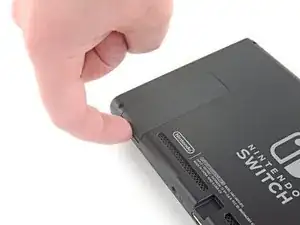
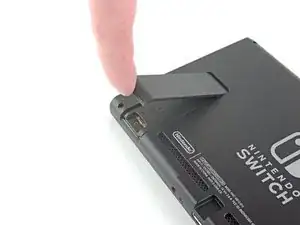
Premi e tieni premuto il piccolo bottone rotondo dietro il controller Joy Con.
-
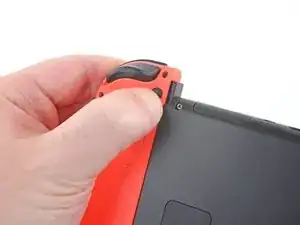
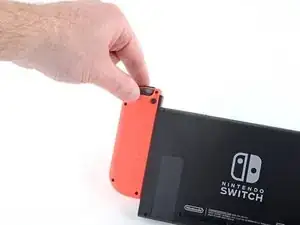
Mentre tieni il bottone premuto, fai scorrere il controller verso l'alto.
-
-
-
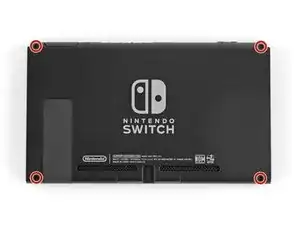
Usa un cacciavite Y00 per rimuovere le quattro viti lunghe 6,3 mm che tengono fermo il pannello posteriore.
-
-
-
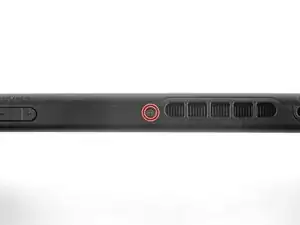
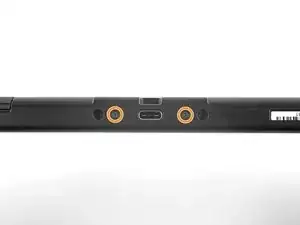
Usa un cacciavite JIS 000 o quello PH 000 ufficiale di iFixit per rimuovere le seguenti viti che fissano il pannello posteriore:
-
Una vite lunga 2,5 mm sul bordo superiore del dispositivo
-
Due viti lunghe 2,5 mm sul bordo inferiore del dispositivo
-
-
-
Usa un cacciavite JIS 000 o quello PH 000 ufficiale di iFixit per rimuovere le due viti centrali da 3,8 mm ai lati del dispositivo (una per lato).
-
-
-
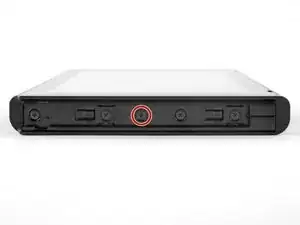
Usa il tuo dito per ruotare verso l'alto il cavalletto sul pannello posteriore del dispositivo.
-
-
-
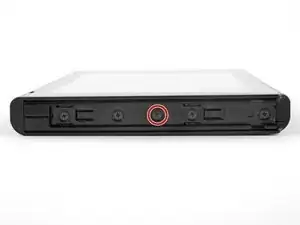
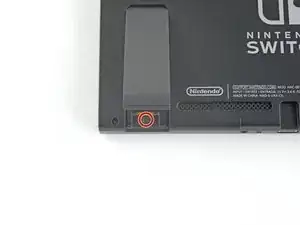
Usa un cacciavite JIS 000 o quello PH 000 ufficiale di iFixit per rimuovere la vite da 1,6 millimetri nella sede del cavalletto di supporto.
-
Chiudi il cavalletto.
-
-
-
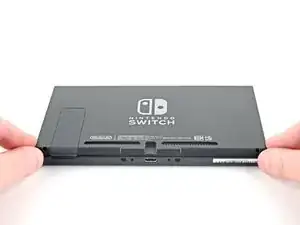
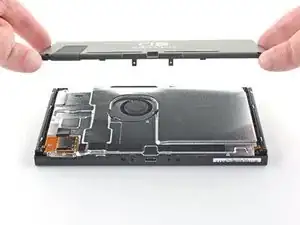
Solleva il pannello inferiore dal lato posteriore del dispositivo e rimuovilo.
-
[*icon_note] Il cavo di collegamento del lettore di cartucce è collegato all'altra metà della scocca di plastica impedendoti di sollevare completamente il pannello posteriore se chiuso.
-
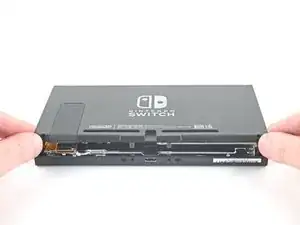
Solleva il pannello posteriore dal fondo del dispositivo e rimuovilo
-
-
-
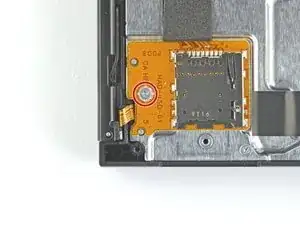
Con un cacciavite a croce JIS 000 o quello PH 000 ufficiale di iFixit, rimuovi la singola vite da 3,1 mm che blocca sul dispositivo il lettore di schede micro SD.
-
-
-
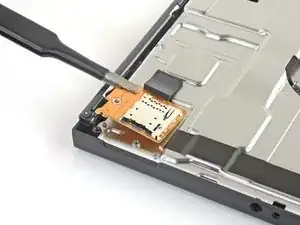
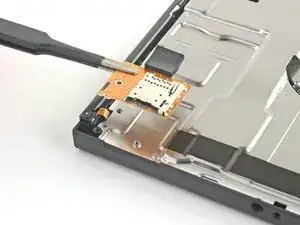
Usa le dita o delle pinzette per sollevare dal dispositivo il lettore di schede microSD e quindi disconnetterlo e rimuoverlo.
-
-
-
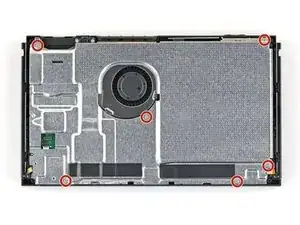
Con un un cacciavite a croce JIS 000 o quello PH 000 ufficiale di iFixit, rimuovi le sei viti da 3 mm dalla piastra di schermatura.
-
-
-
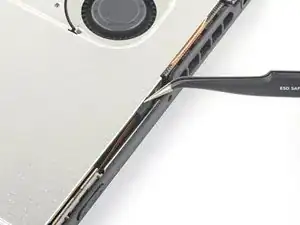
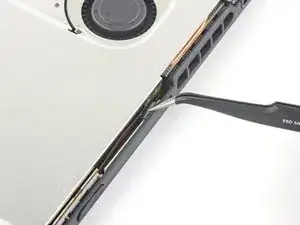
Usa un paio di pinzette per staccare il pezzo di schiuma sul bordo superiore del dispositivo vicino alla porta di scarico della ventola.
-
[* icon_caution] Se non riesci facilmente a staccare la schiuma, non forzarla! Potrebbe strapparsi facilmente. Sollevala cautamente da più punti fino a staccarla.
-
-
-
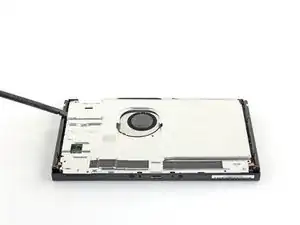
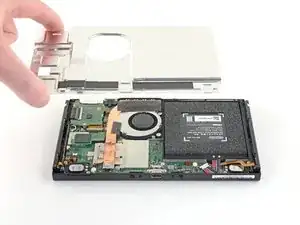
Inserisci uno spudger sotto la piastra di schermatura lungo i bordi.
-
Fai leva per sollevare con delicatezza la piastra di metallo e rimuovila dal dispositivo.
-
Puoi riutilizzare la pasta termica rosa se sei attento. Mantieni pulita la pasta e assicurati che faccia un contatto solido tra il dissipatore di calore e la piastra durante il rimontaggio.
-
Se devi sostituirla, consulta la nostra guida sulla pasta termica per rimuovere quella vecchia e sostituirla con una pasta termica appropriata, come la K5 Pro, durante il rimontaggio.
-
-
-
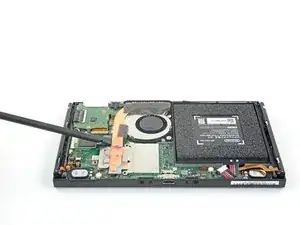
Inserisci l'estremità a punta di uno spudger per far leva e sollevare il connettore della batteria dal suo zoccolo sulla scheda madre.
-
-
-
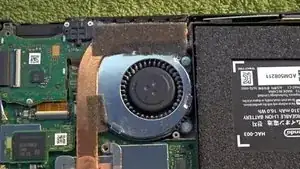
Usa un cacciavite a croce JIS 000 o quello PH 000 ufficiale di iFixit per rimuovere le tre viti da 3 mm che fissano il dissipatore alla scheda madre.
-
-
-
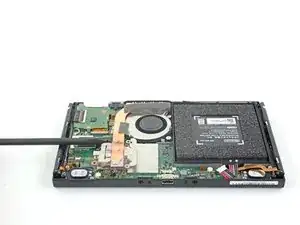
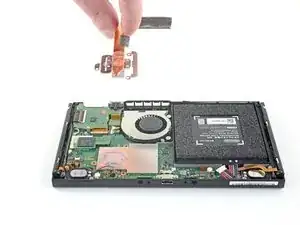
Cautamente stacca dalla ventola i due pezzi di schiuma incollati sul dissipatore e sulla ventola.
-
Inserisci la punta di uno spudger sotto la parte di schiuma che non è a contatto con nulla.
-
Premi il lato superiore della schiuma con un dito per tenerla ferma.
-
Ruota la punta dello spudger sotto la schiuma fino all'altra estremità per staccarla.
-
-
-
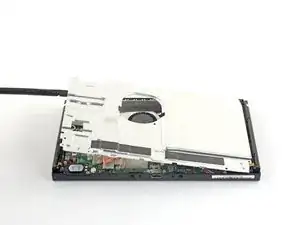
Usa uno spudger o le dita per sollevare il dissipatore verso l’alto e in direzione opposta alla scheda madre, per rimuoverlo.
-
Applica della pasta termica a tutte le superfici che l'avevano precedentemente, anche tra il tubo e la schermatura in alluminio, che la Switch utilizza come dissipatore aggiuntivo.
-


Confronta il tuo componente di ricambio con il pezzo originale. Prima dell’installazione potrebbe essere necessario trasferire da esso altri componenti, o rimuovere alcuni adesivi dal componente nuovo.
Per riassemblare il tuo dispositivo, segui queste istruzioni in ordine inverso.
Porta i tuoi rifiuti elettronici presso una ricicleria certificata R2 o e-Stewards.
La riparazione non è andata come previsto? Eseguite una identificazione di base dei problemi, o chiedete supporto alla nostra comunità Risposte per Nintendo Switch.

9 commenti
I couldn’t even get past the first step because my screws were in so tight I made them threadbare trying to get them out. I did use the iFixit toolkit so I was using the right head but taking the screws out is not as easy as demonstrated lol
same mines are stripped
Same happened to me :( I was able to file down the screwdriver I was given and it worked on three of the screws before they’d stripped too much. The fourth screw I couldn’t remove so I was able to slightly bend and turn the backing enough to access the fan. I also wasn’t able to peel the tape back without it completely disintegrating. Haha guess I don’t have the magic touch.
Do you need the K5 thermal peas or is the Arctic silver 5 thermal paste enough?
Carlos O -
You just need a good thermal paste
Thank you for this guide, I managed to repair our family switch using the strip down guide here, Our console was working fine as a hand held but when docked it started to show intermittant blank screen making the games unplayable.
I thought it was a cooling issue so I got some new high spec heatsink paste and took the heatsink and fan off, cleaned out the fan and fins removed the dried old compound and replaced it, also new paste put on the metal housing on the back, cleaned out the vents on the shell and rebuilt it. and now its working perfectly both handheld and docked
Kann ich diese Anleitung auch für die OLED anwenden? Habe im INet sonst leider nichts brauchbares gefunden.
Ina Barz -
backup all your sd card data i had to format mine after this tutorial and lost all my game data
JustForThisComment?ComeOn -