Introduzione

Guida solo prerequisita per la scheda logica.

  1. fxownC3PGcvJQQRl
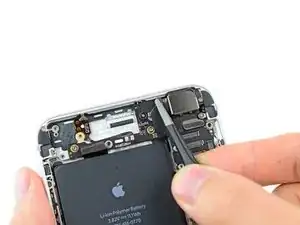
    • Usa delle pinzette per staccare il pezzo di adesivo che copre la vite nascosta che fissa la staffa della fotocamera posteriore al case posteriore.

  2. gsRjqmltFGfCRMFF
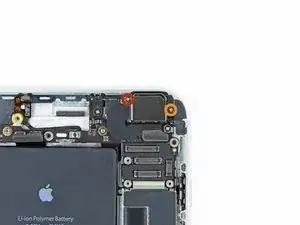
    • Rimuovi le seguenti viti a croce Phillips #00 che tengono in posizione sul case la staffa della fotocamera posteriore.

    • Una vite da 1,7 mm

    • Una vite da 2,3 mm

    In my case, the rear facing camera was connected to the antenna clip with a piece of black tape, the two can come off together if removed very carefully

    derwentx -

  3. TSFYocEGRn6RfjJD
    • Solleva e rimuovi la staffa della fotocamera posteriore dalla fotocamera stessa.

    On my iPhone 6+, the screw removed in step 41 had to come off too as the part number A21-2247A is attached to this cover… seems to have a tiny coil or other component connecting the (ground) post at the 1.6mm screw in step 41

    Matthew Goheen -

    Apparently the antenna clip in step 41 has self adhered to my rear facing camera cover… had I not already removed the screw from step 41 it would have broken when I pulled that cover with just two screws off

    Matthew Goheen -

    WARNING:

    When doing this step 35, you must do step 41 (Simply undo the small screw under “One 2.3 mm Phillips #00 screw “ as well) .

    Step 42 shows a ribbon. This ribbon seems to be stuck on the rear-facing camera bracket (step 35).. so pulling rear-facing camera bracket off  , be careful it is not adhered and pulling off Step 42 ‘s ribbon!

    It is electronic and a ribbon.

    Anyname -

  4. rTPYFRBa41aqguHt
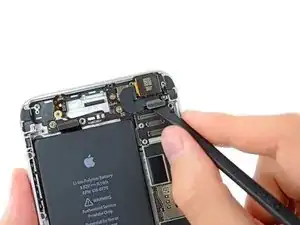
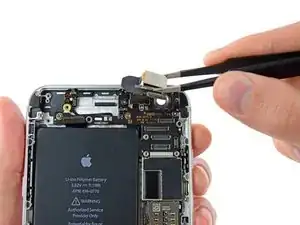
    • Usa l'estremità piatta di uno spudger per scollegare il connettore della fotocamera posteriore dalla sua presa sulla scheda logica.

  5. hAQuTADJHht2a3q1
    • Solleva con cautela e rimuovi dall'iPhone la fotocamera posteriore.

Conclusione

Per rimontare il tuo dispositivo, segui queste istruzioni in ordine inverso.

Walter Galan

693768 Reputazione

0 commenti