Introduzione

Questa guida ti mostrerà come sostituire il grilletto in un aspirapolvere Dyson V11 Torque Drive. Poiché il grilletto è in plastica, si rompe facilmente. Se il grilletto sul tuo Dyson V11 Torque Drive è rotto, non inizierà l'aspirazione. Anche se la batteria è completamente carica, il Dyson V11 Torque Drive non inizierà ad aspirare. Una volta sostituito il grilletto, il Dyson V11 Torque Drive dovrebbe essere operativo e inizierà l'aspirazione.

Gli strumenti necessari per sostituire il grilletto sull'aspirapolvere Dyson V11 Torque Drive sono un cacciavite a croce Phillips #1, un cacciavite a croce Phillips #0 e uno spudger.

  1. JREqCWfSTslHATyN
    • Rimovi l'unica vite Phillips #1 dal retro dell'impugnatura.

  2. aBoiEmNhQWqmf4dh
    • Rimuovi le due viti Phillips #1 dal fondo della batteria.

  3. KXV4BEbj6tsmnUV6
    • Tira verso il basso la batteria per farla scivolare fuori dall'impugnatura.

  4. 5cGrfTywnITBmPaV
    5cGrfTywnITBmPaV
    EVAEqkdS2RZRJyeX
    • Ruota il filtro e fallo poi uscire per rimuoverlo completamente.

    Buena tarde

    Nesecito la carcasa de la aspiradora

    Hugo Restrepo -

    Nesecito la carcasa de la aspiradora

    Hugo Restrepo -

  5. XJQS6YWQK5GGqpr3
    XJQS6YWQK5GGqpr3
    GjFY5tOxoEhJfYwb
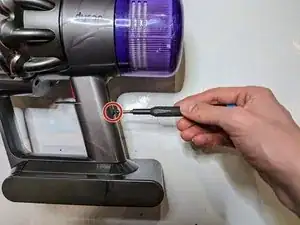
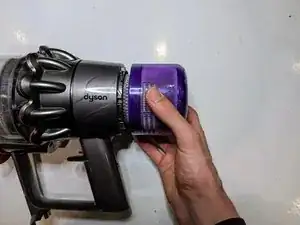
    • Rimuovi le quattro viti accanto all'indicatore della batteria con un cacciavite a croce Phillips #1.

    YOU MUST REMOVE THE BATTERY FIRST!! It is not apparent in this guide, but I almost got electrocuted when I went to remove the power in step 6!

    Ran Xiao -

    done the same once, but yeah always remove the power source before working on any appliance

    Ray Bradshaw (Falconsirrus) -

  6. TouXO1jXWOZTqPqW
    TouXO1jXWOZTqPqW
    qOT6w4tUI2WGhuKy
    • Rimuovi due viti accanto alla maniglia utilizzando un cacciavite a croce Phillips #1.

  7. WHZi2pCJvJm5nDuo
    WHZi2pCJvJm5nDuo
    fH4LkRXZOyXPWrjR
    • Separa la maniglia e l'estremità anteriore dell'aspirapolvere.

  8. bBsXODjs6aX45DCE
    bBsXODjs6aX45DCE
    DafmKoDds5lXIsvC
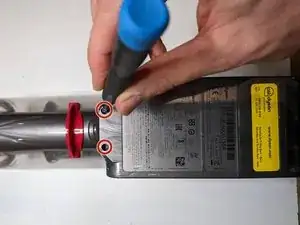
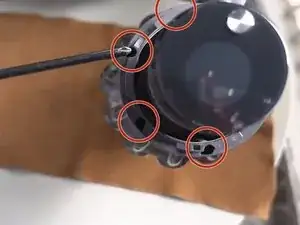
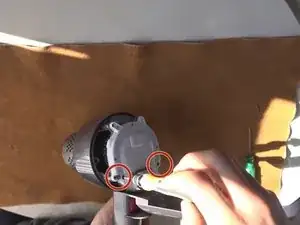
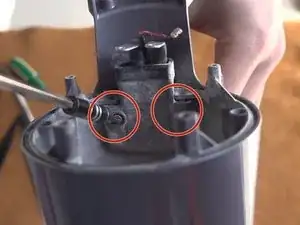
    • Rimuovi due viti dalla custodia protettiva che copre il circuito stampato.

    • Su alcuni modelli queste viti sono Phillips #0, su altri Torx #8.

    These screws were Torx #7 instead on my Dyson V11

    Lenno -

    Same for me.

    Beth Romanelli -

    its a T8 on all of the Dysons V10 and V11 at this stage

    Ray Bradshaw (Falconsirrus) -

    Efectivamente son necesarios un destornillador T7 y un T8

    Alberto Vazquez -

  9. QiFRpCChY4cyuRJ2
    QiFRpCChY4cyuRJ2
    j2XeeKK3nTM4do3Z
    UctQyjDigS4DwF5V
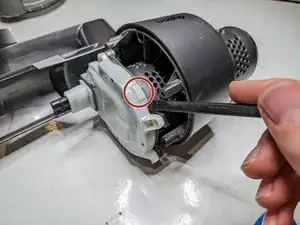
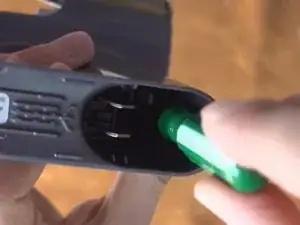
    • L'involucro del circuito è molto rigido e può essere difficile da rimuovere. La chiave è quella di utilizzare un spudger per fare leva vicino alle sporgenze rettangolari, poiché queste coprono le clip di plastica.

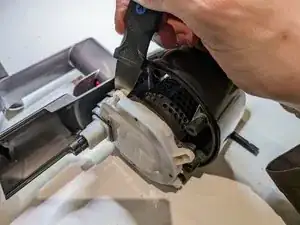
    • Per aiutarti, puoi anche far scivolare un jimmy sotto l'involucro da cui hai appena rimosso le viti e fare leva da lì per allentare quel lato.

    You need to pop the connector through the white cover to enable its removal.

    Chuck -

    unnecessary in my experience, just move out the way, unclip the tiny wire and remove the 2 power lines

    Ray Bradshaw (Falconsirrus) -

    The cover is clipped behind the small protrusions at 11 and 1 o'clock. You can see the counter parts in the image on the vacuum's body. I believe it is safe to pry the white protective case off.

    Jouni Reiman -

  10. CCXLKCI2cdKXZyv1
    CCXLKCI2cdKXZyv1
    ANZoKNIKkDvPmPJx
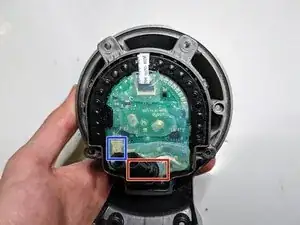
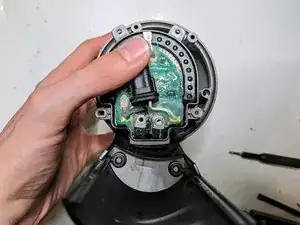
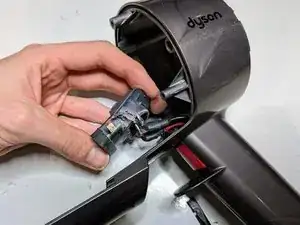
    • Il circuito potrebbe essere coperto con una grande quantità di colla traslucida. Dobbiamo accedere a tre cose sotto questa copertura: due connessioni di alimentazione e il cavo dell'interruttore.

    • Raschia accuratamente o taglia la colla dalle teste delle viti e dai cavi di alimentazione.

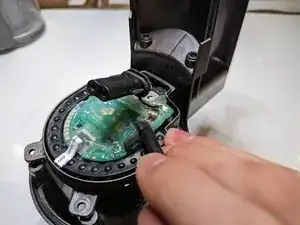
    • Allo stesso modo, libera il cavo dell'interruttore e la sua spina.

    • Se utilizzi uno strumento tagliente, fa' attenzione a non danneggiare alcun cavo elettrico durante questo passaggio.

  11. YCSKhYTBgZKFLdjE
    YCSKhYTBgZKFLdjE
    TEf3RAOKoxxR6qJS
    5HZtIWRuG1K2wRqX
    • Rimuovi le viti che trattengono i cavi di alimentazione.

    • Su alcuni modelli queste sono viti Phillips #1, su altri Torx #8.

    These screws were Torx #7 instead on my Dyson V11 and bth need to be removed and the pins plied back.

    Lenno -

    There are two screws (torx) here connecting both terminals to the motherboard. Also the pins need to be bent back to slow them to pull through. There was also a black wire that had to be disconnected.

    Chuck -

    your spot on there. like most metals bending more than necessary will snap them so be careful.

    Ray Bradshaw (Falconsirrus) -

  12. lPSQ1vVyVVlZuTWO
    lPSQ1vVyVVlZuTWO
    RBGkDQCSSN6nLJUf
    • Scollega delicatamente la spina del cavo dell'interruttore e solleva il cavo dal circuito stampato in modo che non si aggrovigli con i fili bianchi e neri.

  13. yDa552GTij2diQRU
    yDa552GTij2diQRU
    U5J3JV5XxWrCIAGm
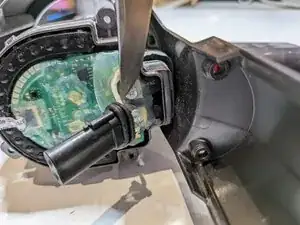
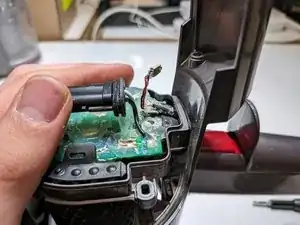
    • Ruota le estremità dei cavi di alimentazione in modo che si inseriscano più facilmente attraverso lo slot nell'involucro del circuito inferiore.

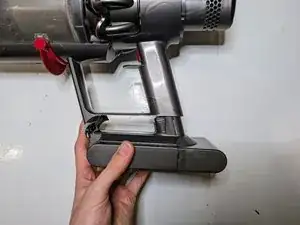
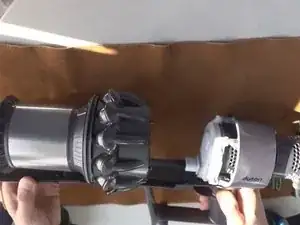
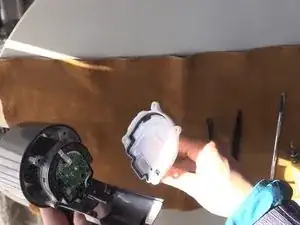
    • Rimuovi la parte centrale dal guscio esterno. Idealmente, spingi delicatamente i cavi attraverso lo slot, ma questo può essere difficile, potrebbe essere necessario utilizzare una certa forza per tirare via la parte centrale.

  14. qGlZBjLMHsNtECQQ
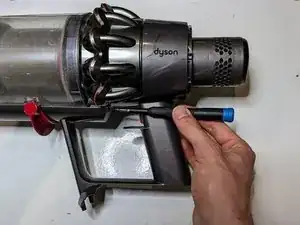
    • Rimuovi la singola vite all'interno del vano di ricarica con un cacciavite Phillips #0 o Torx, a seconda della vite installata nel modello.

    This screw was Torx #7 instead on my Dyson V11

    Lenno -

    What if the housing on that screw is broken? Is it necessary for that screw to be in place?

    BK Estis -

    No, the point of this screw is to fix the trigger assy inside the handle, technically when you refit the battery and screw in, it will all hold in place

    Ray Bradshaw (Falconsirrus) -

  15. 3pSvuZNberXpZuvj
    3pSvuZNberXpZuvj
    LvEDJgea2MaoPGml
    FoYY6uDsWBJT1FAn
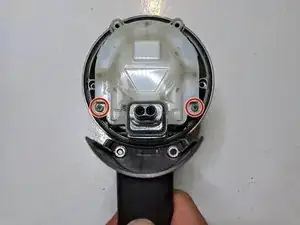
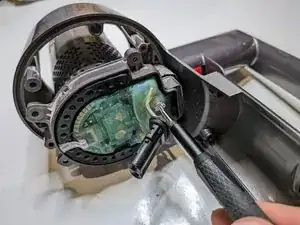
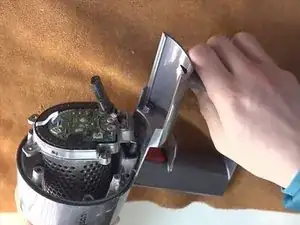
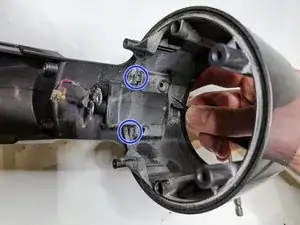
    • Rimuovi due viti dall'alloggiamento del cavo.

    • Queste possono essere viti Phillips #0 o Torx, a seconda del modello.

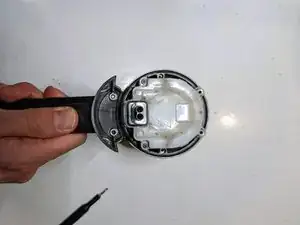
    • Solleva l'alloggiamento del cavo per liberare le clip. Potrebbe essere necessario spingere le clip con un cacciavite o una pinzetta.

    • Fai scorrere l'alloggiamento via dai cavi.

    These screws were Torx #7 instead on my Dyson V11 and you need a very short screwdriver/ratchet or a flexible bit attachment.

    Lenno -

    T8 - i use a 100mm long shaft, it is at a bit of an angle but works fine

    Ray Bradshaw (Falconsirrus) -

  16. DCVOUUxZ4JPvFIUS
    DCVOUUxZ4JPvFIUS
    MeDFLs1way4seAYP
    no1SLBFrge4cJEMD
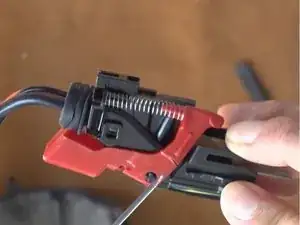
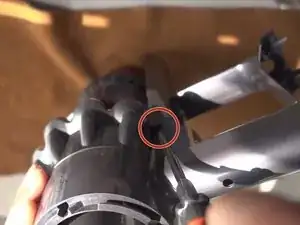
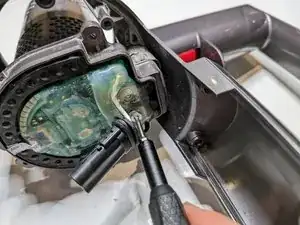
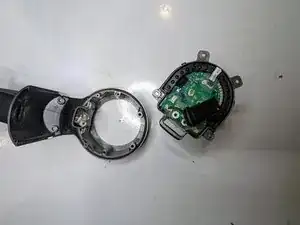
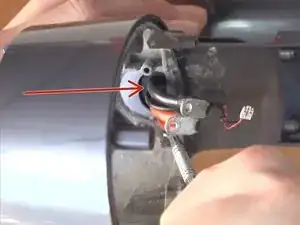
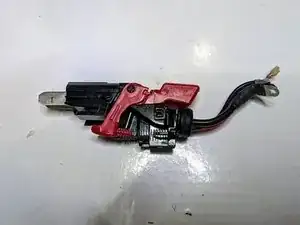
    • Utilizza uno spudger per spingere la parte contrassegnata nell'immagine per rimuovere il grilletto dal vano di ricarica.

    • Ciò richiede una quantità ragionevole di forza.

    pushing the trigger assy down tho the handle, well large screwdriver and small hammer works well, lol

    Ray Bradshaw (Falconsirrus) -

Conclusione

Per rimontare il dispositivo, segui queste istruzioni in ordine inverso.

Beicheng Zhu

Membro da: 15/01/22

613 Reputazione

11 commenti

Some of the screws in this repair (step 8 and 9) require a T8 Torx bit instead of a Phillips. The Torx screwdriver should be at least 10 cm long and relatively thin to be able to fit into the base of the vacuum. The screwdriver I used from my iFixit essentials kit was too short and too wide to fit into the compartment. That should be added to the guide.

James Leung -

L'assemblage de cet appareil le rend assez compliqué à démonter... surtout la partie avec les câbles de puissance qui vont à la batterie.

Par expérience, en ce qui concerne la gâchette c'est faisable. La gâchette peut se trouver facilement sur internet, ça permet de réparer à pas cher et souvent certaines pièces génériques sont renforcées.

Brendan -

Also applicable to the v10. Some philips are T8 and as one comment already said, they need to be long and thin for some screws - but otherwise a good guide. Step 1 should be remove battery. My dust cover over the circuit board had little retaining clips which made it feel stuck. The small connector attaching the red/white wires lifts out vertically, with a little retaining clip. The final step, I needed a large screw driver to push the trigger part out. I couldn't get the leverage with the shorter spudger.

Ben Mason -

I chose to buy the full body and replace it after 6 years of use. I hadn't realized how the performance had degraded over time. My early release V11 animal with a screw on battery works better than new and now I have the upgraded display. I am going to deep clean the old body and replace the trigger as a backup but I didn't have a T8 long enough and skinny enough to remove all the screws.

Dave -

Missing the punch line! This is a good review all until the last step, which is INCOMPLETE and incorrect. The switch assembly must be removed from the arm, and this is much easier to do with a pliers than by pushing on the top. Once the assembly is removed, you must be careful to note the orientation of the broken switch trigger, remove the old, and replace the new trigger, not forgetting to attach the spring.

Paul Christensen -

I found this very helpful thank you, managed to fit a 3D printed replacement trigger which has a beefed up side to the section that breaks so hopefully will last forever now. Completed job cost $15NZD where as Dyson wanted to sell me a replacement motor body for $269NZD.

Ian Fussell -

Muchas gracias por tu post , acabo de cambiar el gatillo a mi dyson v11 absolute , gracias ati

Manuel Gato -

Just did it. Followed the instructions exactly. Excellent procedure, thanks! Saved me buying a new battery.

Gino -

Gracias. Guia perfecta para reparar el gatillo sin ser tecnico

Jose Manuel Giral -

Gracias por este magnífico tutorial, excelente.

Sin él me habría sido imposible cambiar el gatillo roto.

Me parece increible que sea tan difícil cambiar un simple gatillo, está claro que lo que quieren los de Dyson es que acudamos al servicio técnico ante la más mínima averia.

Saludos,

Antoni Tortella Soler -

Super Anleitung.....es hat absolut geklappt. Jetzt funktioniert der Staubsauger wieder. Das Auseinanderschrauben ist nicht einfach, da man nicht in jedem Baumarkt einen Torxbit 8 kaufen kann, bzw. einen entsprechend langen dünnen Torx 8. Und die ganze Arbeit nur wegen einem kaputten Drücker, der von Dyson eingebaut wurde. Das Teil ist einfach billig hergestellt....aber die Reparatur ist sehr aufwendig. Nochmals recht herzlichen Dank für diese wirklich tolle Reparaturanleitung !!!!!

KlausBeulerRohbau -