Introduzione

Prerequisita per rimuovere il gruppo telaio centrale interno e scheda madre.

  1. DLQUBMAVlE5QCmJT
    • Rimuovi le dieci viti Phillips #000 da 3,4 mm dal lato display del telaio centrale.

    It’s probably a good idea to remove (and subsequently screw back in) these screws in a sort of “star fashion” (e.g. alternating from top-to-bottom, left-to-right) in order to equally distribute the tension.

    OmniWeb Technical Education -

  2. YfT26JYqScUXJyHG
    • Capovolgi il telefono e rimuovi le viti seguenti dal lato batteria del telaio centrale:

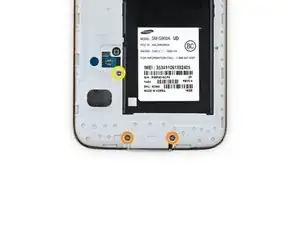
    • Due viti Phillips #000 da 4,4 mm vicino alla presa USB sul lato batteria del telaio centrale

    • Una vite Phillips #000 da 4,4 mm

  3. P2EMIXYQkM5nKMLZ
    P2EMIXYQkM5nKMLZ
    EsRbVOklL1yX5Wvb
    aHPiOoP6vjkWxVFE
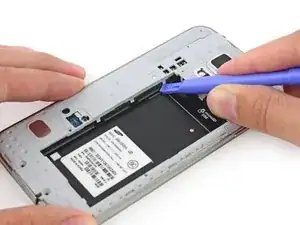
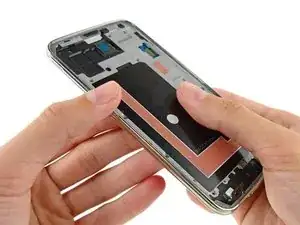
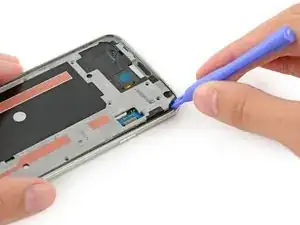
    • Fai delicatamente scorrere uno strumento di apertura di plastica lungo il bordo sinistro interno del telaio centrale per sganciare le tre clip di plastica bianca.

    There are also two more white clips just along the edges of the battery connection terminals (to the right of the 3 shown in the pictures). Using a spudger to pry these loose too will make separating them later much easier.

    Peter Morris -

    Yes, I second that! You definitely need to loosen those two other clips or you may have problems separating this interior frame from the midframe.

    OmniWeb Technical Education -

  4. oau5VuqXgsb6UDIT
    oau5VuqXgsb6UDIT
    BFKXEZTSZnUZfZ3X
    • Il telaio intermedio è composto di due metà che rinchiudono la scheda madre.

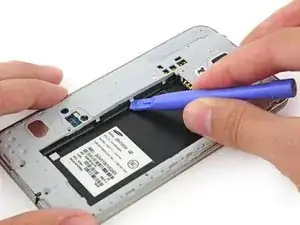
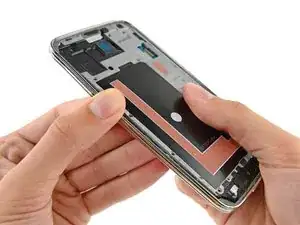
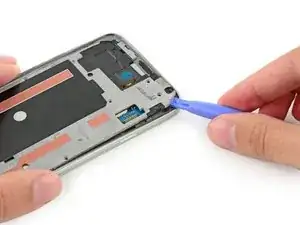
    • Solleva delicatamente i bordi lunghi della cornice cromata allontanandoli dal telefono per separare le due metà del telaio centrale.

    • Può essere utile premere dall'interno dell'alloggiamento della batteria, ma stai attento a non piegare la metà interna del telaio centrale, dove è montata la scheda madre.

    maybe my phone was stuck a little, but i had to work it pretty hard to get this step. Just take your time.

    andrew beals -

    Personally I wouldn’t recommend separating the midframe-motherboard assembly like this. What I recommend is the following: 1. Insert the flat end of a spudger between the main speaker grille and the main camera assembly (technically, between the gray and black plastic pieces. 2. Pry up on the black plastic piece (using the gray plastic piece as a fulcrum) in such a way that allows you to lift that end of the interior midframe-motherboard assembly from the inner midframe (see step 27). THEN 3. Once you have created enough space, insert a triangular pick tool, and THEN use a plastic opening tool to pry any remaining corners out of the silver bezel (see step 26). WARNING: BE VERRRRY CAREFUL WHERE YOU INSERT TOOLS or apply pressure because there are many sensitive components along that top part (where the cameras and infrared sensors are located).

    OmniWeb Technical Education -

  5. tBRwTBSTmFpdVyXy
    tBRwTBSTmFpdVyXy
    LkHrsLEEMEtKwVKw
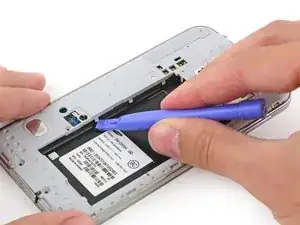
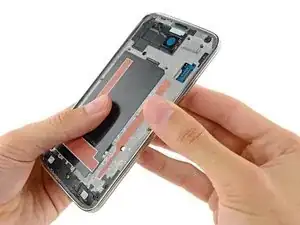
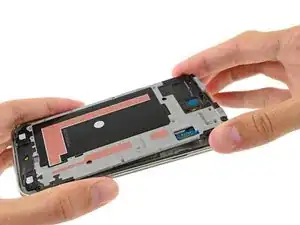
    • Continua dalla parte destra della cornice cromata, allontanandola dalla parte interna del telaio centrale, per separare le due metà.

    Personally I wouldn’t recommend separating the midframe-motherboard assembly like this. What I recommend is the following: 1. Insert the flat end of a spudger between the main speaker grille and the main camera assembly (technically, between the gray and black plastic pieces. 2. Pry up on the black plastic piece (using the gray plastic piece as a fulcrum) in such a way that allows you to lift that end of the interior midframe-motherboard assembly from the inner midframe (see step 27). THEN 3. Once you have created enough space, insert a triangular pick tool, and THEN use a plastic opening tool to pry any remaining corners out of the silver bezel (see step 26). WARNING: BE VERRRRY CAREFUL WHERE YOU INSERT TOOLS or apply pressure because there are many sensitive components along that top part (where the cameras and infrared sensors are located).

    OmniWeb Technical Education -

  6. xEeTrYOZh1MgDZd2
    xEeTrYOZh1MgDZd2
    3avGRewLcqsqBw1U
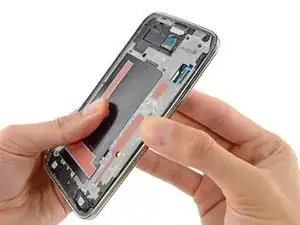
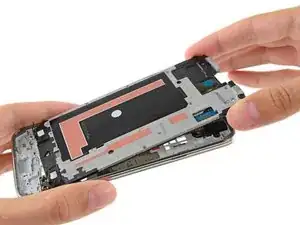
    • Usa uno strumento di apertura di plastica per staccare eventuali angoli ancora aderenti della cornice cromata.

  7. 15SyYwLCP6BqmnEf
    15SyYwLCP6BqmnEf
    JOwAdcljaiJ1rZXT
    • Rimuovi delicatamente il gruppo telaio centrale interno/scheda madre dal telaio centrale interno bianco.

    Did two of these phones, and a small white hard plastic cap fell out. Can anyone tell me where this goes on reassembly? See pic: http://library-static.snapfish.com/libra...

    Brian Guild -

    The white plastic cap which fell out is actually the piece that covers a small hole marked R2 near the original philips head screw you remove when first disconnecting the small display connector. The good news is that this cap can be put back on after fully reassembling the phone.

    Brian Guild -

Conclusione

Per rimontare il tuo dispositivo, segui queste istruzioni in ordine inverso.

Sam Goldheart

Membro da: 19/10/12

465140 Reputazione

0 commenti