Introduzione

Prerequisito per rimuovere la scheda madre. La ventola e l'alimentatore sono già rimossi.

Strumenti

  1. rAirT1GHZP1qpIqC
    rAirT1GHZP1qpIqC
    FI1BVEajFcTkxyGe
    fH3KYDKkVeWLdH2L
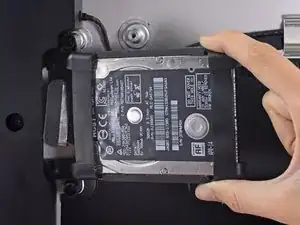
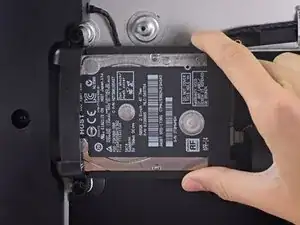
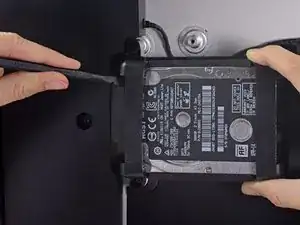
    • Solleva l'hard drive dal lato più vicino alla scheda madre e tiralo leggermente fuori dal suo alloggio.

    • Il disco rigido è ancora collegato all'iMac con un cavo dati/alimentazione SATA: non cercare di rimuoverlo ora.

    The newer drives have rubber ends and an adhesive side, be careful removing them if replacing the drive and be sure they are securely pushed back into the holder

    Carl Schultz -

  2. xAT4mnLlMEmZaE1l
    xAT4mnLlMEmZaE1l
    nUVTcTkKjNk2phCg
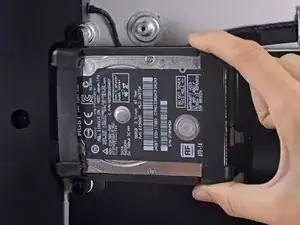
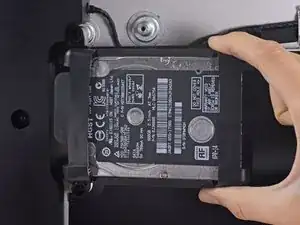
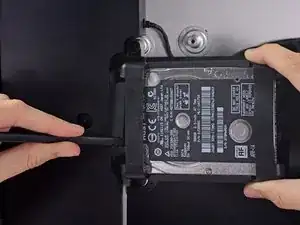
    • Usa uno spudger per scollegare il cavo dati/alimentazione SATA facendo leva delicatamente su entrambi i lati del connettore per farlo scorrere lontano dall'unità.

    When reconnecting the SATA cable, there is nothing to make the connector hold still, and it is hard to reach, so it took several tries. I ended up taking off the rubber baby buggy bumpers to get more room, and then jamming them back on after getting the SATA connector snugged up.

    bstaud -

    If by rubber baby buggy bumper, you mean left speaker, then yes, I agree. Reinstall the hard drive before the left speaker.

    jerrid_foiles -

    Kudo to @jerrid_foiles! I was going crazy trying to attach the SATA cable until I took the two screws out of the left speaker and slid the top end of it aside by about 3/4 inch. Make the whole process SO MUCH easier!!

    jiclark -

    We solved this by removing the hard drive tray screw, then inserting the cable into the SATA hard drive. Then hold the hard drive a bit out of the way to insert the 7.3mm hard drive tray screw.

    Marjie -

    Agree with this method, found it an impossible task to reconnect the SATA connector until removed the tray screw, then it was relatively easy to reconnect and then replace the tray screw.

    daveedwards -

    Also agree with this method!

    jmorphett5 -

  3. gPY6hXsOGJ1vn6ij
    • Rimuovi il gruppo dell'hard drive dall'iMac.

    When reassembling, I found it easier to loosen the HD tray screw from Step 48 and pull the tray outwards from the left side in order to plug the SATA cable in more easily.

    Cool_Breeze -

    Thanks! I, too, had a hard time reconnecting the SATA cable.

    boboswell -

    I found this helpful too!

    Anwar -

    And DON’T do what I did, which is to remove the left speaker - which can easily lead to breaking the cable between the power on button and the power supply. The cable is routed through a hidden slot at the very bottom of the left speaker

    bsmith1 -

    I did loosen the speaker so I could get a tool behind the SATA cable to push it on to the SSD drive. Otherwise hard to align cable.

    Noah Ralston -

    I found the easiest way to connect the SATA cable was to not screw the plastic hard drive tray down until you plug the drive in. That way you can easily push the connector in and due to the cable you’ve got some wiggle room. You can position the tray then just lift one end of the drive up and secure the screw. Then just push the drive down.

    Chris Caldwell -

    This was the step that I had the most trouble with. I’m used to replacing a hard drive in a MacBook Pro, where the “plug” that you plug the drive into is a rigid thing that you can firmly press the hard drive into.

    With the iMac, the plug is situated on the end of a non-rigid cord, so the plug moves back when you try to snap a drive into it. Also, those two rubber gasket things that you adhere to the side of the drive really make it difficult to maneuver the now-overly-chubby drive towards the plug.

    After must frustration/concern, what I ended up doing was temporarily removing the rubber gasket things, using the “spudger” as kind of a lever behind the “plug on a cord” so that it didn’t move as much, and then pushed the gasket-less SSD into the plug.

    Once I got it connected, I put the rubber gaskets back on the sides of the SSD and kind of coaxed it down into place, using the pointy end of the spudger to get the chubby corner pieces to “sit” correctly in the rigid plastic tray that the SSD kind of rests in.

    Jack OnFlickr -

    From another comment elsewhere on this repair, I *highly* recommend removing the two screws holding the left speaker in place, then sliding it just a tad out of the way to be able to easily attach the SATA cable. You don’t have to move it much to make the whole process so much easier!

    jiclark -

Conclusione

Per riassemblare il dispositivo segui la guida al contrario.

Walter Galan

693768 Reputazione

0 commenti