Introduzione

Segui questa guida per sostituire il gruppo display di un Samsung Galaxy S7 Edge.

La guida spiega come sostituire solo il display mentre lasci il telaio e la batteria originali al loro posto.

I bordi curvi e l'adesivo resistente rendono l'apertura iniziale molto complicata. Sii paziente e ripeti più volte la procedura di riscaldamento, e prima o poi l'adesivo si ammorbidirà.

Nota: alcuni display di ricambio sono forniti preinstallati in un telaio (cioè chassis) nuovo. Questo richiede di trasferire tutti i componenti interni del tuo telefono e installare una nuova batteria. Assicurati di avere la parte giusta prima di cominciare la guida.

Se il telaio è danneggiato o deformato, bisogna sostituirlo. Altrimenti può essere che il nuovo display non si lasci montare correttamente o si danneggi a causa della pressione irregolare.

Di solito separare il display dal telaio distrugge il display, quindi non seguire questa guida a meno di voler sostituire il display.

Se il tuo display è già a pezzi, indossa occhiali protettivi e copri il display con una pellicola di protezione o nastro adesivo per tenere insieme i frammenti di vetro.

  1. yXHrRJ2WaPeXHiMr
    yXHrRJ2WaPeXHiMr
    2XLsKVP1DHSJtXwF
    ht12NoJva5PkIESE
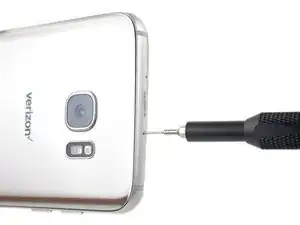
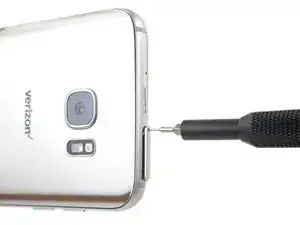
    • Inserisci uno strumento di estrazione SIM, una punta di estrazione SIM o una graffetta nel piccolo buco sul bordo superiore del telefono.

    • Ci sono due fori sul bordo superiore. Quello giusto si trova dentro un rettangolo lungo.

    • Premi sullo strumento estrazione per far uscire il vassoio.

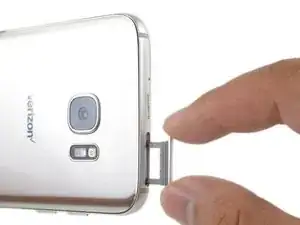
    • Rimuovi il vassoio per la scheda SIM e la scheda SD dal telefono.

  2. yjsAxqeAZCPdMoHe
    • L'apertura del tuo telefono danneggerà le guarnizioni impermeabili. Procurati tenute di ricambio prima di procedere oppure, se non sostituirai l'adesivo, stai attento ad evitare di esporre il tuo telefono ai liquidi.

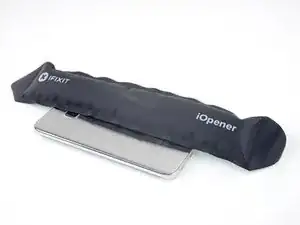
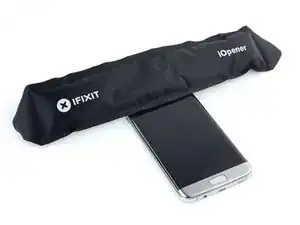
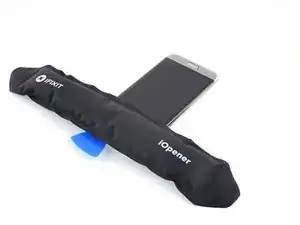
    • Riscalda un iOpener riscaldato e applicalo su uno dei bordi lunghi del telefono per circa due minuti.

    • Può essere necessario riscaldare e applicare di nuovo l'iOpener più volte finché il telefono sia abbastanza caldo. Segui le istruzioni dell'iOpener per evitare di surriscaldarlo.

    • Si può anche usare un asciugacapelli, una pistola termica o una piastra riscaldante. Ma stai attento a non surriscaldare il telefono – il calore può danneggiare il display OLED e i componenti interni della batteria.

  3. FHHqQpe5TjxgECRI
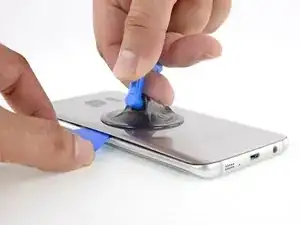
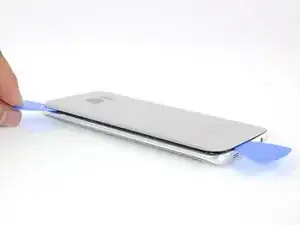
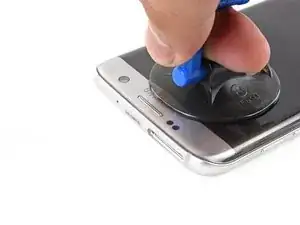
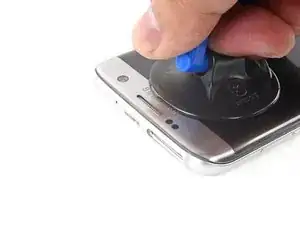
    • Quando il pannello posteriore è caldo al tatto, applicaci una ventosa, il più vicino possibile al bordo riscaldato ma evitando la parte incurvata.

    • La ventosa non aderirà bene sulla parte incurvata del vetro.

    • Se la cover posteriore è crepata, può essere che la ventosa non aderisca bene. Prova a sollevare la cover con un nastro adesivo robusto o fissa la ventosa con della supercolla che lascerai indurire prima di continuare.

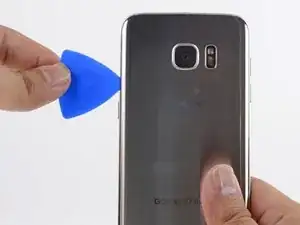
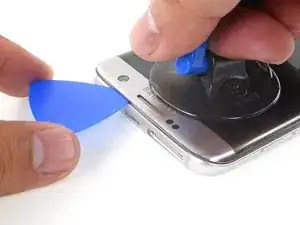
    • Solleva tirando con la ventosa e inserisci un plettro di apertura sotto il vetro posteriore.

    • Dato il vetro incurvato, spingerai l'attrezzo verso l'alto invece di inserirlo parallelamente al piano del telefono.

    • Se non riesci, riscalda di nuovo per ammorbidire di più l'adesivo e riprova. L'adesivo si raffredda molto velocemente, quindi è probabile che dovrai riscaldarlo più volte.

    Suction cup does not seem to work.

    Wincess Gentius -

    Makes it sound ridiculously easy, when in reality you have to be pulling with tons of force while also holding the phone down and on top of that you have to insert the pick in a relatively small amount of time.

    Rodrigo Morgado -

    I was getting no where with the iOpener and picks alone, so I followed a YouTube video and used the iOpener as well as a hairdryer. I had to make the first cut in the ahesive with a utility/razor knife, then as soon as I was through the first part I inserted the plastic picks. The back of the phone has to be too hot to touch, ideally all around, so the iOpener alone is not enough.

    Mark Frost -

    Thanks for the above comments. I was also getting nowhere with the iOpener then used a hairdryer on the non-camera end until it was hot to the touch and managed to get a Stanley knife into the gap and lifted enough to get a pick in. Plain sailing from there with patient heating and working the picks in to cut the glue. Eventually success and the back came off.

    Alastair -

  4. bNeaXFpywjbKdsNU
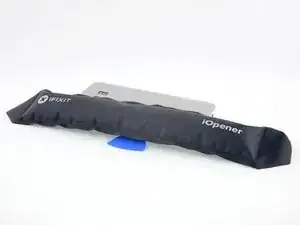
    • Quando il plettro è saldamente inserito sotto il vetro, riscalda e applica di nuovo l'iOpener per ammorbidire l'adesivo.

  5. 3MMgFNEMPC2HMMtJ
    3MMgFNEMPC2HMMtJ
    xVvZFCFlmHaJyHQ2
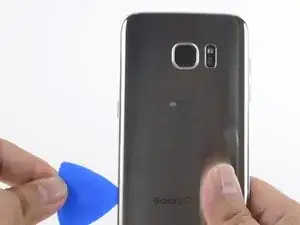
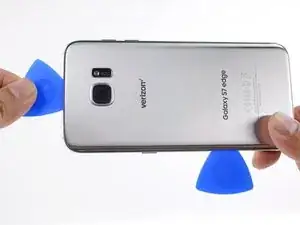
    • Fai scorrere il plettro di apertura lungo il bordo del telefono per tagliare l'adesivo.

    • Prosegui lentamente in modo che la punta non scivoli fuori dalla giuntura. Se hai delle difficoltà nello scorrimento, riscalda e applica di nuovo l'iOpener.

    • Lascia il plettro in posizione e prendine un altro per procedere al passo seguente. Lasciare inserito il plettro evita che l'adesivo appena tagliato aderisca di nuovo.

  6. Y4LDCRmHgnoSIsJD
    Y4LDCRmHgnoSIsJD
    KHcnbVQvoTJ5S1aI
    f4NGhygd3DgkPpNZ
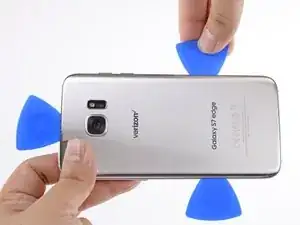
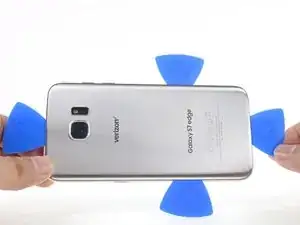
    • Ripeti la procedura precedente di riscaldamento e di taglio per gli altri tre bordi del telefono.

    • Lascia un plettro in ogni bordo del telefono mentre procedi con il successivo per evitare che l'adesivo aderisca di nuovo.

  7. oMUWlQsL6NDPav6r
    oMUWlQsL6NDPav6r
    ba3VLFbnETGJcxMW
    • Solleva il vetro e toglilo dal telefono.

  8. YZtMUpEto3WfwtEC
    YZtMUpEto3WfwtEC
    XcSQlD54SaYWpQXj
    • Per rimontare una nuova cover posteriore:

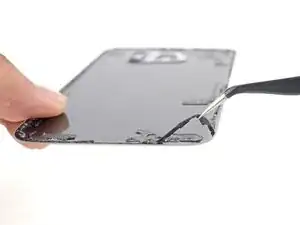
    • Usa delle pinzette per staccare ogni adesivo residuo dal telaio del telefono. Quindi pulisci le zone dove era presente con dell'alcool isopropilico ad alta concentrazione (>90%) e un panno senza lanugine per preparare la superfice al nuovo adesivo.

    • Rimuovi le coperture adesive dal nuovo vetro posteriore, allinea attentamente un bordo del vetro contro il telaio del telefono e premilo con decisione sul telefono.

    • Se stai reincollando il vetro originale, o ne stai usando uno senza adesivo preapplicato, segui questa guida.

    • Assicurati di accendere il tuo telefono e di controllare la tua riparazione prima di applicare il nuovo adesivo e di chiudere di nuovo il telefono.

    • Se preferisci, puoi rimontare il pannello posteriore senza sostituire l'adesivo. Rimuovi i grossi pezzi di adesivo che potrebbero impedire alla cover di allinearsi bene. Dopo il rimontaggio riscalda la cover e premila per fissarla bene. Il telefono non sarà più resistente all'acqua, ma di solito la forza di adesione è più che sufficiente.

  9. Rc3MEdW4COvtZ2LS
    • Svita le dodici viti a croce Phillips da 3,5 mm.

  10. 6QxK5orukfoHwYIl
    6QxK5orukfoHwYIl
    I4IDW3itZjNhWPGF
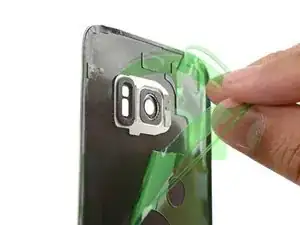
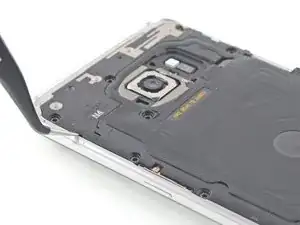
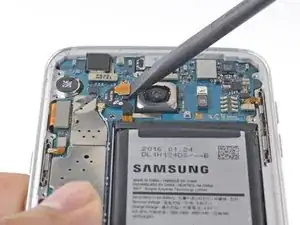
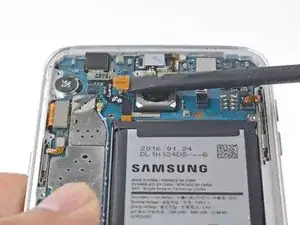
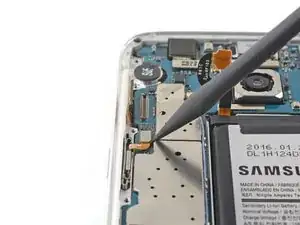
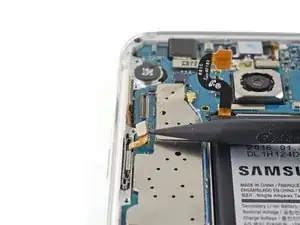
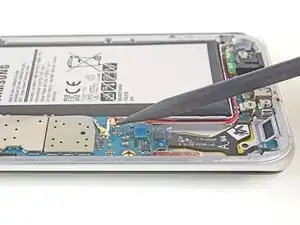
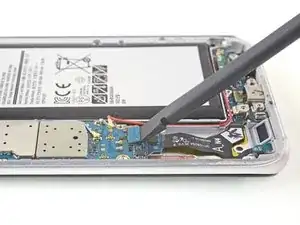
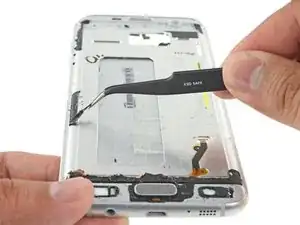
    • Usa la piccola rientranza nell'angolo in basso a sinistra del gruppo dell'antenna superiore per far leva e staccare il gruppo stesso dal telefono.

    • Rimuovi il gruppo dell'antenna superiore.

  11. MMvRtGIJZrxUgSrq
    • Solleva e rimuovi la bobina di carica wireless dal telefono.

  12. yaknSxqZmJBqqLmq
    • Solleva e rimuovi l'altoparlante dal telefono.

  13. YGONxdBQq6nBMgDY
    YGONxdBQq6nBMgDY
    QhHA2dtUQQxnNPwR
    • Usa l'estremità piatta di uno spudger per staccare il connettore della batteria.

  14. mHO3rt5EX4AAJUTi
    mHO3rt5EX4AAJUTi
    vmUJKAwa5cGQcHsB
    • Usa l'estremità piatta di uno spudger per staccare il cavo del display.

  15. vLJZvGaZRufIcIbn
    vLJZvGaZRufIcIbn
    iOlaPfqYBL1IOvh4
    • Con la punta di uno spudger sconnetti il cavo del pulsante di accensione.

  16. hVPiALCNaNZqyofE
    hVPiALCNaNZqyofE
    nfOSMFdxPhORcAU1
    CCewYoUi2H3M55Qj
    • Scollega i cavi bianco e rosso dell'antenna con la punta del tuo spudger.

  17. jgAk3MbBlvPdLPiq
    jgAk3MbBlvPdLPiq
    wOldrQwQmWfCZZBG
    • Usa l'estremità piatta di uno spudger per staccare il connettore del pulsante home.

  18. WXUSoWGYFJQRsheN
    WXUSoWGYFJQRsheN
    OIfORVRmFgkj35WT
    GHhMNtrddByTqsdy
    • Con la punta del tuo spudger, disconnetti i cavi del gruppo sensori frontali.

  19. BVLfCoIhRqKT3F6I
    BVLfCoIhRqKT3F6I
    oCVxgN5BiwVoQtNt
    • Scollega il cavo del pulsante volume con la stessa punta del tuo spudger.

  20. lSrLfsT2PqtVwuP2
    lSrLfsT2PqtVwuP2
    RrHlfVUUXsARl2MY
    dSD1V3p4KOjZjfp6
    • Non sollevare interamente la scheda madre. È sempre collegata alla scheda figlia da un cavo.

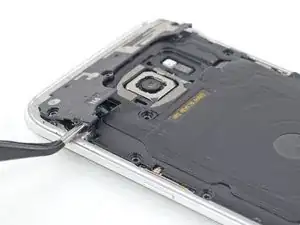
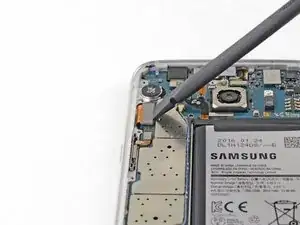
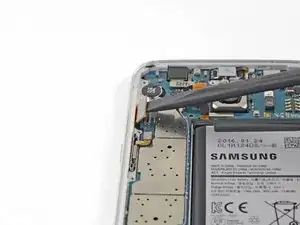
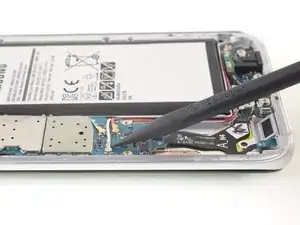
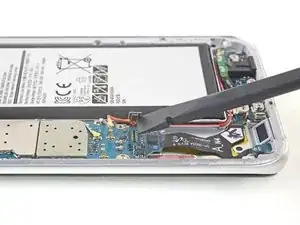
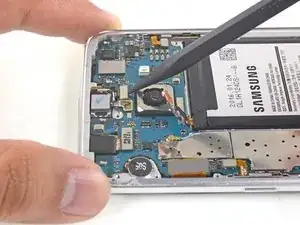
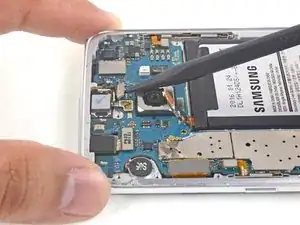
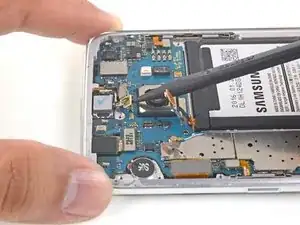
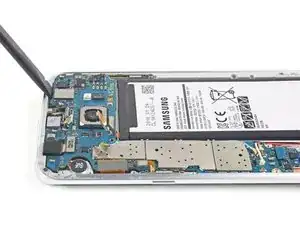
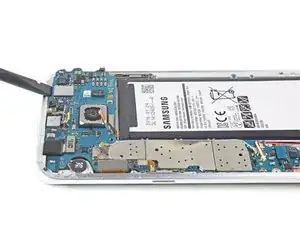
    • Usa l'estremità piatta di uno spudger per sollevare la scheda madre con cautela.

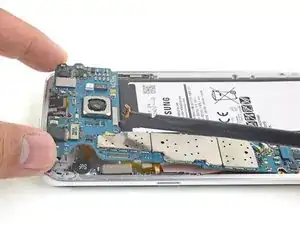
    • Afferra i lati della scheda madre e sollevala lentamente mentre tieni da parte i cavi con lo spudger.

  21. HEwRaQZvr1tMDQXp
    HEwRaQZvr1tMDQXp
    UvgoJU3ZOwTPGYON
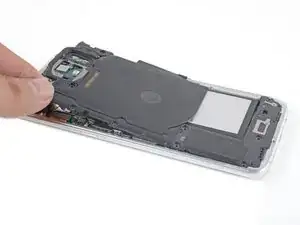
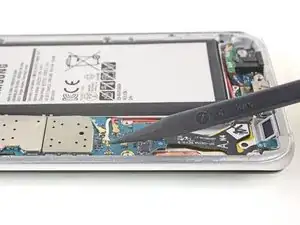
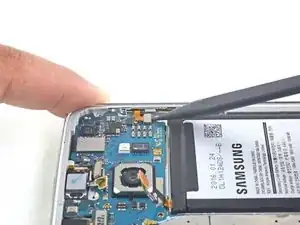
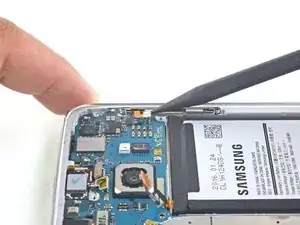
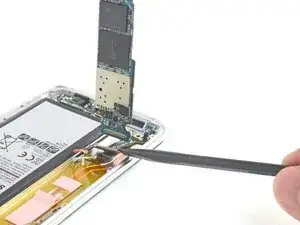
    • Usa l'estremità piatta dello spudger per scollegare il cavo piatto della scheda figlia dal lato inferiore della scheda madre.

    • Rimuovi la scheda madre.

  22. LPEsGiTbaILaxMhZ
    • Riscalda un iOpener e applicalo sul bordo superiore dello schermo.

    • Può essere necessario riscaldare e applicare di nuovo l'iOpener più volte finché il telefono sia abbastanza caldo. Segui le istruzioni dell'iOpener per evitare di surriscaldarlo.

    • Si può anche usare un asciugacapelli, una pistola termica o una piastra riscaldante. Ma stai attento a non surriscaldare il telefono – il calore può danneggiare il display OLED e i componenti interni della batteria.

    • Mentre aspetti che l'adesivo si ammorbidisca, leggi il passo seguente per farti un'idea del punto migliore per far leva.

  23. 5Qb6KFMnMxnAp1JT
    5Qb6KFMnMxnAp1JT
    3XrfKd3E3QRTo3no
    vvoiCaetM3V2cdAO
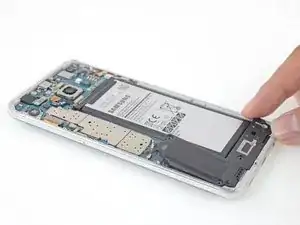
    • I bordi del gruppo display sono fissati da strisce di adesivo in espanso molto tenace.

    • Un pezzo di nastro biadesivo robusto copre l'intera superficie di rame.

    • I passi seguenti richiedono una cautela estrema in certi punti per evitare di danneggiare il telefono:

    • I pulsanti capacitivi aderiscono al display e si rompono molto facilmente. Devi riusarli per la riparazione.

    • Mentre il pannello OLED e il cavo del display si sostituiscono insieme al nuovo schermo, i pulsanti capacitivi devono essere riusati. Stai quindi molto attento a non danneggiarli.

    • Se rompi uno dei pulsanti capacitivi o dei cavi piatti, puoi sostituire il gruppo scheda figlia che include nuovi pulsanti capacitivi.

  24. Lw2UfYZshW3rENxG
    Lw2UfYZshW3rENxG
    UfBWuevMq2UgXIlm
    B1vslRMPkwABi3VM
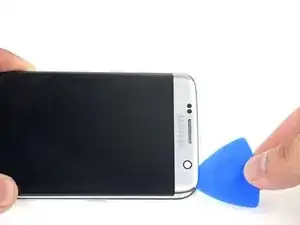
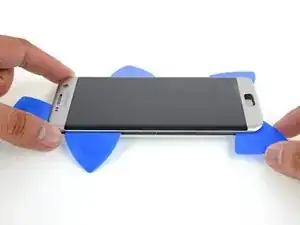
    • Quando il bordo è caldo, applica una ventosa il più vicino possibile al bordo riscaldato, ma evitando di coprire la griglia dell'altoparlante.

    • Se il tuo display è seriamente crepato, disponi del nastro adesivo sul vetro e prova a sollevare la cover con un nastro adesivo robusto.

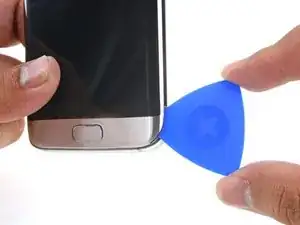
    • Solleva la ventosa per aprire una piccola fessura sotto il bordo superiore del display.

    • Questa azione può richiedere di applicare una forza abbastanza significativa, ma con la ventosa devi soltanto aprire una fessura molto piccola per inserirci il tuo attrezzo.

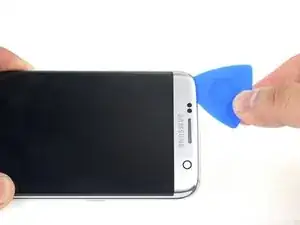
    • Introduci un plettro di apertura nella fessura. Stai attento a non inserirlo più di 6 mm.

    • La robustezza dell'adesivo può rendere necessari diversi tentativi. Segui le istruzioni di riscaldamento dell'iOpener e ripeti la procedura riscalda-ventosa-solleva finché riesci ad inserire il plettro.

  25. ZOejgfQBsKTnhPTg
    • Quando il plettro di apertura è in posizione, applica ancora una volta l'iOpener riscaldato sul bordo superiore per ammorbidire l'adesivo.

  26. iMEVTpvVQgNnyb3i
    iMEVTpvVQgNnyb3i
    2LcxRYMSAV1txKPv
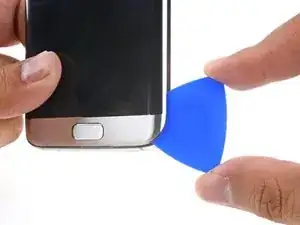
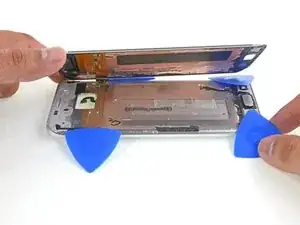
    • Fai scorrere il plettro di apertura lungo il bordo superiore del display, stando attento a non inserirlo più di 6 mm.

    • Inserire il plettro troppo in profondità può danneggiare la camera frontale o l'altoparlante voce.

    • Lascia il plettro dal lato superiore per evitare che l'adesivo aderisca di nuovo.

  27. yPnACkgHBQIQkuuR
    yPnACkgHBQIQkuuR
    BN34Jj1ycvUM4IxP
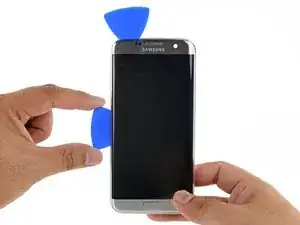
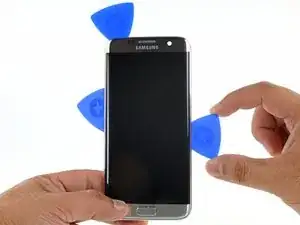
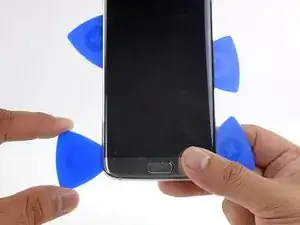
    • Ripeti la precedente procedura di riscaldamento e taglio per i lati lunghi del telefono. Non tagliare ancora il bordo inferiore.

    • Larghe strisce adesive fissano il display al telaio. Progredisci lentamente e metodicamente per tagliare più adesivo possibile.

    • Lascia un plettro di apertura da ogni lato mentre prosegui con il bordo seguente per evitare che l'adesivo aderisca di nuovo.

    • Il cavo del display è posizionato poco sopra il centro del lato destro e può interferire con il tuo plettro se tagli troppo profondamente.

  28. s3bPFdfvHQRYFdVZ
    s3bPFdfvHQRYFdVZ
    gIvKPmL3pS1ZODmg
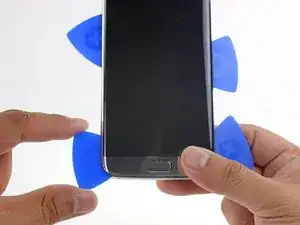
    • Inserisci un plettro di apertura nell'angolo inferiore destro.

    • Spingi lentamente il plettro. Prova a sollevare la punta affilata del plettro verso l'alto in modo da farla scorrere lungo il rovescio del display.

    • Così farai scorrere il plettro fra lo schermo e il pulsante capacitivo senza danneggiare il cavo del pulsante.

    • Quando il plettro avrà tagliato l'adesivo nell'angolo destro, lascialo in posizione per evitare che l'adesivo aderisca di nuovo.

  29. xHPLAAspehSUEs1Q
    xHPLAAspehSUEs1Q
    YC1R1cq5rMotjjEb
    • Inserisci un plettro di apertura nell'angolo inferiore sinistro.

    • Spingi lentamente il plettro. Prova a sollevare la punta affilata del plettro verso l'alto in modo da farla scorrere lungo il rovescio del display.

    • Quando il plettro avrà tagliato l'adesivo nell'angolo sinistro, lascialo in posizione per evitare che l'adesivo aderisca di nuovo.

  30. 3XfmZsADAN11OeHR
    3XfmZsADAN11OeHR
    kYvJgRHaJfCXZbZ1
    • Usa i plettri di apertura per tagliare l'adesivo attorno al pulsante home e ogni adesivo rimasto.

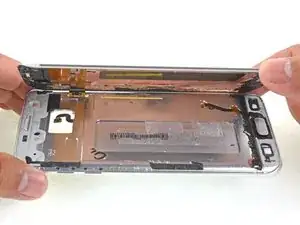
    • Apri leggermente il telefono, cominciando dal lato opposto al cavo del display.

    • Non rimuovere completamente il gruppo display. Un cavo display passa attraverso il telaio centrale ed è collegato allo schermo.

  31. H1ETrPpcKGMDa6na
    H1ETrPpcKGMDa6na
    OSpQQ2vN1Nol4P4v
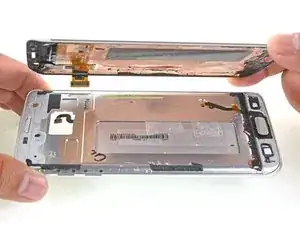
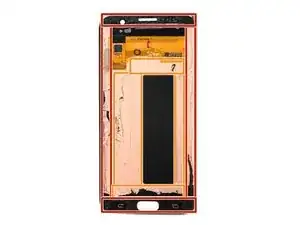
    • Solleva il gruppo display dal telaio centrale mentre fai passare con cautela il cavo del display attraverso il foro nel telaio centrale.

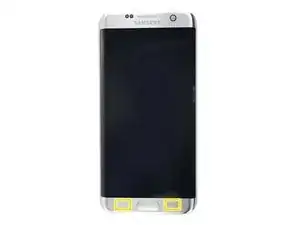
    • Rimuovi il gruppo display.

    how can I change the power button in the process?

    trust ikara -

  32. tr36gjxA2ImXsmPD
    • Vedi questo link per una guida dettagliata su come applicare l'adesivo sul display.

    • Prima di montare un nuovo display, è molto importante rimuovere ogni traccia del vecchio adesivo dal telaio, stando specialmente attenti a togliere ogni piccolo frammento di vetro.

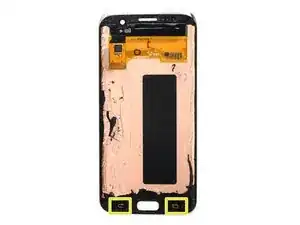
    • Dopo aver rimosso ogni traccia di adesivo e di vetro dal telaio, pulisci le zone di adesione con alcol isopropolico al 90 % (o più concentrato) e un panno privo di pelucchi o un filtro per caffé americano. Passa il panno in un'unica direzione, non avanti e indietro.

    • In questo modo rimuovi ogni adesivo rimasto e prepari la superficie per accogliere il nuovo adesivo.

    • Se il telaio è deformato o se rimane qualsiasi residuo di adesivo o di vetro, il nuovo display non si monterà correttamente e potrebbe danneggiarsi.

    • Il miglior modo per fissare il nuovo schermo è un foglio di biadesivo tagliato su misura. Applica il nastro dietro il display, poi fai passare con cautela il cavo del display attraverso il telaio. Allinea lo schermo e premilo in posizione.

Conclusione

Per rimontare il tuo dispositivo, segui queste istruzioni in ordine inverso.

Arthur Shi

Membro da: 03/01/18

248236 Reputazione

38 commenti

Excellent guide, really enjoyed following the instructions. A job well done :-D

Craig Naidoo -

How do you get the glass backing off without it shattering at all?

Simeon -

There is no fool proof method. Apply liberal amounts of heat. Be careful when slicing near the corners. If your back has micro-fractures already, chances are your back will crack along the fracture.

Arthur Shi -

No matter how long I try to heat the back panel with an iOpener, I cannot seem to get the glue warm enough… Any advice on how to better unglue this thing?

Jérémie Corbier -

Hi Jérémie,

The glue is pretty strong on this phone. You can try using a heat gun if you have one, or a hair dryer. You can also try the bottom edge instead of the long edge- sometimes the glue is not as strong there.

Arthur Shi -

You should buy a hot plate with digital temperature adjustment which they use to separate LCD from glass.

The hot plate gives even heat to the surface of the phone incomparison to using a heat gun you cannot check how much heat it gives and you get uneven hot and cold spots.

Recommended temp around 85 degrees centigrade and use an i opener to create an opening and get a plastic pry card and coat it with alot of isopropyl alcohol and slide around the edges whilst adding more alcohol to the card

Aminur Rouf -

I only use a head gun with samsung phones because they have an impressive amount of stick to them. Just be careful not to over heat the back or front because then the glass will start to actually separate from the back plate and then it gets odd bubbles that are melted plastic and paint

Tom -

Force…. And tlc…lol

Michael Howard -

Hi Arthur, thanks for your feedback. I’ll give the iOpener another shot and if it doesn’t work I’ll use a hair dryer.

Jérémie Corbier -

I’d like to see a picture and/or more detail about the capacitive buttons and how to detach them. I assume this was done in step29?

Susan Nelson -

To clarify the question above… Step27 refers to “the button”. I assume that means “the right capacitive button”. Then in step28, the left capacitive button is separated from the display and perhaps in step29 the home button and the button cable are separated from the display? Or do you wait until step29 to do all of the buttons with the two corner picks in place?

Susan Nelson -

Hi Susan,

You are correct: step 27 refers to the right capacitive button, 28 refers to the left, and 29 refers to the home. Take a close look at the two images in step 30. They show what you are cutting through in terms of capacitive buttons.

Arthur Shi -

Thanks. Last question. If I just want to replace the display LCD and glass, do I really need to take the back off (steps 1-20)? It doesn’t seem like that would be necessary.

Susan Nelson -

Unfortunately, yes. The display connector must be disconnected in order for the LCD to be removed, and that can only be done on the back side. Note the dangling connector in the second picture of step 30.

Arthur Shi -

Hi ! I just want to replace my digitiser. Is that possible?

Varad Narvekar -

Very detailed explanation, I'm very impressed, now if you could include all of this in the Australian site that would be amazing!

Duane Johnston -

thanks for sharing, really nice and complete…

by,,,yudionline

diva rey -

Hi,

I have a circular crack in the centre of the glass which has slowly expanded due to the frictional force of operating the phone with my finger (finger inadvertently dragging small bits of glass from the edge) , leaving the screen below exposed.

I intend to replace the screen using this comprehensive and detailed guide. Does anyone have any recommendations for cleaning the exposed screen? The screen itself does not have the smoothness of the glass collects dirt easily.

I have isopropyl alcohol, but is this too harsh for the touch sensitive screen?

fearthespork1 -

This is a well written guide up to a point, but seems very redundant at the end. You are advising removing an extremely strong foam adhesive and then replacing it with double sided tape?

How about a guide to reapplying a new coat of foam adhesive? Including a guide to what foam adhesive is used, and where a quality replacement could be found.

This is a premium engineered product, so a guide that can restore it to near factory quality including the waterproofing would be very useful.

It would also be very helpful to have a guide to what kind of screen replacements are available, and where to find a proper ‘aftermarket’ replacement and not a cheap variant.

Shamsung -

Hello Shamsung,

While quality adhesives are very important in sealing the phone, there is unfortunately no reliable way for users to “waterproof” their repairs (other than using a waterproof case). Repair shops may be able to improve the resistance by sealing the phone using special pressure and temperature presses, but even then, they would not guarantee water resistance.

There are links to adhesive guides in the steps, which will show how to apply the proper adhesives to the phone.

In general, I would suggest not to trust in the water resistance rating. The phones are tested when they are brand new, and adhesives break down due to wear and tear. There is a reason why companies will not cover water-damaged phones in their warranties.

Arthur Shi -

Hi,

Is it possible to connect a S7 Edge screen on a S7 (G930F) just a moment in order to recover data to my computer ?

I do not want to assemble it, but connect the screen somme minutes.

Thanks.

Bonjour

Est-ce possible de brancher l’écran d’un Galaxy S7 Edge sur un Galaxy S7 en ne branchant que la nappe, sans essayer d’assembler le tout. L’idée étant juste de faire la manipulation une heure, le temps de récupérer les données.

Merci :)

Benrie -

Can you remove the display assembly without breaking it?

I need to access the digitizer flex but i dont know if the display is reuseable if you remove it.

stoneheart 21 -

You can theoretically remove it without breaking it, but there is a significant chance of damage. The curved OLED display is very prone to damage as you try to pry it off the frame.

Arthur Shi -

Can you do this to a working display without it breaking in the process?

Markus Norstrøm -

You can theoretically remove it without breaking it, but there is a significant chance of damage. The curved OLED display is very prone to damage as you try to pry it off the frame.

Arthur Shi -

I need new back and front screens how do I know which one to buy

Barry -

Nice Guide can can we remove line from screen i got pink link in set

packages plan -

Hello,

I can no longer charge my S7 Edge with the cable.

This problem suddenly appeared.

Perhaps this is due to a failure of the charging connector.

Do you think wireless charging would be a solution?

Because the wireless charging coil is connected to the motherboard, not directly to the charging connector.

In this case, the charging connector would be useless for charging (it is also almost impossible to be replaced due to the display glue).

Thanks

Vigneron -

You are right! Your connector is most likely worn out, so wireless charging is definitely a good workaround.

Arthur Shi -

Hey (Thanks for a very good guide)

I tried replacing the screen assembly on my s7 edge. I got a midframe with the screen already installed, so all i had to do was to move the board, batteri and so on. The problem is, when i turn on the phone, the LCD doesn’t work.

Any idea what is wrong?

(i tried whit to new screens with the same result)

nicown -

try check again all the connections

Daniele Carminati -

Daniele Carminati - 4 hours ago

I think i have tried that already :) but thanks for your advice.

nicown -

is the LCD the only thing not working? I mean, does the phone makes sounds and/or vibrates?

Daniele Carminati -

Yes.. It seems to be the LCD that is not working. I vibrates when its powered op, and the back and recent buttons lights up. Sorry for my slow reply.

nicown -

I think you may have got a defective replacement screen… Try to get it changed with a new one contacting the seller

Daniele Carminati -

I already got another one that i tried :( Do you think i have damaged the connector? (Thanks for your help so far :) )

nicown -

Or you are very unlucky, or you might have a damaged socked on the motherboard… It is still fixable, but you have to do some microsoldering (or bring it to someeone who does it)

Daniele Carminati -

Thank you, excellent guide and toolkit (essentials)! New display, new battery, new home button (finally working after 4.5+ years)… feels like a new phone!

Daniel Fueger -