Introduzione

  1. fJxXaVwrD5fhPicg
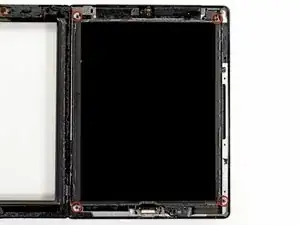
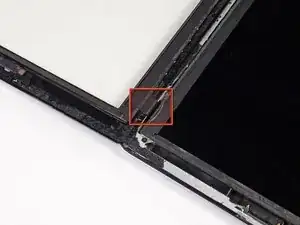
    • Svita le quattro viti a croce Phillips #00 da 2 mm che fissano il pannello LCD alla cornice in alluminio.

    End of teardown. Start of disassembling.

    Dorothy Simler -

    The top left screw may be covered by black adhesive tape.

    Chat Pat -

    The ribbon cable on my unit was too short to lay it all the way down. I had to let it sit sideways.

    Petabyte Studios -

  2. bsb2BBUpsOYsIQAs
    bsb2BBUpsOYsIQAs
    jernUONBTLXtdMJB
    QXXfYvKLHQEn5gKL
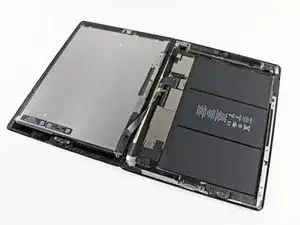
    • Usando uno strumento di apertura in plastica o uno spudger, solleva il bordo destro del pannello LCD dall'iPad.

    • Ruota il pannello LCD attorno al suo bordo sinistro ed appoggialo sopra il vetro anteriore.

    • Stai attento mentre muovi il pannello LCD. Il cavo a nastro è delicato e potrebbe rompersi se si piega troppo.

    I skipped everything beyond this point and proceeded with the detachment of the battery starting from the right side, one section at a time, with a credit card and a glue remover. I then removed the three screws around the battery connector (on both logic boards) and the one of the battery connector itself. I then lifted the boards up jointly just enough to free the battery connector from the screw hole cylinder that keeps it in place. I then cleaned up and removed all the adhesive from the base, inserted the new battery and glued it to the base. I then put the screws back, mounted the LCD, closed the glass with new adhesive, and powered on. The iPad booted normally and I proceeded with the calibration. I am aware that removing the boards is safer, but if you are careful you save a lot of time disconnecting and reconnecting fragile connectors from the boards.

    Ermanno Bellini -

Conclusione

Per rimontare il tuo dispositivo, segui le istruzioni in ordine inverso.

Brett Hartt

Membro da: 13/04/10

127718 Reputazione

0 commenti