Introduzione

Questa è una guida solo prerequisita per la sostituzione del pannello anteriore.

  1. XyCWjxekvWxnuqOQ
    XyCWjxekvWxnuqOQ
    1vvwCYQqVcoof5FC
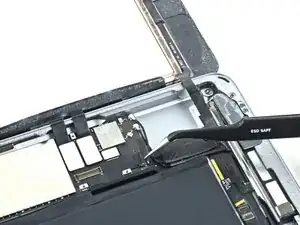
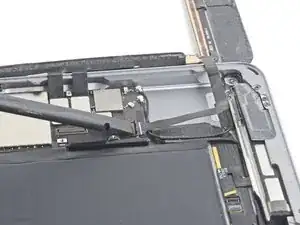
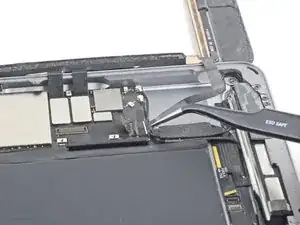
    • Rimuovi i pezzi di nastro adesivo che coprono il connettore del cavo a nastro del tasto Home.

  2. 1nnYUS6q3BYBMGJE
    1nnYUS6q3BYBMGJE
    SfhjSPRKbgrNF4JP
    kPXHEA5apZYGGZUl
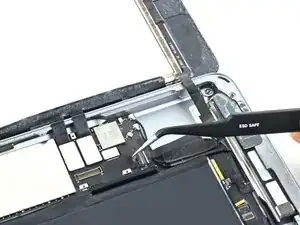
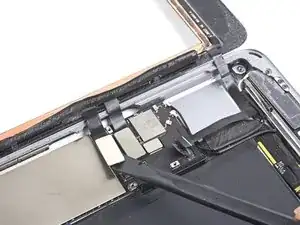
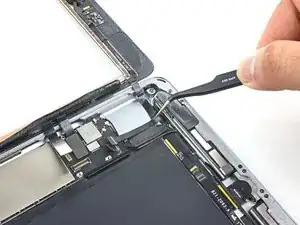
    • Usa la parte piatta di uno spudger per ruotare verso l'alto l'aletta di bloccaggio del connettore ZIF del tasto Home.

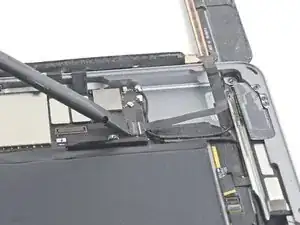
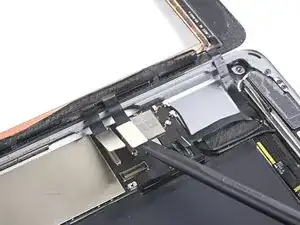
    • Sfila attentamente il cavo a nastro del tasto Home dal connettore ZIF.

    I'm confused about the home flex cable connector required for the 6th generation iPad. It was my understanding that this model required an 18 pin connector. But these excellent pictures clearly show a 14 pin connector, just like the one for the first generation iPad Air AKA the iPad 5. I know this is not the primary focus of this guide, but can anyone clarify this for me?

    Bonnie Baxter -

    I did the whole repair but this part is the problem HELP !!! I unlocked it but it took me 1 hour to carefully pull out the HOME BUTTON RIBBON CABLE. It finally came out with tweezers but now I CAN'T GET IT BACK IN and as a result my touch I.D. won't activate. It seems there was a tiny bit of black tape overlapping the connector on the ribbon which I carefully cut off exposing only the connector on the ribbon itself but how the heck does it slide in before you lock it. It seems easy on Youtube videos but mine just doesn't slide in with hand or with tweezers. OR in fact is there another connector that controls the TOUCH I.D. ???

    Just a guy -

    Failed this step- broke the connector. If I try this again, I'd be inclined try to remove the home button from the front panel without unplugging it. Everything else seems to work fine.

    Sandy Kilday -

  3. bJwcDG4kFHJhGDIj
    bJwcDG4kFHJhGDIj
    ZdkVYykjGYHsGQGm
    XBHwTrTJUOej1eIU
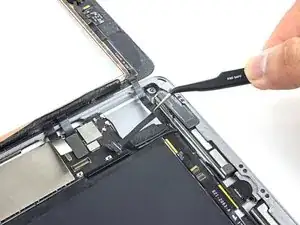
    • Usa la parte piatta di uno spudger o un'unghia per scollegare attentamente i due connettori dei cavi del digitizer dalle loro prese.

    • Per evitare di danneggiare il tuo iPad, fai leva solo sui connettori stessi, non sulla presa sulla scheda madre.

    • Durante il rimontaggio, assicurati che i connettori siano inseriti correttamente nelle rispettive prese, o potresti riscontrare dei problemi con lo schermo.

    Where can I get a good used motherboard for a A1954 iPad 6 gen everywhere I look, there sold out ?...

    Trent Weaver -

  4. IZgunLOMRiiOPIQX
    IZgunLOMRiiOPIQX
    TdHG1uN6NbfujTC2
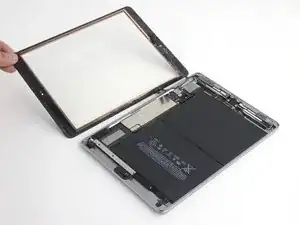
    • Separa attentamente il cavo a nastro deel tasto Home dall'adesivo che lo fissa alla copertura posteriore.

    If you can make sure to not pull on the home button side, i would leave out this step. i replaced two displays so far, on the first i removed it, but left it connected on the second attempt. worked like a charm

    Tommy Wienert -

  5. WaJMIvf2e2QUlJsQ
    WaJMIvf2e2QUlJsQ
    vdolqRB3iEWSTWhO
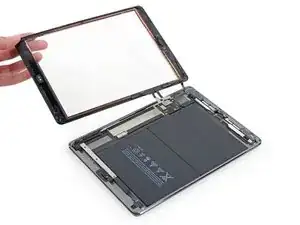
    • Rimuovi il gruppo del pannello anteriore.

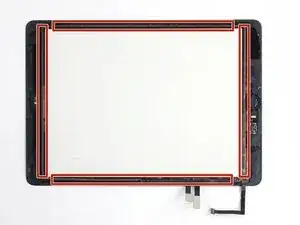
    • Se riscontri dei tocchi "fantasma" con il tuo nuovo schermo, puoi risolverli aggiungendo uno strato di nastro isolante molto sottile, come il nastro Kapton (poliimmide), nelle aree evidenziate sul retro del pannello. I pannelli iFixit hanno già l'isolamento adeguato e non dovrebbero richiedere del nastro aggiuntivo.

    • Senza l'isolamento adeguato, queste aree del digitizer possono fare cortocircuito con le altre componenti, causando il malfunzionamento del touch.

    • L'isolamento non è visibile ad occhio nudo ed è separato dalle strisce della barriera in polvere di schiuma che si trovano in diversi iPad.

Conclusione

Per rimontare il tuo dispositivo, segui le istruzioni in ordine inverso.

Sam Goldheart

Membro da: 19/10/12

465149 Reputazione

0 commenti