Introduzione

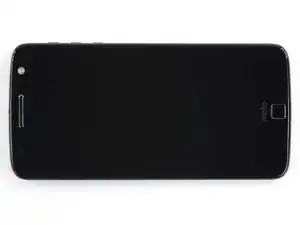
Questa guida mostra come sostituire un gruppo schermo crepato o rotto nel Moto Z. Il gruppo schermo comprende il vetro anteriore e il display AMOLED.

Il gruppo schermo è estremamente fragile e non è dotato di rinforzi. Lavora lentamente e con metodo quando lo maneggi.

Se il vetro del tuo display è crepato, evita ulteriori rotture e previeni infortuni nel corso della riparazione applicando del nastro adesivo sul vetro.

  1. AOhWsAmeA3BjCQYI
    • Scalda un iOpener e applicalo sul bordo sinistro del telefono per almeno 90 secondi.

    • Puoi usare anche un asciugacapelli, una pistola termica o una piastra calda, ma stai attento non surriscaldare il telefono: sia il display OLED sia la batteria interna possono essere danneggiati dal calore.

    • Mentre aspetti che l'adesivo si ammorbidisca, vai avanti a leggere il passo successivo per farti un'idea di dove dovrai far leva.

  2. B3AD1TEtWaQNbuQw
    B3AD1TEtWaQNbuQw
    SESAOm3TZKfiLIxx
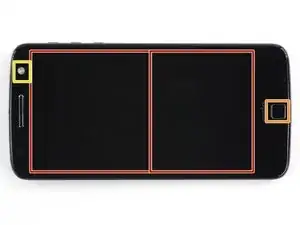
    • Nei passi successivi dovrai tagliare l'adesivo tutto attorno al bordo del gruppo display.

    • Per evitare danni, non tagliare nelle aree indicate qui sotto:

    • Pannello OLED

    • Pulsante home

    • Unità flash

  3. ecDSu1IwXefvHyOe
    ecDSu1IwXefvHyOe
    Sl2XHVITPZBMAA1V
    45l3ETvbWoLXAHYt
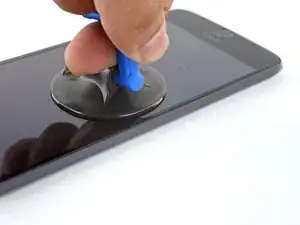
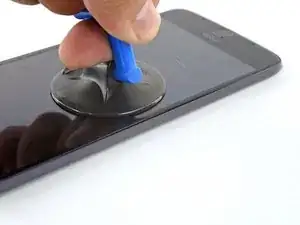
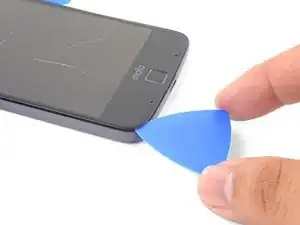
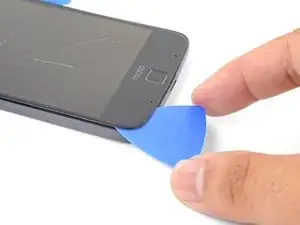
    • Applica una ventosa il più vicino possibile al bordo riscaldato.

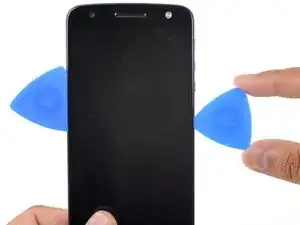
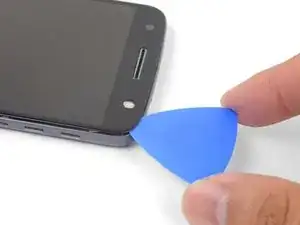
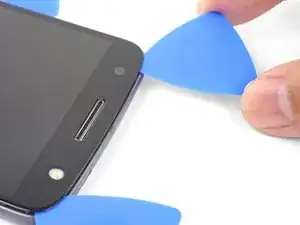
    • Solleva tirando la ventosa per inserire la punta di un plettro di apertura nella fessura.

    • Non inserire il plettro di apertura oltre 1,5 mm di profondità, altrimenti potresti danneggiare il pannello OLED.

  4. oIt5C4Ld2ZDNBqFF
    oIt5C4Ld2ZDNBqFF
    vV1rcoBNSTvN5yRd
    rTHWq4cY2OoSYtRm
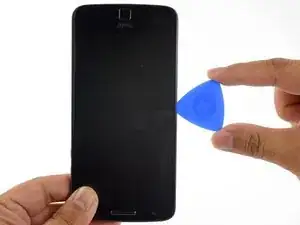
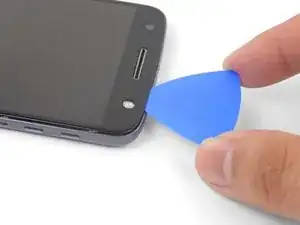
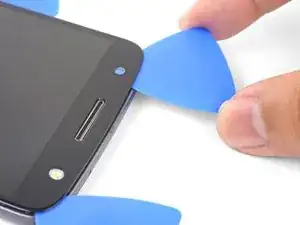
    • Fai scorrere con cautela la punta del plettro di apertura su e giù lungo il lato del telefono, facendo attenzione a non infilarla a più di 1,5 mm di profondità.

    • Mentre fai scorrere il plettro lungo il lato, sentirai la punta dell'attrezzo andare contro il bordo del pannello OLED. È questa la profondità a cui inserire il plettro senza danneggiare il pannello.

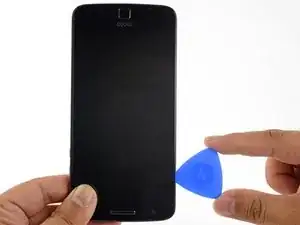
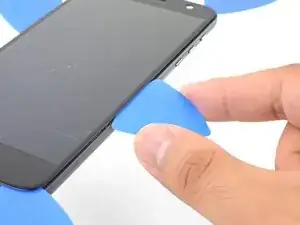
    • Una volta che hai scollato l'adesivo, lascia un plettro di apertura sul bordo per impedire che la colla si riattacchi.

  5. bUsMXMKnGssnwu5A
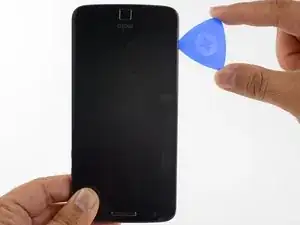
    • Ripeti gli stessi passi di riscaldamento, sollevamento e taglio sull'altro lato lungo del telefono.

  6. wSBsESUHl1PVsuNR
  7. rYGN2OAKDGmOhlTG
    rYGN2OAKDGmOhlTG
    14kej2hZQVqIk2J2
    • Inserisci il plettro di apertura nell'angolo del telefono dal lato del flash e taglia con cura tutto attorno all'unità flash.

    • Non inserire il plettro all'interno del bordo per più di 1,5 mm di profondità.

    • Eseguito il taglio, lascia il plettro nell'angolo per impedire che l'adesivo si possa riattaccare.

  8. ICwKD6Xk6t4TxUJb
    ICwKD6Xk6t4TxUJb
    pjHLdexBUTu3FjVI
    odQrxdZ4ckAPau5I
    • Inserisci un plettro di apertura nell'angolo superiore rimasto.

    • Taglia con cautela l'adesivo nella parte superiore del telefono.

    • Non inserire il plettro oltre 12,5 mm di profondità.

  9. CdtgmSxofc6FivmV
    • Applica un iOpener riscaldato nella parte inferiore del telefono per almeno 90 secondi.

  10. 2cGQEyKevPlyC6mE
    2cGQEyKevPlyC6mE
    pEWg1m4XQYxs2kmH
    tjWsxZdsvq6HgZbv
    • Inserisci un plettro di apertura in uno dei due angoli inferiori e taglia in direzione del pulsante home, fermandoti prima di raggiungerlo.

    • Una volta finito il lavoro sull'angolo, lascia un plettro in posizione per impedire che l'adesivo possa riattaccarsi.

    • Ripeti la procedura per l'altro angolo inferiore.

  11. brUPNyqVDPZVCP21
    brUPNyqVDPZVCP21
    p4HKLBK3hFxuYY1A
    • Ruota delicatamente e in misura minima il primo plettro di apertura per favorire il distacco dell'adesivo sul bordo.

    • Ripeti la stessa procedura per tutti i plettri rimasti, muovendoli quanto necessario e ruotandoli lievemente per staccare l'adesivo.

  12. PSbMswxRT54lC3jW
    PSbMswxRT54lC3jW
    yUnYjJkaQWgN1oUY
    XROmdJOEYlNDElxe
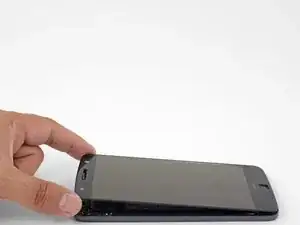
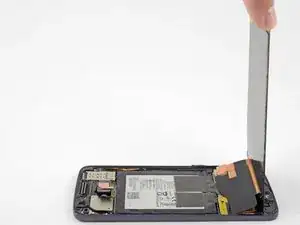
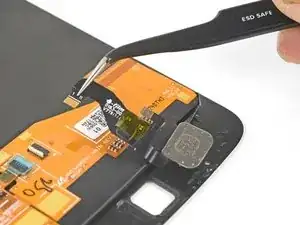
    • Solleva la parte del display dal lato dell'altoparlante voce per avere accesso ai cavi del display.

    • Non aprire il display oltre 90° e supportalo sempre per tenerlo in posizione.

    It says lift home button end of display but the photo shows lifting the earpiece end.

    Lynne Ayers -

    Good catch! I have fixed the step.

    Arthur Shi -

    When I finally got mine opened, all I see is a white piece of metal. Nothing like you photo…UhOH…

    Diana Myera -

    Oh no! It sounds like a different model! Motorola phones are notorious for their similar sounding naming conventions.

    Arthur Shi -

  13. AliGuJ5ZLd1KkOub
    AliGuJ5ZLd1KkOub
    1TNRwfivjGnX2WXk
    N5HiOnp4LXA5YLcu
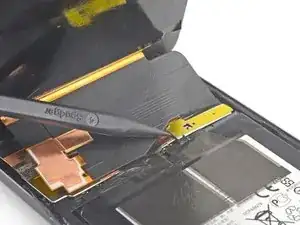
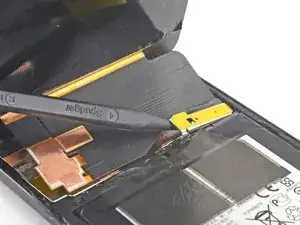
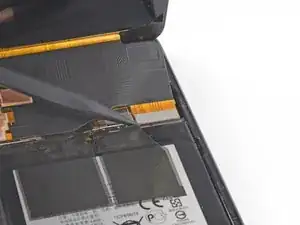
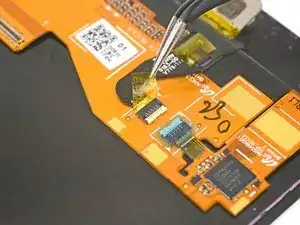
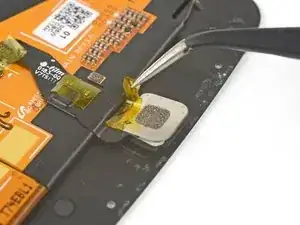
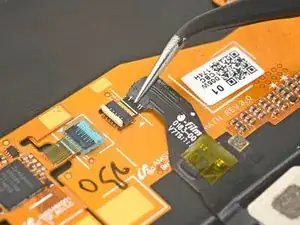
    • Usa la punta di uno spudger per staccare la schermatura del cavo del display.

    • Rimuovi la schermatura del cavo del display.

  14. AmvnVWuA4bcqApdC
    AmvnVWuA4bcqApdC
    SYEPgOWWepwwPHaW
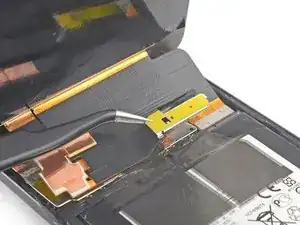
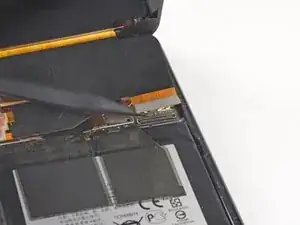
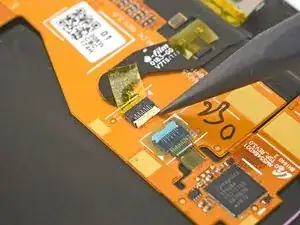
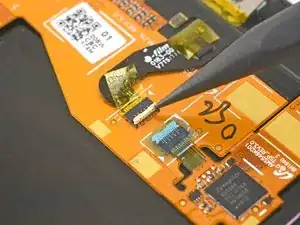
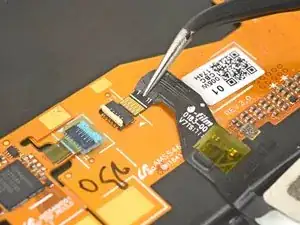
    • Usa la punta dello spudger per sollevare e scollegare dal suo zoccolo il connettore del cavo del display.

  15. MffriIMQwph2MZhw
    MffriIMQwph2MZhw
    kepJQHIFFmTjkKUv
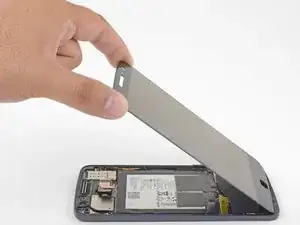
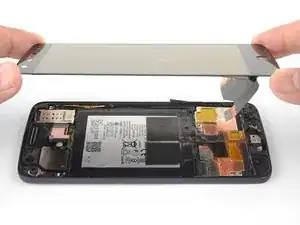
    • Rimuovi il gruppo display.

    • Prima di installare nuovamente il gruppo display, rimuovi con cura dalla scocca ogni parte rimasta di adesivo o di vetro.

    • Dopo aver rimosso ogni traccia di colla e di vetro, pulisci le aree di adesione con alcol isopropilico al 90% (o superiore) e un panno privo di pelucchi o un filtro per caffè americano.

    • Ricordati di accendere il telefono e provare la riparazione prima di applicare del nuovo adesivo e sigillare nuovamente il telefono.

    • Usa l'adesivo per display Motorola Moto Z per sigillare di nuovo il telefono.

    By removing the traces of glue from the frame, you will also remove the protective covers of the microphone and whatnot at the home button side,, as well as the speaker cover at the other side, because the glue does its duty…

    dr_baeschtlr -

  16. BHLxGqUZ2nVLSUh4
    BHLxGqUZ2nVLSUh4
    FW2XPybMSReFAoVH
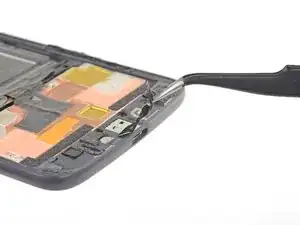
    • Usa delle pinzette per staccare qualsiasi pezzo di nastro adesivo sia presente sul connettore del pulsante home e sul pulsante stesso.

  17. A4iEeFiX2Rend56y
    A4iEeFiX2Rend56y
    sUYQeqxOcmp5Q1cH
    • Usa la punta di uno spudger per sganciare il blocco del connettore del pulsante home.

  18. SYxxIVCawlGfDYee
    SYxxIVCawlGfDYee
    3kxcWOvEOhkHhd4h
    • Usa con attenzione delle pinzette per tirare fuori dal suo zoccolo il cavo del pulsante home.

  19. 4wktrDPUJVhSwmkE
    • Rimuovi il pulsante home.

Conclusione

Confronta il pezzo sostituito con quello originale. Potresti dover trasferire componenti rimasti sulla vecchia parte o rimuovere adesivi sul retro del componente nuovo prima di installarlo.

Per rimontare il dispositivo, segui queste istruzioni in ordine inverso.

Porta i tuoi rifiuti elettronici a un riciclatore certificato R2 o e-Stewards.

La riparazione non è andata secondo i piani? Vai sulla nostra comunità Risposte per trovare aiuto nella risoluzione dei problemi.

Arthur Shi

Membro da: 03/01/18

248236 Reputazione

14 commenti

Do you ship to India?

gsriram72 -

Watch the youtube video it’s a lot better also instead of sending a sticker that connects the phone and the screen they should’ve added adhesive to the new screen.

Jonathan Davila -

Hi Jonathan,

Unlike aftermarket screens that may have adhesive pre-attached, we are an authorized Motorola reseller and sell OEM Motorola parts. In this case, the OEM screen comes without adhesive pre-attached.

Arthur Shi -

For the most part this was a helpful guide, but what about the flash? When following the directions the flash comes off with the screen/digitizer, and it appears to have happened to the author as well. There is no mention or help in reattaching this component or needing to purchase a new flash component prior to beginning the repair. It will be too late for me, but any insight might help others.

Joe Wiltjer -

Hey Joe,

You’re right—depending on the part you order, you may need to transfer the flash lens from your original back cover to the replacement part. This involves prying the original off and sticking it back onto the replacement cover. I’ll add a note to one of the steps.

Arthur Shi -

You have to reattach the flash lens wires directly to the underside of the OLED screen, not the ‘back cover.’ It sticks directly to the OLED screen. That’s where it was on the old screen. Was this wrong?

Daniyal Kazi -

Hi, do you know if it would be possible to use the screen from a Z Play (much cheaper)?

Jean-Yves -

Hello,

Somehow in the middle of the process to replace my Moto Z screen and battery, I lost the display cable shield. I assemble the display without it, but the touch won’t work. AIs this because I lost the part, or the replacement part is faulty?

Also, the adhesive tapes on the battery are also gone. Is it going to a problem?

Thank you

Farshad Khoshnoud -

Hi Farshad,

It is possible, though unlikely that the missing display cable shield is the culprit for the touch. I would double-check the wide display connector to make sure it is fully seated. Connect the display, place a non-conducting sheet between the display and the rest of the phone, and power it up to see if the digitizer works. If it does, there’s a grounding issue. The black tape on the battery mainly helps dissipate heat, but may also help electrically insulate certain parts.

Arthur Shi -

Hello

I have tried to use a piece of folded aluminium foil as the shield, but it won’t work. I used it because I failed to find this small part online, on the other hand, I find in comments after my story that the shield may not be of touch function value, so, I am wondering what else could be the issue. I also ordered two more display assemblies because I thought they may be faulty, but nothing changed. Any idea?

Farshad Khoshnoud -

Everything went great but I forgot to replace the Display Cable Shield, found it when I was cleaning up. Hope it’s OK without it?!

Randall Patkowsky -

Hi Randall,

If you already sealed the phone and it works, that’s fine!

Arthur Shi -

Hi Randall

Is the phone fully functional? I have lost the display cable shield and when I assemble the device, there’s no touch.

Farshad Khoshnoud -

The screen is super sensitive and I messed up the volume and power buttons.

Randall Patkowsky -