Introduzione

Usa questa guida per sostituire uno schermo rotto o crepato sul tuo Samsung Galaxy Watch Active.

  1. RCApCkRPAgtqkLXV
    RCApCkRPAgtqkLXV
    qb4A4EIFaOI2MqEF
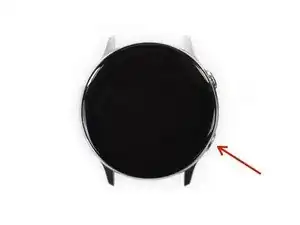
    • Spegni il Galaxy Watch Active tenendo premuto il pulsante inferiore per circa tre secondi. Dovresti sentire una breve vibrazione.

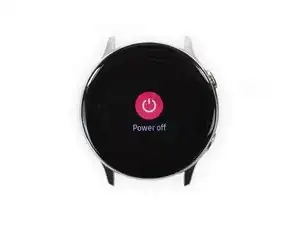
    • Quando compare il simbolo "Spegni", premi il centro dello schermo per spegnerlo. Dovresti sentire una vibrazione più lunga come conferma.

  2. 1Jj2uF5cWgFAtF3r
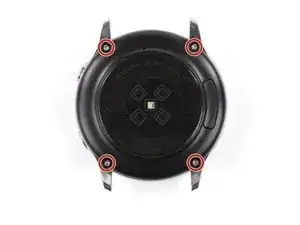
    • Usa un cacciavite Tri-point Y00 per rimuovere le quattro viti da 4 mm sul retro dell'orologio.

  3. ksCYS2QHyDkHnEjh
    ksCYS2QHyDkHnEjh
    WWqrWonten1M6re6
    ggRiQmOIcuHNliuZ
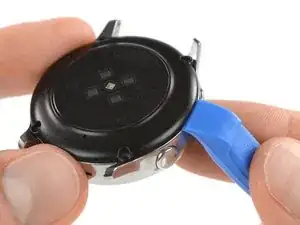
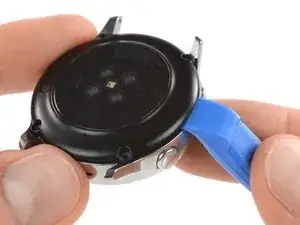
    • Usa uno strumento di apertura e posizionalo tra il retro di plastica e l'alloggiamento in metallo vicino ai pulsanti.

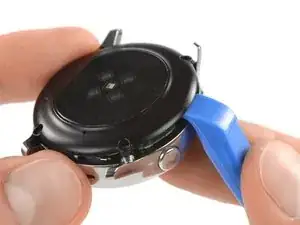
    • Spingi la punta dello strumento di apertura nella fessura per separare la copertura posteriore dall'alloggiamento.

    • Non rimuovere ancora la copertura posteriore completamente. C'è un cavo che la collega alla scheda madre.

    Do i need heat for this? i can't get a pry tool in

    23william90 -

    EDIT: use a Rasor knife in the corner nest to the screw holes and it's a lot easier and less damaging to take off.

    23william90 -

  4. sjEsBcJfgjGXLtui
    sjEsBcJfgjGXLtui
    LMRZBowcgZpA3DqF
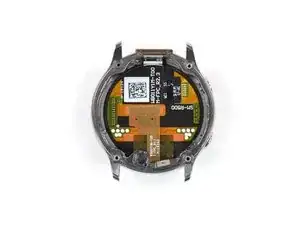
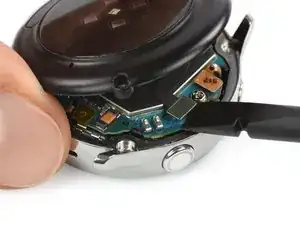
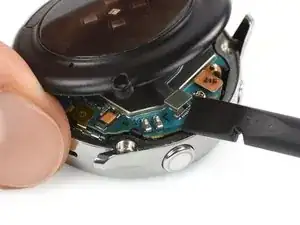
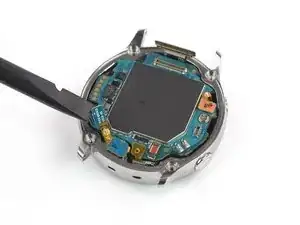
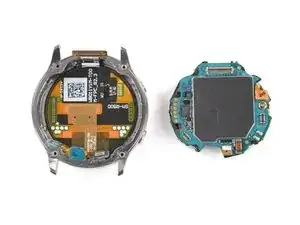
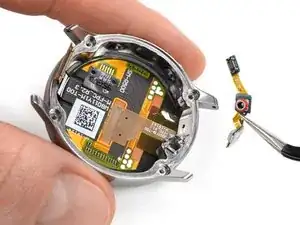
    • Solleva con attenzione la copertura posteriore per circa 2 cm per avere accesso al connettore del gruppo dei sensori vicino ai due pulsanti.

    • Usa uno spudger per scollegare il gruppo dei sensori dalla scheda madre.

  5. XQ1qXkBInRiA1uVd
    • Rimuovi la copertura posteriore.

    Thank you very much. Nice job!

    Alvaro Grites -

  6. ZGVLCTNHPt6hHTDA
    ZGVLCTNHPt6hHTDA
    DFpCr3UJjYPTttg4
    sRvQ4XNolKIAmDIM
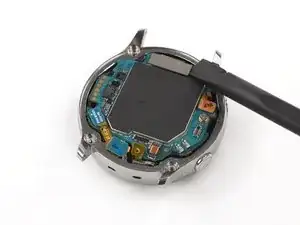
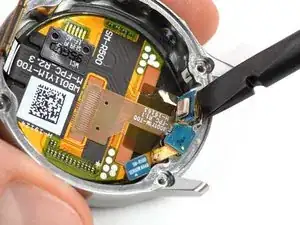
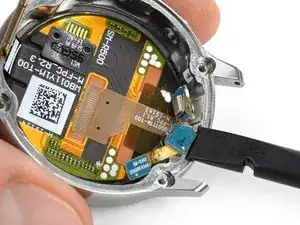
    • Usa uno spudger per scollegare il gruppo schermo e quello del microfono e del sensore di pressione.

  7. eZTwOTfsR4XhjwXp
    eZTwOTfsR4XhjwXp
    HqBqNdusil4POwvq
    rCRUeQ1GOQSyiSpj
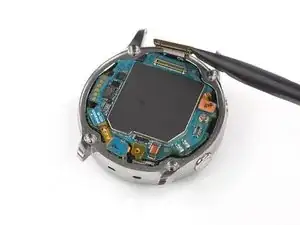
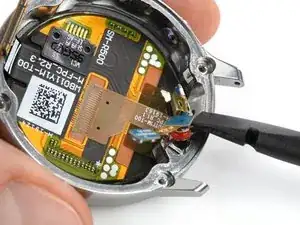
    • Usa un plettro di apertura per rimuovere il nastro adesivo sottile del gruppo del microfono.

    • Quando rimonti il dispositivo, assicurati che questo nastro adesivo aderisca correttamente alla scheda madre, premendolo con la parte piatta di uno spudger.

    What can I use if the glue no longer holds?

    Dominik Dittrich -

    Just make sure it lays flat and the counterpart on the back cover (the white thing at the bottom in the image of step 5) will press it down and hold it in place.

    Tobias Isakeit -

    What can I use to make it lay flat?

    Every time I press it down it just pops up again.

    Rosalie E. Morgan -

  8. nRHagQSSQCgBxIWD
    nRHagQSSQCgBxIWD
    mDNoIjCfAtLKprdJ
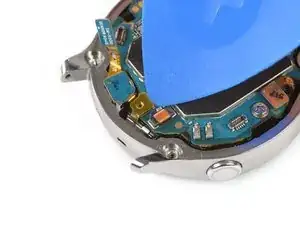
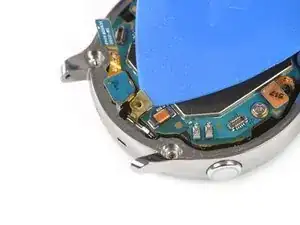
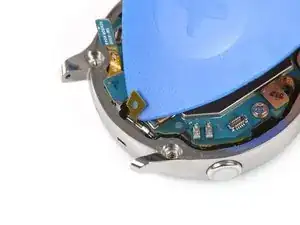
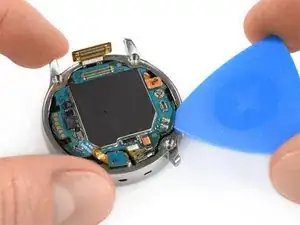
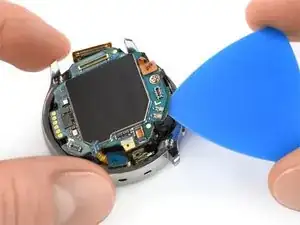
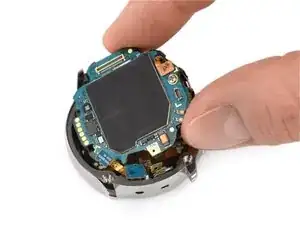
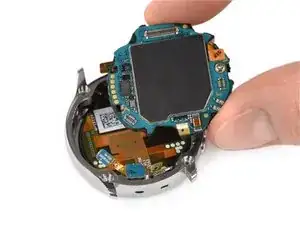
    • Inserisci un plettro di apertura in basso a destra tra la scheda madre e la cornice per sollevare il corpo centrale.

  9. jwwDYN4Kb2xoEwKO
    jwwDYN4Kb2xoEwKO
    mnPNrRcallwY3oBC
    EQtZ2yrnFhyJ41d5
    • Solleva e rimuovi il corpo centrale.

  10. AmUYSGPOpHXg1r63
    AmUYSGPOpHXg1r63
    dGqpvBTU3tM5LGFO
    • Usa uno spudger per allentare il microfono che è fissato alla cornice con del leggero adesivo.

  11. bYqGpY1ajClV2iJ2
    bYqGpY1ajClV2iJ2
    DqKjK5sfv1AtiBCJ
    • Usa uno spudger per sollevare il sensore della pressione dal suo alloggiamento nella cornice.

  12. bQfbpGnxn5TFEady
    bQfbpGnxn5TFEady
    u6fkDFpRF1lxpvfJ
    • Rimuovi con attenzione il gruppo del microfono e del sensore di pressione dalla cornice.

    • Assicurati di paragonare il nuovo gruppo schermo a quello precedente per controllare se ci sono parti che devono essere trasferite.

    This looks like a great guide but you stopped short of removing the face and reattaching it. Isn't there some adhesive needed?

    Susan E Hammer -

    It says the guide is for removing and replacing the screen but it stops seemingly one step before

    Heather Lee -

    Anyone know where I can find the last steps or video covering roving the face and replacing it?

    Doug Apr 19,2023

    Doug Scott -

Conclusione

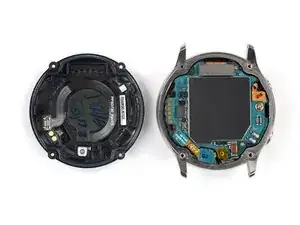
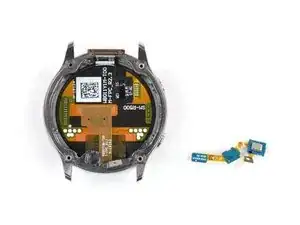
Confronta la tua nuova parte di ricambio con quella originale: potresti aver bisogno di trasferire i componenti rimanenti o rimuovere protezioni adesive dalla nuova parte prima di installarla.

Per rimontare il dispositivo, segui queste istruzioni in ordine inverso.

Porta i tuoi rifiuti elettronici a un riciclatore certificato R2 o e-Stewards.

La riparazione non è andata come previsto? Prova delle soluzioni ai problemi di base o rivolgiti alla nostra comunità Risposte per trovare aiuto.

Tobias Isakeit

Membro da: 31/03/14

116550 Reputazione

10 commenti

These instructions look very good! My screen has several cracks and I want to replace the front module. Do you have any idea where I can order one?

Jantine Stulp -

Yes there s one on eBay for $31.76 https://www.google.com/aclk?sa=l&ai=DChc...

Dylan Austin -

My screen was black or showing static. I disassembled and reassembled and now it's back to normal. Might have been a bad internal connection.

Benjamin Franzmayr -

Think I have the same issue may have to try opening it. Do you still have it? Is it still good?

Simon Hall -

this is a rather silly question, but which model is that diode on the LCD panel? I couldn't find the schematics for the screen

Thomas Jungblut -

This looks like a great guide but you stopped short of removing the face and reattaching it. Isn't there some adhesive needed?

Susan E Hammer -

Hello my screen crack/charger not working can you refer.

Christopher Moss -

I've ordered a screen on aliexpress which came with two adhesives, and I'm glad they did, because I messed up with the first one.

I had trouble following the step three, there was nowhere to put the opening tool. I had to use a metal tool instead of the plastic one between the two buttons (put on gloves to avoid injuries). It did slightly scratch the plastic side, but I was able to pop it open and follow the rest of the tutorial.

The mic tape is a mess to put back properly, and I gave up, maybe I needed some tape or glue to put it back on ? Anyway I never use the watch's mic, but I always need a screen :D

Jérémy VIGNELLES -

Update : the adhesive provided with the spare screen lasted only 2 weeks, and I got the screen glued instead. It' still sticking for now.

Jérémy VIGNELLES -

I would like it to be fixed and I will need to buy a bumper case for it

Vearnet Varner -