Introduzione

Guida pre-requisita per rimuovere l'intero gruppo schermo.

  1. faYLZCcUqNgfLImh
    faYLZCcUqNgfLImh
    fTsCL5NUphoD5vbV
    • Solleva il display in posizione quasi verticale.

    • A questo punto ci sarà sempre una striscia di adesivo nella parte inferiore del display che lo terrà incollato alla scocca come una cerniera. Puoi allentare questo adesivo muovendo il display su e giù per alcune volte.

    The best way to remove the chin adhesive is to use the tabs at either end (there are two strips that run from each outside corner to near the centre). Carefully pull the tabs up and the strips should peel off.

    Advance Technical Service -

  2. EyrkeRmWKhVr6PQL
    EyrkeRmWKhVr6PQL
    V3KWORppGRpxkZl5
    EEJDoH3W6oKg6nHd
    • Fa' molta attenzione a non toccare i conduttori del condensatore o le saldature esposte sul retro dell'alimentatore (riquadrati in rosso).

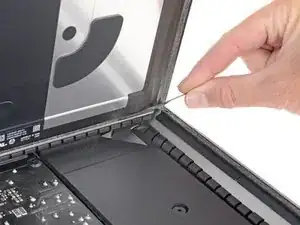
    • Afferra la linguetta alle estremità di una delle strisce adesive sul bordo inferiore dello schermo e tira l'adesivo verso la parte superiore dell'iMac per rimuoverla.

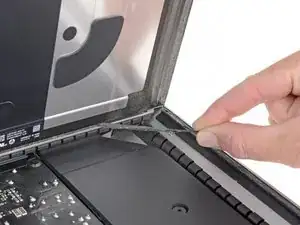
    • Ripeti questo passo con l'altra striscia adesiva e rimuovila.

    • Se una delle strisce adesive si rompe prima di essere rimossa, usa una scheda di plastica per tagliare l'adesivo rimanente.

    At step 21-22, releasing the adhesive strips from the bottom of the display, I noticed a tab on the outer end of each strip. Pull the tab to remove the whole strip, no need to mess around with the plastic cards!

    roberttrevellyan -

    Instead of the plastic cards, use the flat end of a spudger. Use it as scraper. Be careful as there are antennas mounted on the inside edge of the frame on the right side (facing you), and the top right (facing you). The original adhesive strips are on those as well. - ECJ

    ECJohansen -

    A little bit of hot air (eg. hair dryer) will help soften the adhesive. Use a piece of cardboard or equivalent if you want to avoid blowing hot air towards the electronics.

    Be careful to remove absolutely everything - any remainder will create a bump and prevent your screen from sticking back to the frame when reassembling.

    Froggy Manny -

  3. W11PURO2LYnqVMEL
    W11PURO2LYnqVMEL
    4x45fNhvlBjfqU3f
    WstuEbNDdOlFKIns
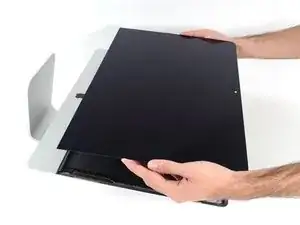
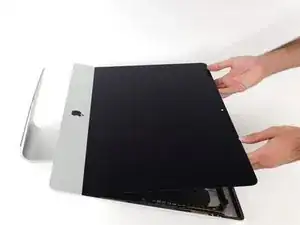
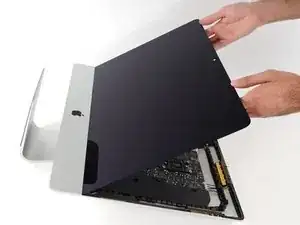
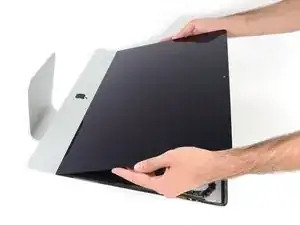
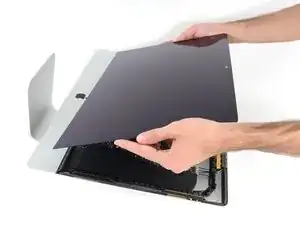
    • Solleva il display dalla scocca e rimuovilo dall'iMac.

    • Potrebbe essere necessario sollevare lentamente lo schermo da una parte per staccare l'adesivo rimanente.

    • Fai molta attenzione a maneggiare il display - è grande, pesante e fatto di vetro.

    • Dopo che l'adesivo è stato tagliato, non può essere riutilizzato per riattaccare il display. segui questa guida quando la tua riparazione sarà completa per sostituire le strisce adesive e assicurare il display alla scocca.

    Après l'étape 23, j'ai suivi les instructions de la vidéo intitulée: Upgrade RAM in a mid-2017 21-inch iMac without complete disassembly.

    Lien: https://www.youtube.com/watch?v=_k9I7N9B...

    J'ai pu upgrader la RAM en enlevant juste le ventilateur.

    Koala -

Conclusione

Per riassemblare il dispositivo, seguire le istruzioni nell'ordine inverso.

Adam O'Camb

Membro da: 11/04/15

195052 Reputazione

0 commenti