Introduzione

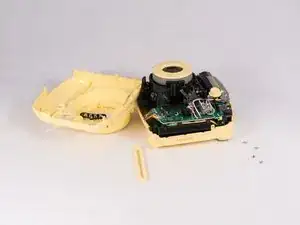
Il guscio della fotocamera è la copertura in plastica che costituisce l'esterno della Fujifilm Instax Mini 8, che serve per nascondere i cavi, proteggere la pellicola e tenere fermi i principali componenti di questa fotocamera in un modo compatto. Un guscio danneggiato comprometterà l'integrità del dispositivo e potrebbe causare il malfunzionamento di altri componenti della fotocamera.

  1. CVMfpJGRVTSfiQRX
    CVMfpJGRVTSfiQRX
    vRvFGMsDsTY2BU2Q
    VhDO2ZXoIwPZwaPu
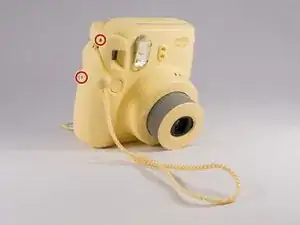
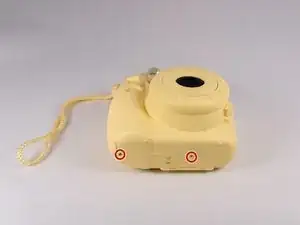
    • Inizia osservando la tua fotocamera girandola per trovare tutte le viti. Ci dovrebbero essere nove viti in totale.

    • Una vite è nascosta sotto il coperchio ovale in plastica dell'apertura della stampante. Rimuovi il coperchio per scoprire la nona vite.

    This doesnt show it but there is a screw under a plastic "pop out" cover where the photo comes out at the top

    Margaret Compton -

  2. sE6BCCnTQnevPvuN
    sE6BCCnTQnevPvuN
    gPViBE4P1xVjOpbr
    r2SAKjOwYNUfBKie
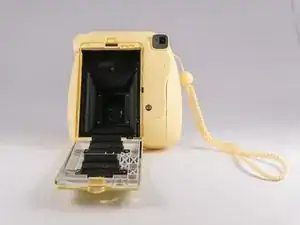
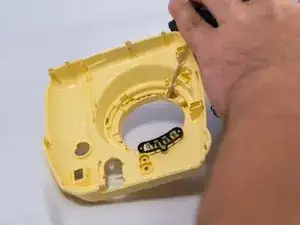
    • Premi l'aletta per sganciare la copertura del compartimento della pellicola.

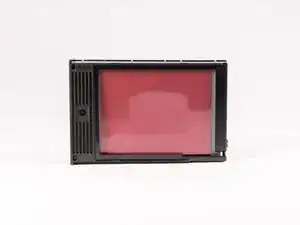
    • Rimuovi la pellicola dal compartimento (se è presente)

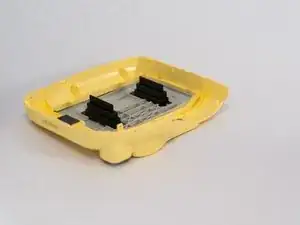
    • Rimuovi del tutto la copertura del compartimento.

    • Inizia usando un piccolo cacciavite a croce Phillips #00 per svitare le viti.

    How do i remove the compartment cover?

    lucy jane holman -

    With the film door closed, try inserting the opener tool into the seam between the camera front and back plates on the side closest to the film door hinge, and start working your way around the camera.

    Remember there’s another screw under the small oval plate covering where the pictures pop out.

    Robert Foss -

  3. t63uvOCcZbv5XqSG
    t63uvOCcZbv5XqSG
    opZxhSGmIkDHxQDf
    5nKxbmkb4gPuEcjP
    • Usa uno strumento di apertura in plastica ed uno spudger per rimuovere in sicurezza il guscio anteriore.

  4. 4uhDYfkCsM2xEGJh
    4uhDYfkCsM2xEGJh
    Yrjim3pndPyMV1eb
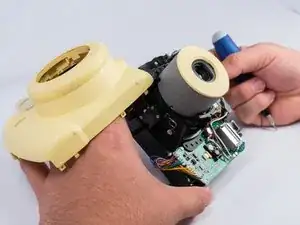
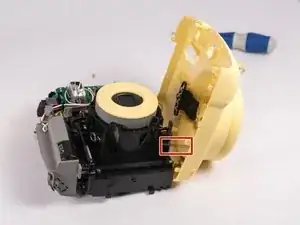
    • Solleva la parte anteriore del guscio, assicurandoti di non tirare troppo, in quanto c'è una molla che collega il guscio e i componenti interni della fotocamera.

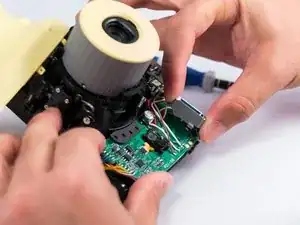
    • Attentamente, usando un piccolo cacciavite a croce Phillips #00, rimuovi la molla dai componenti interni della fotocamera.

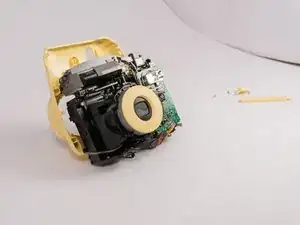
    • A questo punto dovresti aver rimosso del tutto il guscio. Congratulazioni! Segui i passaggi al contrario per rimontare il guscio sulla fotocamera.

Conclusione

Per rimontare il tuo dispositivo, segui le istruzioni in ordine inverso.

Boyang Wu

Membro da: 02/10/12

955 Reputazione

18 commenti

For removing initial screws, there are 9 screws. The 9th screw is under the cover overlying the exit of the Polaroid film area. (hidden under the cover)

princesslsy -

but where near the exit? i cannot find it

Emily Birkler -

It's at the top of the camera where you get picture.

xxx -

I need the circular yellow plastic piece that goes around the lens. How can I obtain that? How do I attach?

jason81173 -

I've drop my instax mini 8 at the airport and it looks perfectly fine at first until I realized that the film compartment has broken and it can't close its 'door', but the instax still can be use just need to press the door against the film everytime I used which is annoying. Does anyone know how to fix it?

Siti Syuhanna hussein -

Did you find the replacement part?

Alber Einstein -

I accidentally got sand under the shutter while I was at the beach, and now the button won't click. How do I fix this?

Julie v -

where do i find the circular plastic piece online how do i find it? what website? what shop?

albert instine -

Lens cover, over front of lens, fall off How do i put back on. Fuji instax mini 8

Marie M -

pls help. battry leak. corrossion. forgot to remove. 1x use palang. what can i do?

Gie Britanico -

you can use vingear and cotton buds to clean the white stuff and then wipe with alcohol; goog;e clean battery leak in youtube then you will know what to do

kit kat -

That final spring is broken on my camera. Do you know what the specs of it are so that I could get a replacement?

Jack Murgatroyd -

HI Jack, I have the same issue, where did you find the spring at the end and what are the specs?

kit kat -

hi i lost the spring to the outershell. where can i buy the replacement and what size of the spring should i get?

kit kat -

The mini 9 has one extra screw. You need to pop off the ‘frame’ at the top around where the picture comes out. There is one more hidden screw there.

Neil -

A few missing parts in the assembly that might help if your camera "explodes" on opening:

- The metal flat spring goes under the shot button. As for the button, there are different diameter holes, so is easy to fit properly. Just test clicking feels

- The "black square" part goes under the strap holes, clipped between shell and chassis (you can place it after fitting the front shell)

- The long spring can "disappear" hidden in the front shell after you unclip it from the lens. No panic, you can easily find it opening from the inside of the shell, the front ring cover with the lettering (it has 3 adhesive pads, plus the tabs). With the cover out is very easy to assemble, fitting the spring first in the lens and letting it go straight into the front (youtube video "FUJIFILM instax mini9./error prob. very easy.").


Please, be very careful manipulating the motherboard. This capacitor has high voltage and keeps charge for ages, it can shock you several times and it is quite unpleasant (don't ask how I found it).

Jose PS -

Just posting this to thank you. Could not figure out where the black square went after the camera "exploded".

Jamato -

Hello!

When removing the case, two parts fell out:

a black plasicc part and a metal part.

Has anyone an idea where to fit these?

https://i.postimg.cc/596Dn5qn/IMG-8868.j...

peterlanger59@web.de -