Introduzione

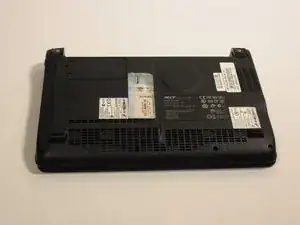
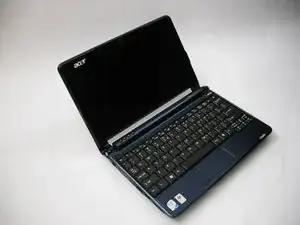
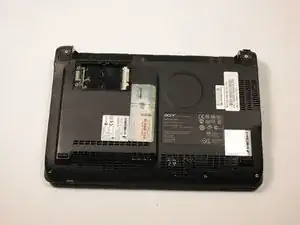
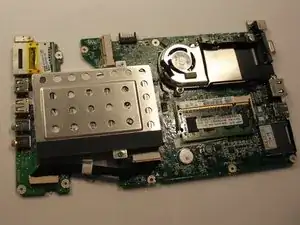
Usa questa guida per sostituire l'hard drive dell'Acer Aspire One ZG5. Dopo aver rimosso la scheda madre, l'unità è semplice da sostituire.

  1. naTflZh26KaS3x6V
    • Gira il netbook a testa in giù con la batteria in alto, rivolta lontano da te.

  2. DRgkWXRoFNEbXDOk
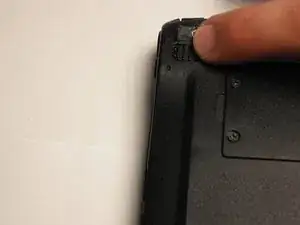
    • Sblocca la batteria scorrendo l'interruttore situato vicino alla cerniera sinistra verso sinistra nella posizione "sbloccata".

  3. p4BamwCYLJNZLTYA
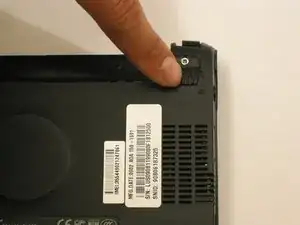
    • Scorri il fermo situato sull'altro lato della cerniera rispetto alla chiusura, mentre spingi verso l'alto la batteria.

  4. mypM1auXeDVeYjnu
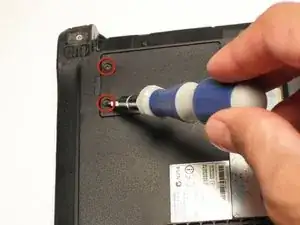
    • Allenta delicatamente le due viti Phillips #0 nel piccolo pannello che copre la scheda wireless.

    • Queste viti sono incorporate nel pannello e non sono destinate ad essere completamente rimosse.

  5. X4SIiJCBljpxjDr6
    • Solleva il pannello e rimuovilo dal case.

  6. BdmrwVTHpIP1CHO5
    • Disconnetti i due cavi dell'antenna dal lato sinistro della scheda wireless.

  7. tPSSajWYXVnh1fus
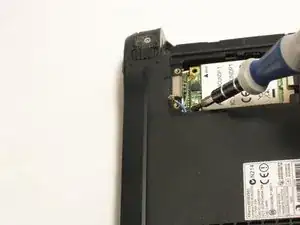
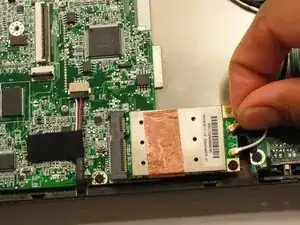
    • Rimuovi la singola vite Phillips #1 da 3,9 mm dal lato inferiore sinistro della scheda wireless.

  8. FHVmVmsqBrUb6WWr
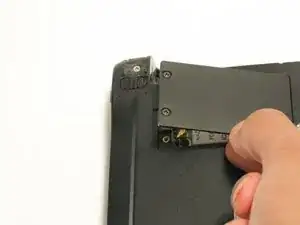
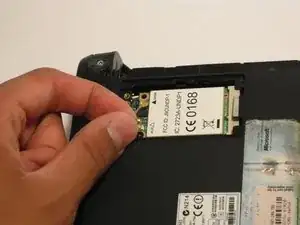
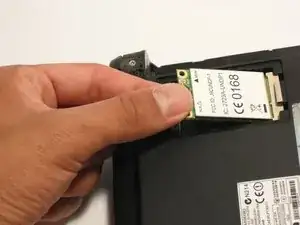
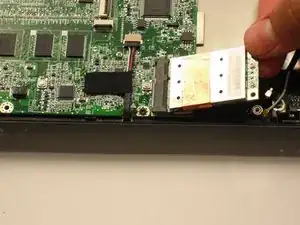
    • Solleva delicatamente il lato sinistro della scheda wireless e scorri la scheda fuori dal suo connettore.

    mi lap NO tiene wireless card

    gustavo cordova -

  9. d5xwUQms1MVp42yn
    • Gira il netbook e apri il display in modo che la tastiera sia rivolta verso di te.

  10. QJ5RKJgepO116E6u
    QJ5RKJgepO116E6u
    XbSbdGRLKmBBxbtq
    QCsmKrWRNgagra5O
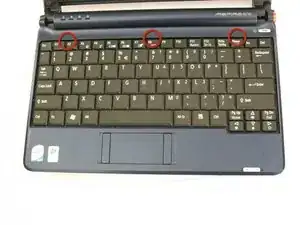
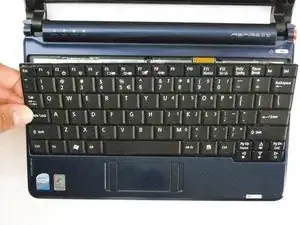
    • Ci sono tre linguette posizionate sulla parte superiore della tastiera.

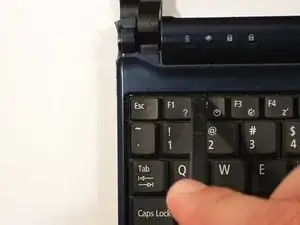
    • Inizia con lo spudger puntato verso il display e fai leve per spingere via ciascuna linguetta dalla tastiera.

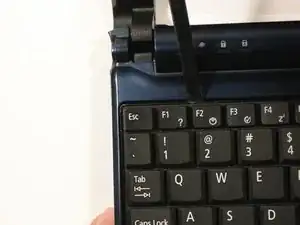
    • Mentre ti sposti alla linguetta successiva, assicurati che la linguetta precedente non si riaggiusti da sola.

  11. aNpF5efmQ4OZxbBO
    aNpF5efmQ4OZxbBO
    4SWWULjBYZwT5j3b
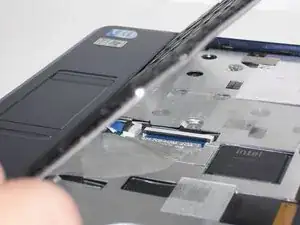
    • Solleva la parte superiore della tastiera. Se non si solleva facilmente, potrebbero esserci linguette ai lati: usa lo strumento per spingerle da parte e/o sposta la tastiera da un lato all'altro.

    • C'è un breve cavo a nastro che collega la tastiera al netbook.

  12. G1tECahc6AUGXUHx
    G1tECahc6AUGXUHx
    sOG5RGecLhOOADGN
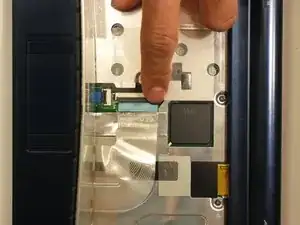
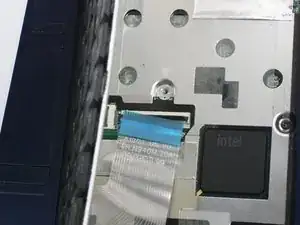
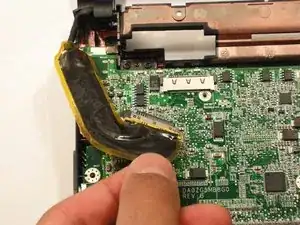
    • Disconnect the ribbon by lifting the black plastic hinge and removing the clear blue cable.

    my keyboard ribbon face damaged. how to repair?

    musa musa -

  13. D24TnM65sGihuGBf
    • Chiudi il display e gira il ZG5 in modo che il vano batteria sia rivolto lontano da te.

  14. GjhxNByu6vrepNHc
    GjhxNByu6vrepNHc
    rXGajilxKPWSrwXp
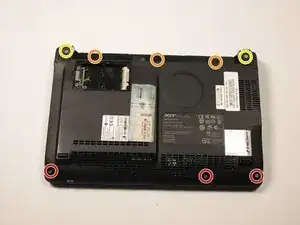
    • Rimuovi tre viti Phillips #0 da 5,8 mm dal fondo del case.

    • Rimuovi tre viti Phillips #1 da 3,9 mm dal vano batteria.

    • Rimuovi due viti Phillips #0 da 5,8 mm dalla parte inferiore, sotto i piedini vicino alle cerniere.

  15. ApcTINtvUyKsGPEe
    • Gira il netbook nuovamente e apri il display con la cavità della tastiera rivolta verso di te.

  16. A4pySPYGCUXIgxON
    A4pySPYGCUXIgxON
    yJY5LB2yDGTqSLaU
    KEWZQA1QQQAKrj1M
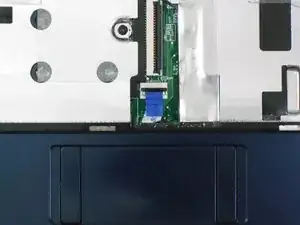
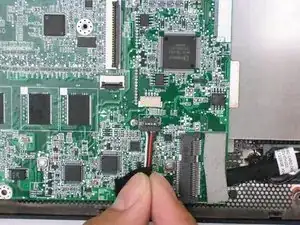
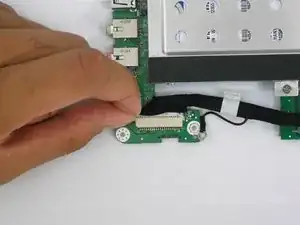
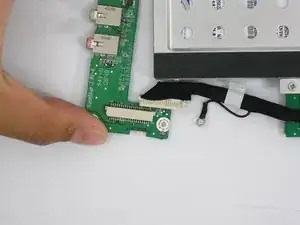
    • Solleva verso l'alto la linguetta di trattenuta sul connettore ZIF del cavo a nastro del trackpad.

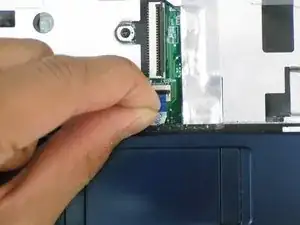
    • Utilizzando la linguetta blu, tira il cavo a nastro del trackpad dalla sua presa sulla scheda madre.

  17. o1Y5eQeDY6QMIMjp
    o1Y5eQeDY6QMIMjp
    tOxkXVDBWIZQkaKC
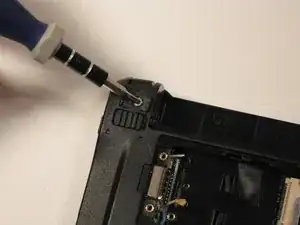
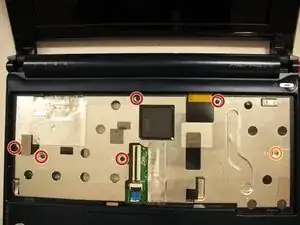
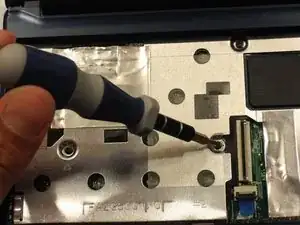
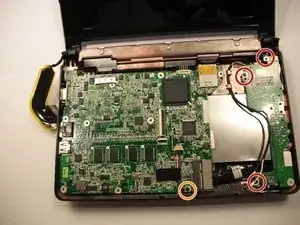
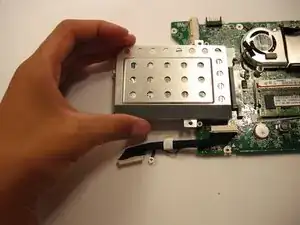
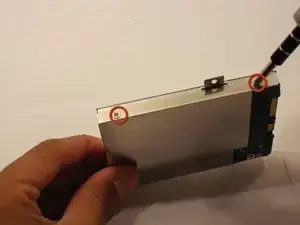
    • Rimuovi le cinque viti nere Phillips #0 da 4,7 mm dal telaio metallico.

    • Rimuovi la singola vite argento Phillips #00 da 4,3 mm dal lato destro del telaio metallico.

  18. JlC1mokVJKXSE46A
    JlC1mokVJKXSE46A
    1W65s1XhyAZHKp2u
    • Iniziando dagli anelli rossi lungo la cerniera, inserisci uno spudger o un utensile di apertura in plastica nella fessura tra le due metà del case.

    • Scorri lo spudger verso la parte anteriore del dispositivo, rilasciando le piccole clip che fissano il coperchio superiore.

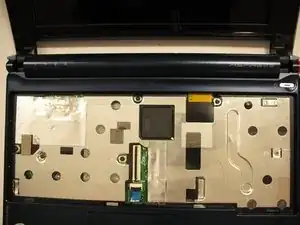
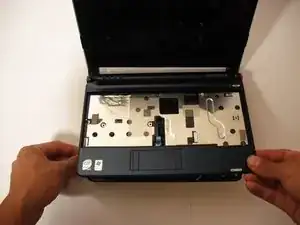
    • Solleva delicatamente il coperchio superiore.

  19. fZXrhDHDkbaJeoAQ
    • Disconnetti i due cavi dell'antenna dal lato destro della scheda wireless.

  20. DocloY6JdjAUHqHg
    • Rimuovi la singola vite Phillips #1 da 3,9 mm dalla scheda wireless.

  21. NWsBUSWHRhxXvAPL
    • Tira delicatamente la scheda wireless verso destra e scorri fuori dal suo connettore.

  22. APlZ5NhFmdsjFur6
    • Scollega il cavo del display dalla parte superiore sinistra della scheda madre.

  23. 3xvYEkfLmC1iqrQB
    3xvYEkfLmC1iqrQB
    vLhxylKm2uyablVm
    • Scollega il cavo dell'altoparlante dalla sua presa sulla scheda madre.

  24. mkjfu2vuYBotWY4c
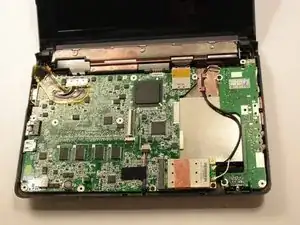
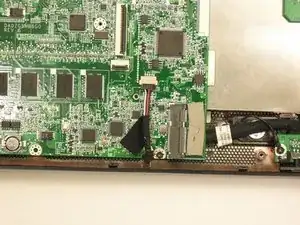
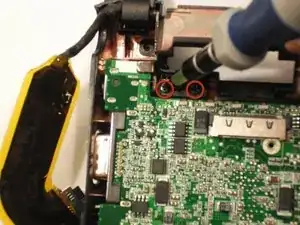
    • Rimuovi tre viti Phillips #1 da 3,9 mm dal piccolo modulo I/O.

    • Rimuovi una singola vite Phillips #0 da 3,9 mm dal davanti della scheda madre.

    • Alcuni laptop possono invece avere una singola vite Phillips #0 da 4,7 mm.

  25. OCDXXMWCQLuRLTrN
    • Rimuovi le due viti Phillips #1 da 4,7 mm che collegano il display alla scheda madre.

  26. hCmlPRSsS6u2iaxD
    • Solleva delicatamente il modulo I/O dal lato destro del case.

    • Il modulo I/O è collegato alla scheda madre da un cavo corto.

    I took apart an SSD variant. At this step, there were two screws holding the SSD down, but the SSD did not come out with the main and daughter boards. Detaching the I/O cable freed the mainboard to come out with or without the daughterboard.

    unixusr -

    there are 2 silver screws that need to be removed in this step your picture shows them still installed (one is located neer audio plug, the other is located neer keyboard plug) in step 27 (next step) they have been removed without mention

    Scott Riley -

    I have added 1 gb of memory to my ZG5 thanks to this helpful guide. Total cost, including a spudger and a new mini screwdriver, to tackle the 00 Philips, GBP 17.57

    I fear I haven't put the trackpad connector back properly, but device works great with a wireless mouse. Very many thanks.

    John Serocold -

  27. quCdZkemWQHJ5IA2
    • Solleva l'intero insieme della scheda madre dal case.

  28. IqvIMuWoCesOxyTY
    • Gira la scheda madre in modo che la RAM guardi verso l'alto.

  29. BDRbpOCxp5GQq6NH
    BDRbpOCxp5GQq6NH
    ZaVi5ni3KeELZTWu
    • Disconnetti la scheda I/O dalla scheda madre.

    This step (29) isn’t required to remove the hard disk drive.

    montazmeahii -

  30. DCEwUF6teHHE46uL
    • Rimuovi le due viti a croce Phillips #0 da 4,7 mm che bloccano il disco rigido.

    La notebook trae el disco duro en la parte de atrás? Por dónde va el ventilador?

    Julio Cesar Roman Gonzalez -

  31. iyV6ZHSVNVK6iBsD
    • Tira via il disco rigido dalla scheda madre.

  32. 1FaADZeO5OEgxFkk
    • Rimuovi le quattro viti a croce Phillips #1 da 3,9 mm dall'involucro del disco rigido.

    • Ci sono due viti da entrambi i lati dell'involucro.

  33. FPJ2aCsxrqRVxEtW
    • Rimuovi le due metà dell'involucro dal disco rigido.

Conclusione

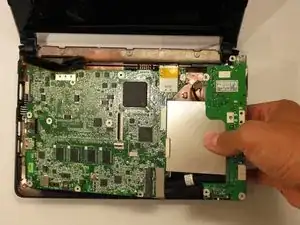
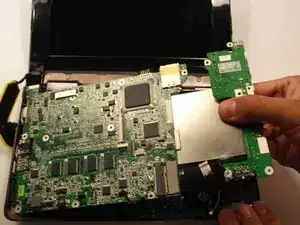
Per riassemblare il tuo dispositivo, segui queste istruzioni in ordine inverso.

Doug Gallatin

Membro da: 05/10/10

6337 Reputazione

12 commenti

Excellent guide. This "student" should be promoted to "instructor" right away. Many thanks.

Rudy Fernandes -

This guide helped a lot with refurbishing my old ZG5. It now has a case that is not cracked, 1.5 GB memory, and a 240GB SSD. I get to put off Windows 10 for a while longer.

James Stallings -

Thanks a lot! i already upgrade memory from 1 to 1.5 on my acer. But i have a question, does the aoa 150 works faster with a ssd disk? i want to try with one of 240 gb. Anyone try it?

Martiniano Vera Enrique -

Not the easiest upgrade I've ever done (perhaps the most difficult, actually), but I got it done. Removing the keyboard was the trickiest step for me. Be patient. If you can work one of the corner releases, you can put a flat-blade screwdriver under the corner of the keyboard and work on the other releases (starting at the far corner, then the centre).

The other tricky problem I had was getting the little ribbon cable for the trackpad properly reconnected after completing the project. (I thought the keyboard cable would be the tricky part, but it turns out to be pretty easy.) Be patient and you'll be fine. You may want to test (with a mouse handy) before you reinsert the keyboard.

Thanks very much for this howto!

Jim MacKenzie -

I had one of these little beasts that my son gave away about 6 years ago. The person he gave it to returned it to him a month later because it would not turn on. It was a case of the boot sector problem that plagues the ZG5. I performed the repair described on the Acer web site and it has been running fine ever since. After installing Linux Mint (dual boot), it was finally given away again last summer. Now it seems it is coming back to me. This might be the time to upgrade it with an SSD. Thanks for this tutorial. I will probably be making use of it over the next few weeks.

Chuck Pilger - 02/23/2017

Chuck Pilger -

Ok I'm ready to take the plunge and install an ssd. Which version of Win 10 works well? Or, how about win7, which I always liked? Pete Lunde 07/13/2017

Quasimodo -

I tried both Windows 7 and 10. I'd say to upgrade the memory to max (1.5GB) before trying to run ANY version of Windows. Also, while 7 ran nicely enough with that upgrade, I think Linux works even better. Windows 10 (32-bit, of course) runs, but it was way too slow to be comfortable for me to use. Of course, Windows 10 has more built-in protections against malware, so there are trade-offs to consider. If you don't *need* to run any Windows-only apps, though, at least try Linux on a Live USB and see how you like it.

pacmanmaster -

I used this guide to upgrade the hard drive, upgrade the memory (from 1GB to 1.5GB), and replace a busted internal WiFi card (upgrading from 802.11g to 802.11n in the process!). It can be done, but I will say that removing the keyboard is harder than it should be. In doing so, I broke one of the clips that holds it in. It still works great, but the keyboard now bounces a little. Be careful with that step!

Overall, considering that the ease of replacing these three parts once opened, it's a shame that Acer made it so HARD to open (safely).

I installed Windows 7 when I upgraded it, and it ran fine (but a bit pokey). I upgraded to Windows 10, and it worked, but it was even slower. After I migrated away from using apps on this machine that required Windows, I installed Linux Mint exclusively (had it dual-booting before), and it works better than it did with either Windows 7 or 10. (Note: To insure Linux compatibility, I used an Intel-branded WiFi card, which I checked for compatibility beforehand).

pacmanmaster -

Parts list shows SSDs compatible with MAC computers, are they also compatible with Aspire one ZG5?

Johnson -

I would like to replace the HDD with an SDD. Are there any specific SDDs that would work best for the MB Connection?

scottfabo01 -

Scott, I assume you mean SSD, which stands for Solid-State Drive, and not SDD (whatever that stands for).

Michael Walsh -

Many thanks for this guide. I was able to replace the disk without any problem

Marco Manna -