
Introduzione
Utilizza questa guida per sostituire il disco rigido nel tuo Mac mini versione fine 2014 con disco rigido o Fusion Drive.
Questa guida è stata realizzata con un Mac mini Fusion Drive. Se il tuo Mac mini ha un normale hard disk, salta i passaggi relativi all'SSD PCIe e al suo connettore.
Strumenti
-
-
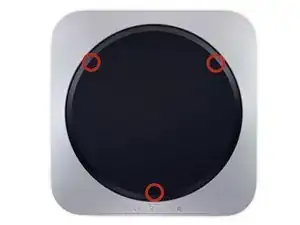
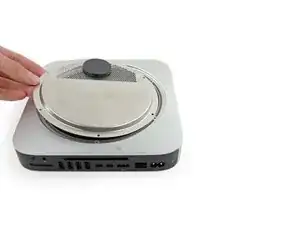
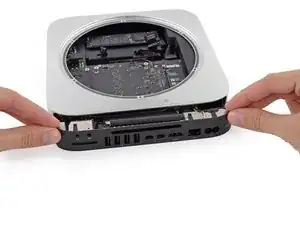
La cover inferiore è infilata su tre alloggiamenti per viti.
-
Fai leva vicino agli alloggiamenti ma non in corrispondenza esatta di questi.
-
-
-
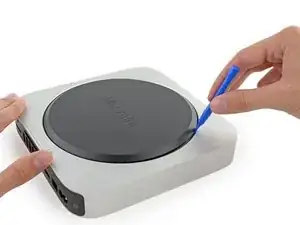
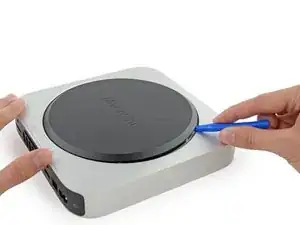
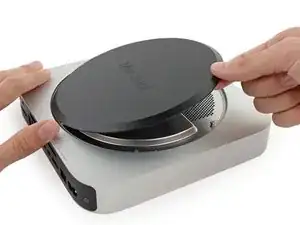
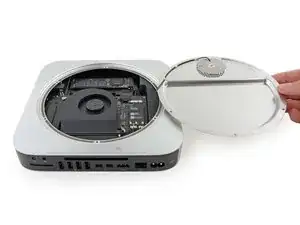
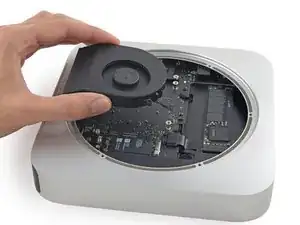
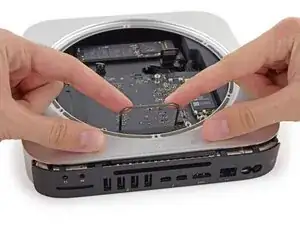
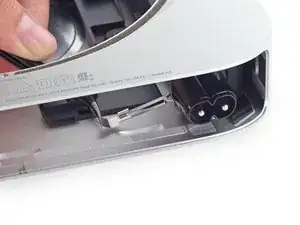
Tenendo le porte I/O del Mac verso di voi, capovolgi il piatto antenna verso destra per consentire l'accesso al connettore del cavo dell'antenna.
-
-
-
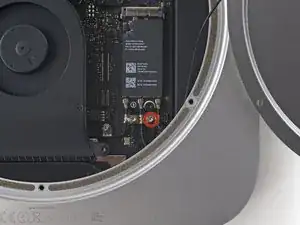
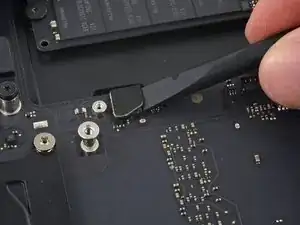
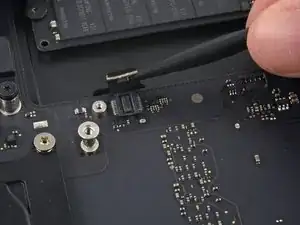
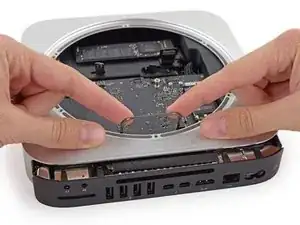
Usa la punta dello spudger per sollevare il connettore dell'antenna scollegandolo dal suo alloggiamento sulla scheda Airport.
-
-
-
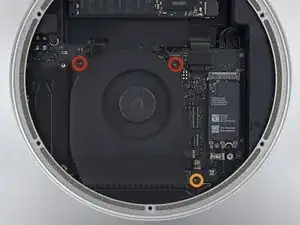
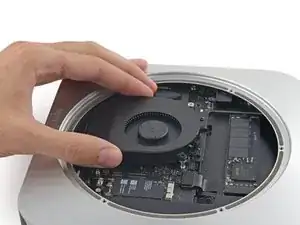
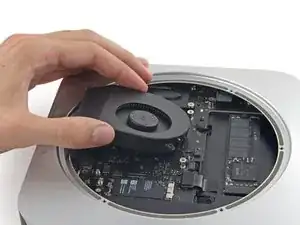
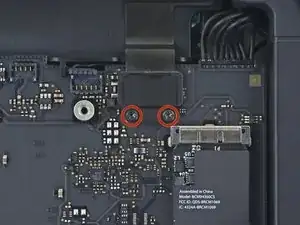
Solleva la ventola verso l'alto per liberare la vite prigioniera dal suo foro nella scheda logica.
-
Allontana la ventola dall'unità SSD finché non riesci ad accedere facilmente al connettore della ventola.
-
-
-
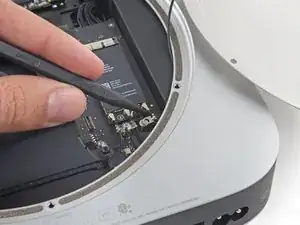
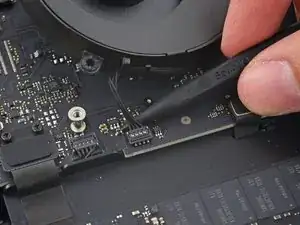
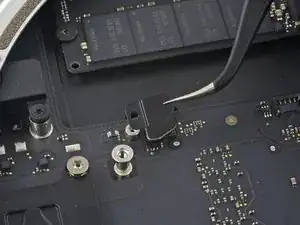
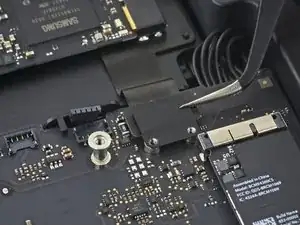
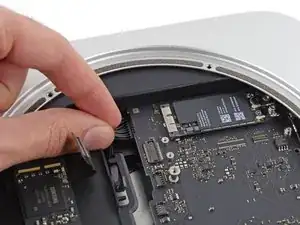
Utilizza l'estremità piatta di uno spudger per sollevare il connettore del cavo SATA dal suo alloggiamento sulla scheda logica.
-
-
-
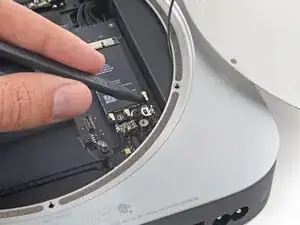
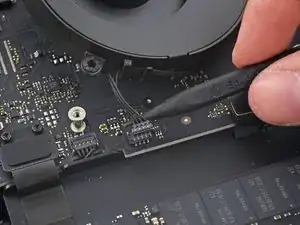
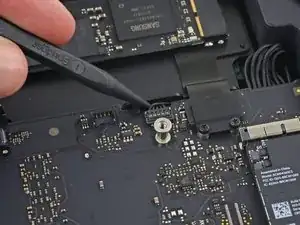
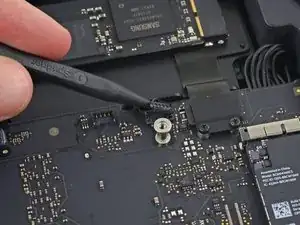
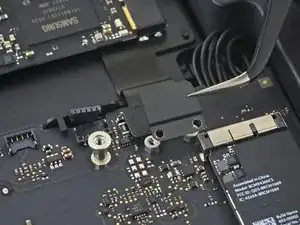
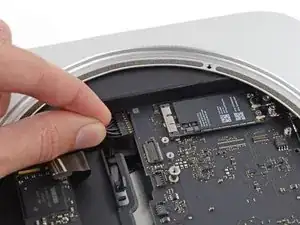
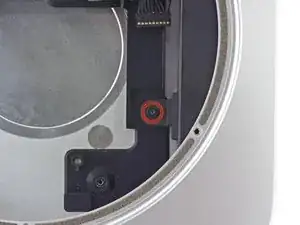
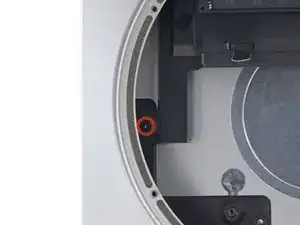
Utilizza la punta di uno spudger per scollegare il connettore del cavo del sensore IR facendo leva direttamente dal suo alloggiamento.
-
-
-
I seguenti tre passaggi si applicano solo ai Mac mini dotati di SSD PCIe. Salta i prossimi tre passaggi se il tuo Mac mini ha un normale disco rigido.
-
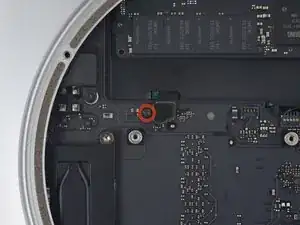
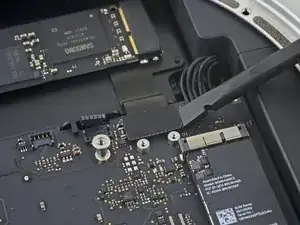
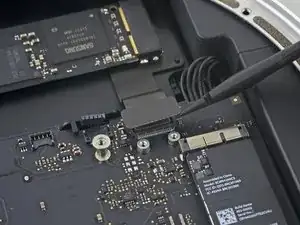
Rimuovi le due viti T6 da 2,6 mm che fissano la staffa del cavo SSD PCIe.
-
-
-
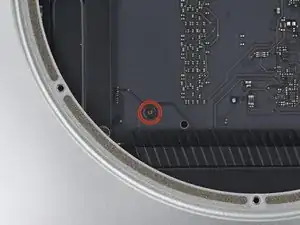
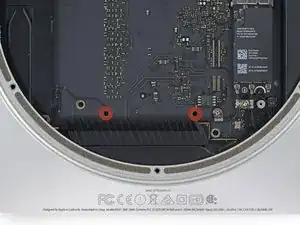
Inserisci lo strumento di rimozione della scheda logica Mac mini nei due fori evidenziati in rosso. Assicurati che le aste entrino in contatto con la custodia sotto la scheda logica prima di procedere.
-
-
-
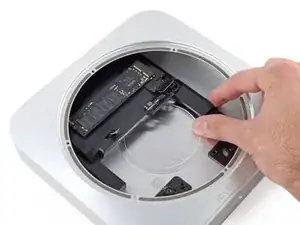
Tira con cautela lo strumento verso la scheda di interfaccia. La scheda logica e la scheda di interfaccia devono essere leggermente sfilati dalla custodia esterna.
-
Smetti di tirare quando lo strumento di rimozione entra in contatto con l'apertura posteriore della carcassa.
-
-
-
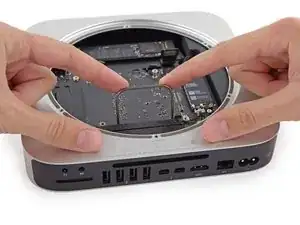
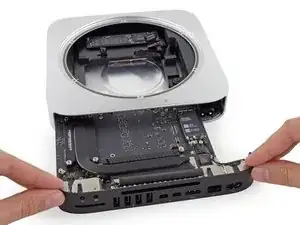
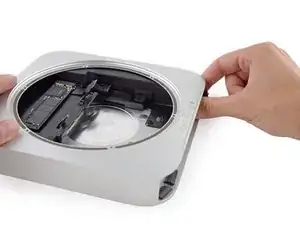
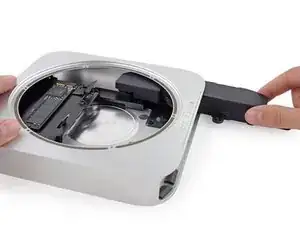
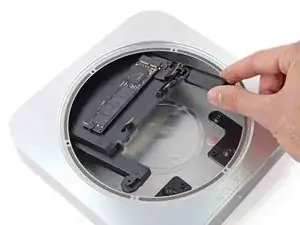
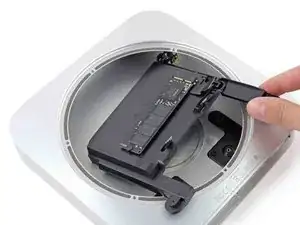
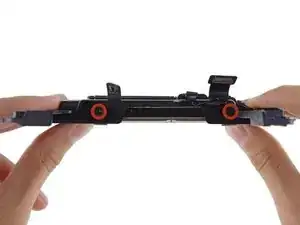
Fai scivolare delicatamente il gruppo della scheda logica del Mac mini, facendo attenzione a eventuali cavi che potrebbero impigliarsi.
-
-
-
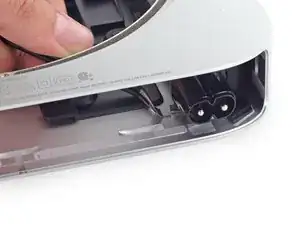
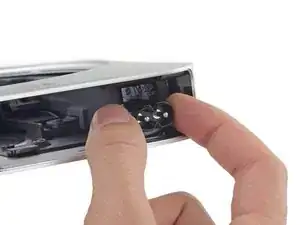
Usa una pinzetta o le dita per estrarre la clip dalla presa AC-in, quindi rimuovila dal Mac mini.
-
-
-
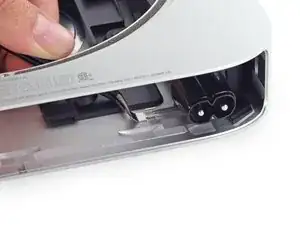
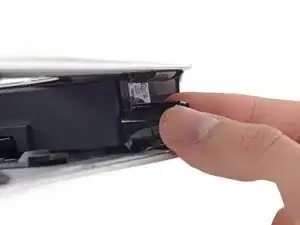
Per liberare l'alimentatore dalla custodia, afferra il connettore AC-In, che funziona come un gancio.
-
Ruota il connettore AC-In di 90 gradi in senso antiorario.
-
-
-
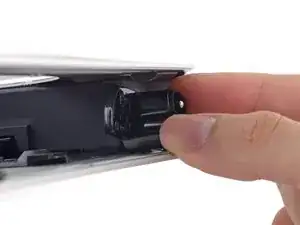
Estrai l'alimentatore dal Mac mini, facendo attenzione a eventuali cavi che potrebbero impigliarsi.
-
-
-
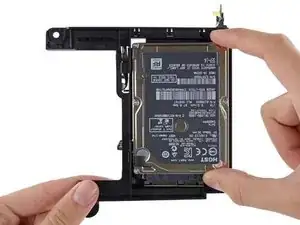
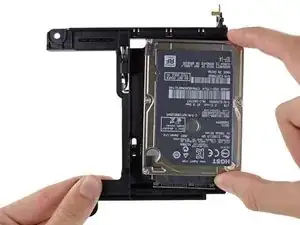
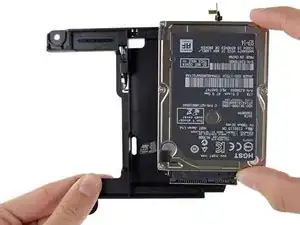
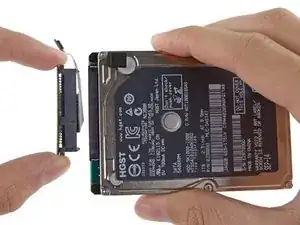
Rimuovi le quattro viti (due per lato) T8 da 6,5 mm che fissano il disco rigido al vassoio dell'unità.
-
-
-
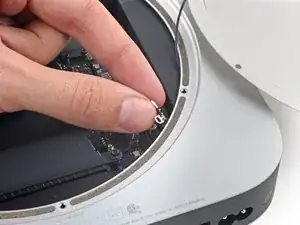
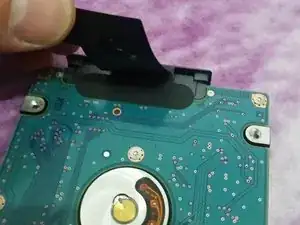
Solleva il cavo piatto e rimuovi delicatamente il nastro nero sottostante, che fissa il connettore del cavo SATA al disco rigido. Se non rimuovi il nastro, quasi sicuramente i contatti saldati al cavo flessibile si strapperanno dall'alloggiamento del connettore, poiché la forza di ritenzione dei contatti nell'alloggiamento è piuttosto bassa.
-
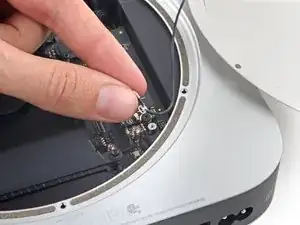
Estrai il connettore del cavo SATA dal disco rigido.
-
Rimuovi delicatamente i due cuscinetti adesivi neri quadrati (uno visibile nell'immagine) dagli angoli del disco rigido e incollali sul nuovo disco rigido nelle stesse posizioni.
-


Per riassemblare il tuo dispositivo, segui queste istruzioni in ordine inverso.

225 commenti
Hello, the following hard drive goes on the Mac Mini ??
no problem. but if you can get a evo 850 or a pro for the 2014 is better
All in all, this was a fairly terrifying process, however this guide was a massive help! Thankyou!!
geeksix -
This is exactly the reason I purchased their tools. They offer these guides which have helped me save several of my computers and a couple of my phones over the years. The $70 was a small price to pay for the help and I love the tools.
Ordered kit which arrived very quickly from Germany to UK. Only problem with taking it apart was with the IR sensor was difficult to lift up and I ended up pulling the whole fitting off glued it back on but now have no working IR sensor or front light but everything else works fine. Swapped SLOW HDD for SSD and now my Mac MIni is flying.
Andrew -
Read Me First: I purchased an SSD drive directly from Crucial and, of course, it came uninitialized. After going thru the entire tear down, installing the new drive, and rebuilding the mini, it refused to recognize the new drive. So, of course, I had to re-tear it down, remove the new drive, insert it into an external housing and format it using my Macbook. After that the mini recognized the new drive. A word to the wise: format the new drive before installing it.
tom -
How were you installing the OS? I am planning on booting into a USB drive with a copy of OS High Sierra on it, and I assume I will be able to format my new Samsung SSD using that?
Simon -
On my Samsung EVO 850, mac mini download system automaticly
Stefan Repac -
Pre-formatting is not necessary if you make a USB boot installation drive with macOS installer. During boot up, hold down the option key until the mac boot into the USB, formatting can then be done using disk utility running off the USB drive.
SBR249 -
I had the exact same experience as tom. I installed a brand new 2TB Samsung 850 EVO and it was not recognized by the Mac Mini. I booted from a portable USB drive with a bootable copy of macOS High Sierra but the 850 EVO SSD I had just installed was not shown as an option. I tore down the Mac Mini again, formatted the 850 EVO, rebuilt the Mac Mini, and booted off the same bootable High Sierra USB drive, and sure enough the 850 EVO was recognized.
maxim -
diskutil list
diskutil erasedisk [filesystem] [drivename] /dev/disk[disk number]
Paul Rodgers -
My drive (Evo 860) was also not initialized. I started in recovery mode and went to disc utility and from there selected the drive. I then was able to use the “erase” function on the drive. I just left the settings as default and as soon as it erased then the drive was ready to go.
Nathan Cooper -
Just completed this upgrade a few days ago, having purchased the 1 TB SSD kit from IFixIt. The kit arrived quickly and the tools and drive worked perfectly. The step by step guide posted here is pretty much flawless, but do pay attention to the specific comments from users on certain steps - they really help. As far as ensuring that the new drive will reboot and install MacOS, I watched 1-2 videos on YouTube about re-installing using the Internet Recovery tool and that worked perfectly. My MacMini is performing WAY better than it used to, for only a $200 upgrade kit and about 3 hours of work, all in. Thanks!
Joshua Rednik -
I’ve had Apple computers since the G3 machines and they have always been snappy.
Unfortunately this 2014 macmini has always been slow but this upgrade (6 years later) has changed that!
if you have a late 2014 macmini, do this.
I used a 860 Samsung.
Mike Hayes -
A quick comment to tell you that at every step, make sure to read the comments and be careful. I managed to do the process fast without any problems, but thanks to the comments that warned me enough on the risky steps.
Euronymous -
This guide surely helped me breath upgrade and bring some new life into my macmini. Thanks to all who contributed.
Cameron Hasell -
can one of you give me the link for the screw drivers please?
Gerardo Ramirez -