Introduzione

Seguire questa guida richiede smontare l'Xbox 360 E e risulta in qualche modo più complesso che sostituire altre parti dell'Xbox.

Strumenti

  1. TIkfryCTehaILEu6
    • Spingi lo Spudger nella fessura presente tra il pannello superiore della Xbox e la parte inferiore che ha i piedini in gomma.

    • Abbassa lo spudger per fare leva, tenendolo premuto all'interno della fessura.

  2. ERPkKFArPRTshPPh
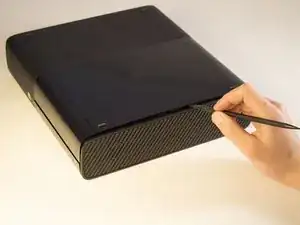
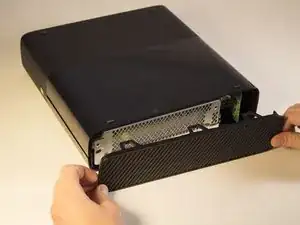
    • Fai scorrere lo spudger sul lato dove hai cominciato a separare la parte con la griglia e la parte inferiore della Xbox.

    • Periodicamente abbassa lo spudger per fare leva , tenendolo premuto sulla fessura.

  3. 21WAeRRGNRrebZwO
    21WAeRRGNRrebZwO
    MfoUiSTn2qFjbOLj
    UvvehPt1bmaqMb4V
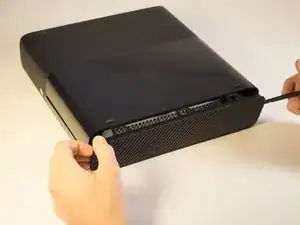
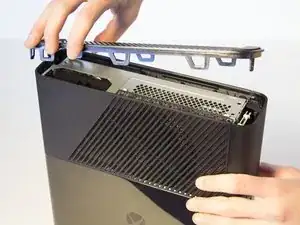
    • Continua a fare scorrere lo spudger lungo il perimetro della parte sinistra della griglia della Xbox.

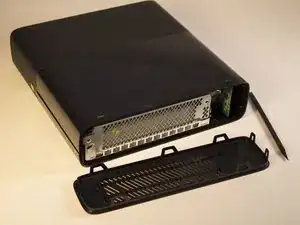
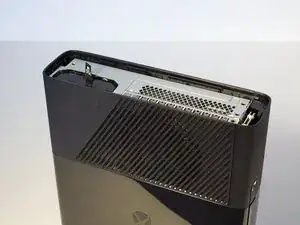
    • Rimuovi il pannello superiore.

  4. dGaeBuMn56SHFP4U
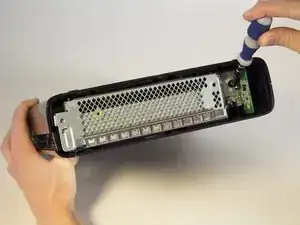
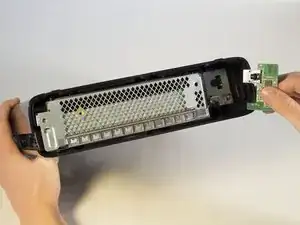
    • Rimuovi la vite sulla sinistra da 11 mm sulla scheda verde del wi-fi con un cacciavite Torx T9.

    In my case it was a T10 Screw, not T9

    Limer o -

  5. Z53XUDpwcU4pDQCT
    Z53XUDpwcU4pDQCT
    BUKBFeZEMwrv1ImF
    • Afferra la scheda verde del Wi-Fi e estraila dalla Xbox.

    On that wifi card there is a little port that you can plug and old router antena into. Any idea what its called?

    Tyler Goyette -

  6. RJCHUEVkPc6cVR5U
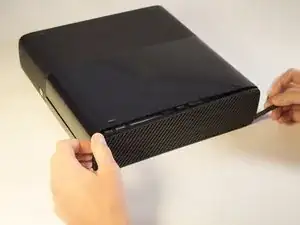
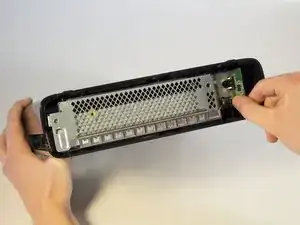
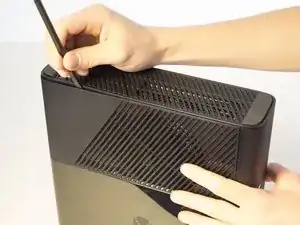
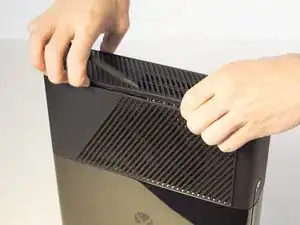
    • Spingi lo spudger nella fessura tra la griglia destra e la parte superiore della Xbox. È più facile partire dalla parte opposta della presa d'aria.

    • Abbassa lo spudger per fare da leva, tenendolo premuto nella fessura.

  7. hN6exAnbrZ4fReNA
    hN6exAnbrZ4fReNA
    yMweMIBKCAsr2GEv
    • Fai scorrere lo spudger lungo la fessura per separare la griglia dalla parte superiore.

  8. kpAmeJfKoDQfiWyw
    kpAmeJfKoDQfiWyw
    x6ghK2CdG3febjDD
    MThCCcS4bfJT2ZAT
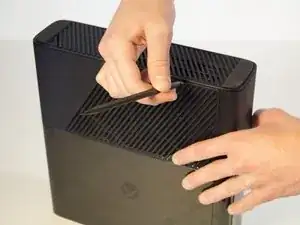
    • Muovi un po' lo spudger nella fessura per far separare le due parti.

    • Fai scorrere lo spudger lungo l'apertura, lungo tutto il perimetro del pannello inferiore.

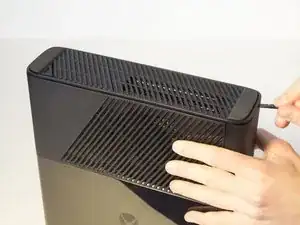
    • Stacca il pannello inferiore.

  9. LlYifhpgiFgVI1Km
    LlYifhpgiFgVI1Km
    MHT2PYrsMUgWIdjI
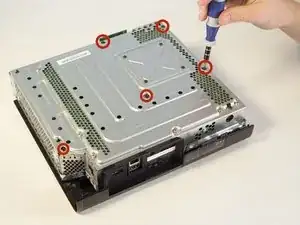
    • Rimuovi le cinque viti lunghe nere da 55 mm etichettate C2-5 e C7 con un cacciavite T9 Torx.

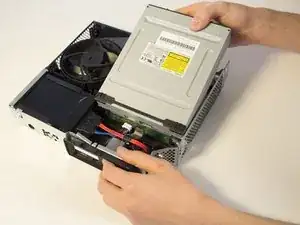
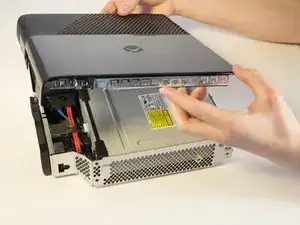
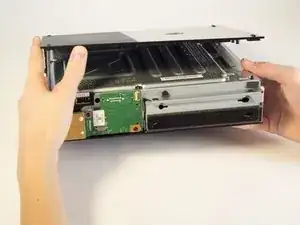
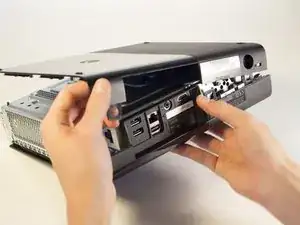
    • Facendo attenzione, gira sottosopra il dispositivo e rimuovi la copertura alzando la sezione in metallo che è attaccata alla parte esteriore in plastica.

    C1 - C5 screws

    Jeff Gray -

    And not T9 - the're T10 screws

    Limer o -

    Missing some steps here…. Where are the clips holding the sides together? To go straight from “Remove bottom cover” to “Device is apart” is a bit… lacking.

    Aksel Barnes -

    Yes, Aksel Barnes is correct. There are missing pictures and steps showing the removal of the plastic exterior from the metal section.

    yovel binjamin -

    another "manual" missing the hardest steps

    Thijs van Ulden -

    Just wanted to share my experience: after you "spudge" off the top and bottom you have to "spudge" off the front as well. Then you can follow the rest of the steps

    lilmolens -

  10. eXfMbnZiYwyOTUGF
    eXfMbnZiYwyOTUGF
    Bvpv65VFAxuJdkMg
    jEl4TpggCFE6hNvX
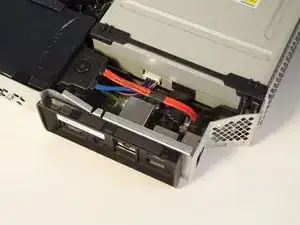
    • Orienta la Xbox in modo tale che la parte inferiore sia rivolta verso l'alto. Assicurati di vedere i piedini in gomma per essere sicuri che sia orientata nella direzione corretta.

    • Alza il pannello inferiore leggermente di 45 gradi dalla posizione iniziale.

  11. H3fcE3EBfbjCreC5
    H3fcE3EBfbjCreC5
    PoJyGGaV2jxpixHv
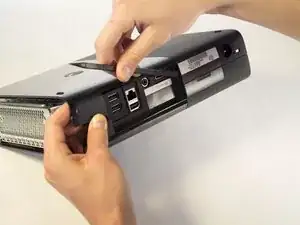
    • Ruota la Xbox in modo tale da non guardare il retro del dispositivo.

    • Questa sezione prevede la rimozione dell'adesivo della garanzia. Questo passo invaliderà la garanzia del dispositivo. Guarda la pagina iniziale per il link alla pagina Microsoft dove sono riportate maggiori informazioni.

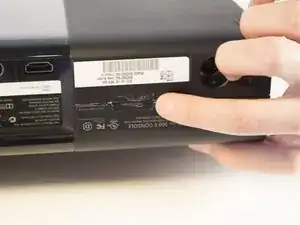
    • Rimuovi l'adesivo dal retro della Xbox.

    • Questo adesivo non è necessario per il ri-assemblaggio.

  12. jGBxXYgHjSwvrXjF
    jGBxXYgHjSwvrXjF
    TuBmSeEBJMN1Y61K
    1xEVZvTGfyAgP3LE
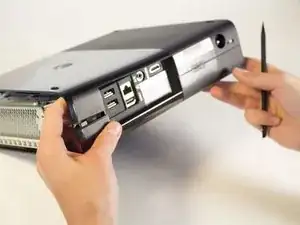
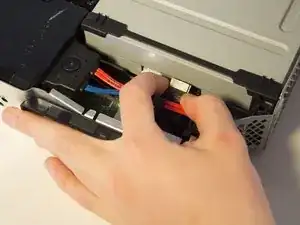
    • Gira la Xbox verso sinistra per sbloccare la clip che tiene la scocca insieme.

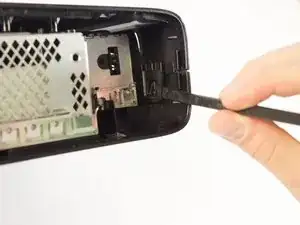
    • Con uno spudger, solleva la clip per liberare le due parti. Fai la stessa cosa all'altra estremità.

  13. ONsIseFA3qyAKhQS
    ONsIseFA3qyAKhQS
    t5aIWOVan3pxGakw
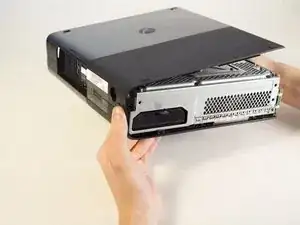
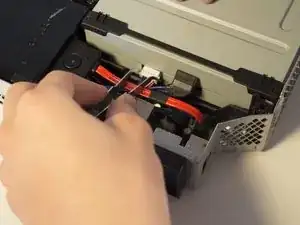
    • Spingi lo spudger all'interno della fessura. Fai scorrere lo spudger lungo la fessura verticale per sbloccare anche l'ultima clip. La scocca inferiore dovrebbe potersi rimuovere.

  14. wbdpZsNP2JZcmyhk
    wbdpZsNP2JZcmyhk
    q1JdQekOBLTL6RvC
    • Usa le dita per scollegare il cavo a nastro blu dal lettore dischi.

    Note: The ribbon cable connected to the CD drive can be in the color red (as it was on my board). Just make sure the other end is connected to the motherboard to be sure.

    yovel binjamin -

    Como destrava a gaveta do cd

    Valtecir César Melo Martins -

  15. iH6ZAlUKWrNkOJiG
    • Usa delle pinzette per scollegare i cavetti blu e rosa.

  16. VsQVM1VUCyj4SEMN
    • Solleva la parte frontale del lettore dischi e tiralo fuori.

    Just note that you will have to swap the PCB inside the disc drive. If you do not go through with this the game will not start.

    You do also require some soldering skills as the wires for the motor and sensor for the disc tray are soldered to the PSB.

    Michael Mouton -

Conclusione

Per riassemblare il tuo dispositivo, segui le istruzioni in ordine inverso.

George

Membro da: 03/02/14

536 Reputazione

11 commenti

i wish the bottom cover magically came off like in step 9

sandjo -

screws are actually C1- C5 one is incorrectly labelled - C7 = C1 also in step 8.5 there are 3 clips holding back edge of bottom cover to top one. one on each end and one just to right of I/O area. can get 2 of them with a spudger (ends) and the middle one with a isesamo.

Andrew Boyd -

Several steps missing between 8 and 9

Freddie Parsons -

Like remove wifi adaptor.

william capewell -

There is some consistency errors in this guide. Step 9 seems to blast ahead beyond where we should be at this point of the guide.

Joe G. -

Yeah, most definitely it jumps from removing the side grills to have completely disassembled the entire console case...

MagoSaronno -

All the videos I watch tell me to take the drive apart and use the old motherboard on the new drive, so it's the same old motherboard. But mine is broke so can I just use the same motherboard from the new drive?

Gregory Lansberry -

No must change the board over or it will not work.Gregory Lansberry.

william capewell -

Did you not mention the fact that the drives won’t work unless programmed?

Jack Smith -

I have had the need to replace the cd assembly on a few 360 e-models. The problem I run into occasionally is the new cd assembly will sometimes only play music discs. I'm not sure if there is a software lock on the assembly or not as installing a 2nd new drive fixes the problem. Are some 360 drive assemblies not compatible with certain mobo revisions? Also, once you get the sides off, a very long screwdriver does the trick on the clips to get it open.

Willam T. Purnell -

Didn't mention you have to remove the original dvd mainboard and put into the new drive for it to be recognised

tim hoath -