
Introduzione
Guida solo prerequisita! Questa guida fa parte di un'altra procedura e non è pensata per essere usata da sola.
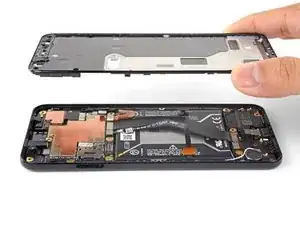
Questa guida mostra come rimuovere il telaio intermedio in plastica, tenuto da clip e viti, del Pixel 3a.
-
-
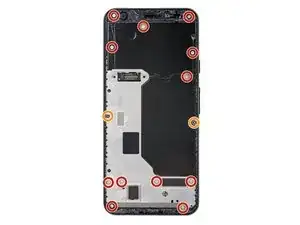
Rimuovi le quattordici viti Torx T3 che fissano il telaio intermedio in plastica, delle seguenti tipologie:
-
Dodici viti cromate da 4,3 mm
-
Due viti nere da 4,3 mm
-
-
-
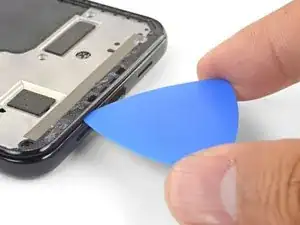
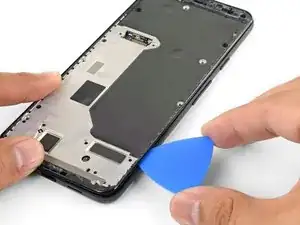
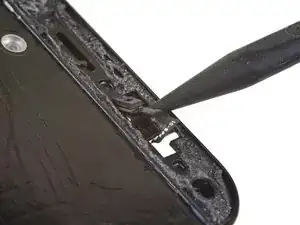
Inserisci un plettro di apertura nella giunzione della scocca nella parte inferiore del telefono. Questa giunzione si trova tra il midframe in plastica e la cover posteriore.
-
Fai scorrere il plettro lungo la giunzione per liberare le clip che trattengono il midframe in plastica.
-
-
-
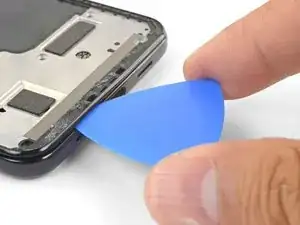
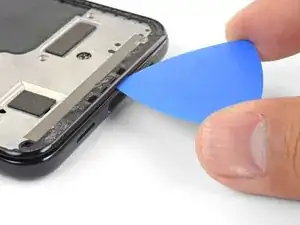
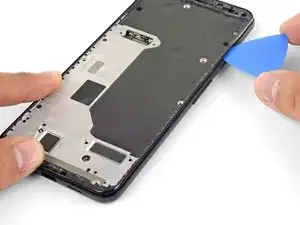
Fai scorrere il plettro di apertura lungo i bordi sinistro e destro del telefono per sganciare le clip del midframe.
-
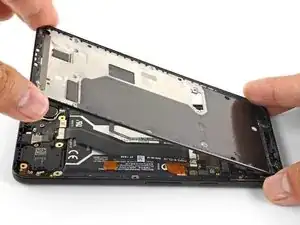
Solleva il bordo inferiore del telaio centrale in plastica ma non provare a rimuovere già ora il midframe. Il telaio in plastica è ancora collegato al telefono dal fragile cavo del sensore di prossimità nel bordo superiore.
-
-
-
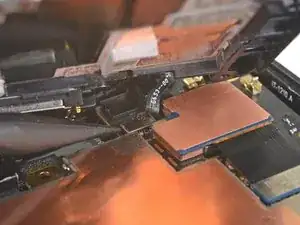
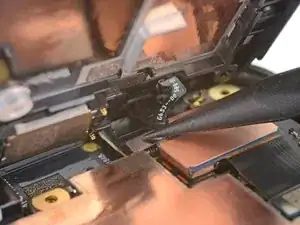
Usa la punta di uno spudger per far leva delicatamente sul connettore del sensore di prossimità scollegandolo dalla scheda madre.
-
Rimuovi il telaio intermedio in plastica.
-
-
-
Allinea il bordo superiore del midframe di plastica con il telefono.
-
Usa la punta di uno spudger per allineare con cura e premere il connettore del sensore di prossimità nel suo zoccolo sulla scheda madre.
-
Questa operazione richiede un po' di pazienza e mano ferma. Una volta messo in posizione il connettore, puoi usare anche un dito per premerlo nello zoccolo.
-
Usa la punta di uno spudger per sollevare delicatamente il sensore di prossimità dal suo alloggiamento sul telaio intermedio. Il sensore è blandamente incollato al midframe.
-
Rimuovi il sensore dal midframe. Infila il connettore del sensore nel suo zoccolo sulla scheda madre.
-
Fai passare il cavo del sensore attraverso il midframe e rimetti il sensore nel suo alloggiamento. Premi con il dito per far aderire di nuovo il sensore al telaio centrale.
-

Per rimontare il tuo dispositivo, segui queste istruzioni in ordine inverso.

I found that a T3 bit didn’t get purchase on the screws in my Pixel 3a, but the T4 bit worked great. Not sure what’s up with that.
E. Dunham -
This is definitely possible, depending on which kit’s T3 bit you use, along with potential screw quality variances.
Arthur Shi -
My Pixel 3a has been apart three times for a non-functioning front camera. The first time, it was by a Google authorized repair shop, and the camera stopped functioning again after a few months. When I took it apart the second time, I noted that many of the screws weren't seated before I removed them. The camera module had become disconnected and simply reseating the connector fixed it. I was careful to fully drive all screws and apply an appropriate amount of torque to them, thinking the repair shop failed to do so. After 9 or 10 months, my front camera stopped working again. Again, I'm noticing a lot of the screws have worked themselves loose. I'm going to try to find an appropriate thread compound that I can precisely apply to these tiny screws.
Reid Solberg -
Hey Reid,
I would suggest blue Loctite or threadlocker. Dab a small drop on each screw before you install them.
Arthur Shi -
One of the bolts was rounded, so the torx screwdrivers (T3 or T5 in the kit) couldn't bite and loosen it. Not sure how to go forward.
Won Choi -