Introduzione

Usa questa guida per sostituire il modulo inferiore del Fairphone 3.

  1. VHPIvnAs3nZkjNpt
    VHPIvnAs3nZkjNpt
    WkeVErKujEGBBpg3
    • Spegni il telefono prima di cominciare lo smontaggio.

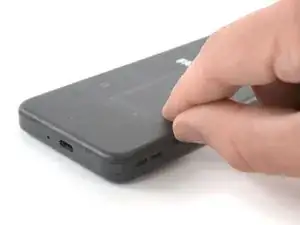
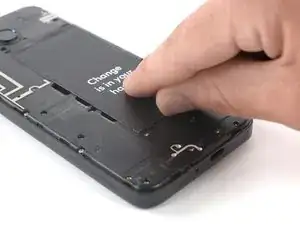
    • Inserisci l'unghia del pollice o un attrezzo di apertura come uno spudger nell'incavo in basso a destra della cover posteriore.

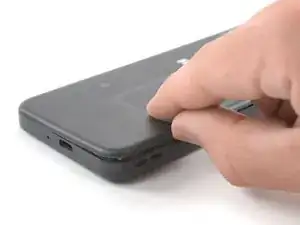
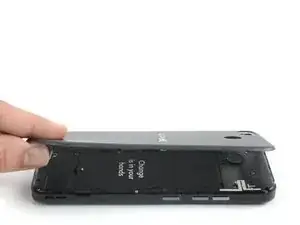
    • Solleva la cover posteriore per iniziare a staccare le clip di plastica.

  2. aZKTuNxLDFBxQsex
    aZKTuNxLDFBxQsex
    ey144kaTLut2E5nl
    ZZNVj6GES5rFkHPm
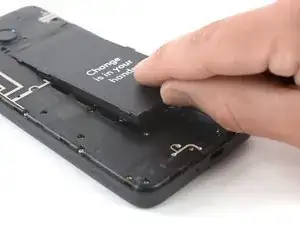
    • Fai scorrere lo spudger lungo l'angolo inferiore destro della cover posteriore per sganciare le clip in plastica inferiori.

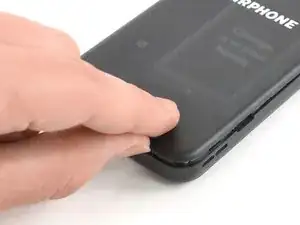
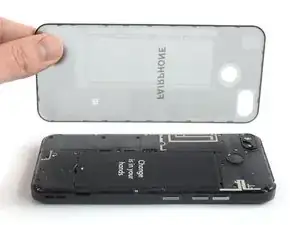
    • Solleva la cover posteriore per sganciare le clip di plastica rimaste e rimuovila.

    • Per rimettere al suo posto la cover posteriore, premila con decisione in posizione finché non senti il clic delle clip che si agganciano per creare una connessione perfettamente a filo della faccia posteriore del telefono.

  3. SWtFbpWgIu4TxSFH
    SWtFbpWgIu4TxSFH
    TJYVdZMIZHXQFg2Z
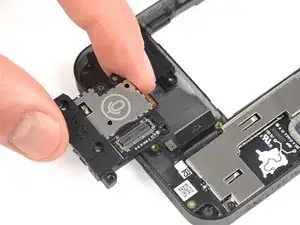
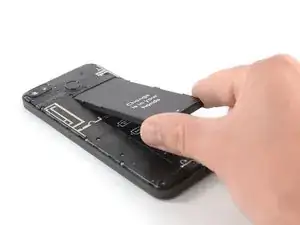
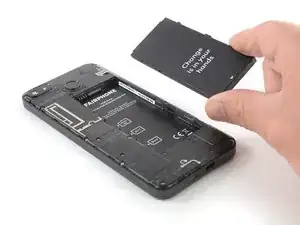
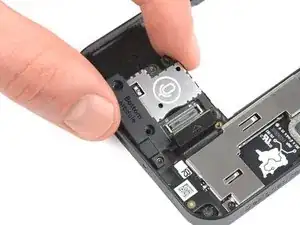
    • Usa un'unghia o un attrezzo di apertura nell'incavo che funge da appiglio per far leva ed estrarre la batteria dal suo vano.

    • Fai leva per sollevare la batteria finché non riesci ad avere una buona presa su di essa.

  4. DWdxDSi4UvMe12h1
    DWdxDSi4UvMe12h1
    Abm5cDTFrqISPRmZ
    • Solleva la batteria dal suo alloggiamento e rimuovila.

  5. K6p6TFBypXdBKHU3
    • Dovunque siano citate delle viti a croce Phillips #00, puoi svitarle anche con un cacciavite di misura #0.

    • Rimuovi le tredici viti a croce Phillips #00 (lunghezza 4 mm).

    vis M 1.4/4 mm

    Felice Suglia -

    Attention : pour dévisser les deux vis du haut il est nécessaire d’avoir un tournevis assez fin, certains tournevis #0 seront trop gros et risquent de marquer les bords du trou, voire la caméra.

    pichel -

    I used the knife edge (on my suiss knife) and it worked fine. Of course, be very very carful not to damage the screws. In one hole I had to "sacrifice" a little bit plastic since the hole was a little bit too narrow for the knife.

    Evaf70 -

  6. RgOqQeFrvGJPrqe5
    RgOqQeFrvGJPrqe5
    SAiSkljUUHLACRCB
    FNDRJilOEUBAKGhs
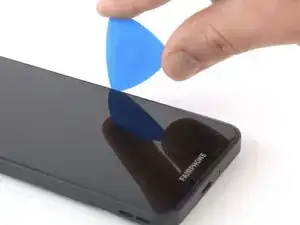
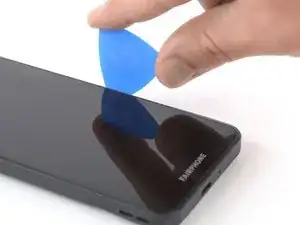
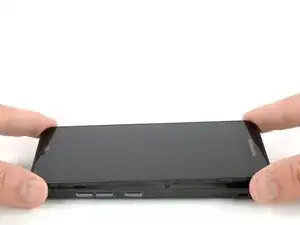
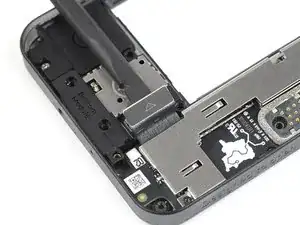
    • Inserisci un plettro di apertura sul bordo destro del telefono tra il midframe e il modulo display.

    • Assicurati di inserire il plettro di apertura tra il telaio intermedio e il modulo dello schermo e non nella piccola fessura di fianco allo schermo, altrimenti solleverai solo lo schermo invece che l'intero modulo.

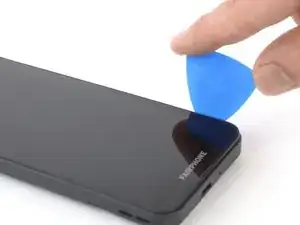
    • Fai scorrere il plettro di apertura verso il basso fino all'angolo inferiore destro per sganciare le clip di plastica che bloccano il modulo schermo.

    Hello. I do not have an opening pick; one was not provided with the telephone or the camera module. How am I supposed to install the item if I have not been either provided with, or informed of the requirement for, a necessary tool? This makes it extremely difficult for a customer to make their own installations or repairs. Also, I do not have a spudger, and I had to look up what a spudger is. These are not everyday items found in most people’s toolboxes, so I feel that they should be provided, or a warning should be given when buying items (such as the camera module) which will require additional tools to install.

    Helen Pearson -

    Hi, you are right, there should be a hint to buy those tools. Maybe you have a guitar pick or a very thin spatula or putty knife. It is better to not use metal, to not damage the frame, but if you have no other tool this may help.

    Fabian Gugger -

    Attention de bien insérer sur la rainure la plus à l'extérieur, vous allez sinon decoller le joint fixant l'écran à proprement parler au reste du module.

    Si ça vous arrive, vous le saurez en voyant que la partie décollée est toujours reliée par une nappe à la partie inférieure de l'écran. Pas de panique, appliquez quelques points de colle par dessus le joint d'origine et recommencez la procédure, cette fois dans la bonne rainure (et la procédure devrait vous paraître beaucoup plus simple ;) )

    Geoffrey Fernandez -

    Punaise, moi cette partie de mon écran se décolle toute seule. Juste un tout petit peu, par le haut. Vous me conseillez de le décoller plus pour pouvoir y mettre de la colle ?? Quelle colle serait le mieux ? (pas envie d’acheter un écran vu que le mien fonctionne très bien quand même)

    Lucy sann -

    Hello, I got frustrated when I didn’t find any opening pick. I’m not a guitarr player either ;-) , so I took a old credit card instead. It worked fine! I got a spudger when I bought the FP3.

    Anyway, these tools are not common in most households, so they should be provided or at least they should be hinted that they are needed.

    Mattias Ahlstedt -

    Hey, I cut the edge off a stiff plastic packaging and inserted it. It was itself too wobbly, but widened the gap enough so I could insert the edge of a credit card which worked just fine.

    Corinna Fischer -

    Ich hatte kein Plektrum habe es mit einer Chip-Karte probiert, das ging auch.

    Britta Hammer -

  7. 1SvcxAEamwNQ1QuK
    1SvcxAEamwNQ1QuK
    xZ65bOMs26GxAYZA
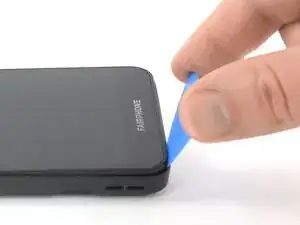
    • Fai scorrere il plettro di apertura attorno all'angolo inferiore destro e usalo per sganciare le clip di plastica nella parte inferiore del modulo schermo.

    Hallo

    nachdem mein Handy ausversehen runtergefallen ist, war das Display dunkel; ein/aus half nichts, akku raus/rein auch nicht. Es gab Brumgeräusche wie beim Starten wenn ich Start gedrückt habe, das Display blieb dunkel. Ich konnte das Display mit etwas mühe(ungeübt) ausbauen und wieder einbauen. Danach ging es wieder; Danke euch hier für die Anleitung. So ein Plektrum habe ich leider nicht mehr, ich glaub es war eines dabei. Ich habe mir mit einem kleinen Plastiklöffel geholfen, der ist jetzt mein Star :-)

    Timo Strauß -

    Sehr gut! Viel Spaß mit deinem Fairphone!

    Fabian Neidhardt -

  8. 4yMFStDHFqMenoHu
    4yMFStDHFqMenoHu
    1H2TLWLSq5mXYbUx
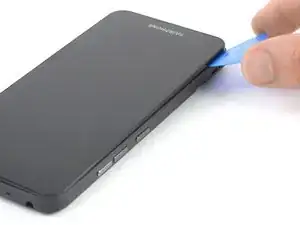
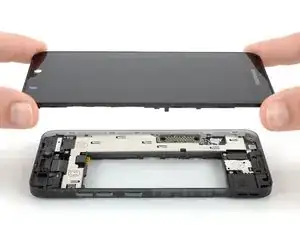
    • Fai scorrere il plettro di apertura lungo il lato sinistro per poter sollevare il modulo schermo.

    • Il modulo dle display dovrebbe saltare fuori dal midframe nel corso di questa operazione. Se non lo fa, controlla se hai dimenticato di sganciare qualche clip.

  9. bIjVTLFAFNfHTjLK
    bIjVTLFAFNfHTjLK
    gKiTEgs2q4qGXYPA
    • Rimuovi il gruppo schermo.

    • Per rimontare il modulo schermo, premilo nella sua posizione lungo tutti i bordi finché non senti il clic delle clip di plastica che si agganciano confermando che il modulo è a filo della scocca.

    The new display module comes with a white plastic cover held by 2 screws over the processor and the connectors. This needs to be taken off!

    Joe -

    ATTENTION !l’écran neuf comprend un cache plastique qui tient avec 2 vis ! pour monter le nouvel écran il faut dévisser les vis et enlever le cache plastique

    Félix Béranger -

    Die weiße Plastikabdeckung an dem neuen Modul muss vor dem Einbau noch gelöst werden (2 Schrauben).

    Christian Schmidt -

    Vielen Dank für die kleinschrittige Anleitung, dir mir als Reparaturmuffel geholfen hat, mein Handy wieder zu aktivieren. Hintergrund: nach einem Sturz war das Display total verpixelt. Durch aus- und Einbau des Displays wurden die durch den Sturz gelockerten Kontakte wieder neu verbunden und - siehe da - es funktioniert wieder alles wie am ersten Tag! Da bin ich froh, daß ich mich für ein fairphone entschieden habe.

    Technikmuffel -

    Sehr gut! Weiter viel Spaß mit deinem Fairphone!

    Fabian Neidhardt -

  10. E4PdHrqQTMOsun2W
    • Rimuovi le quattro viti a croce Phillips #00 (lunghezza 4,1 millimetri).

  11. trpApRt13fdotTyQ
    trpApRt13fdotTyQ
    CTRa5boeIbKlTFbd
    • Usa uno spudger per sollevare e scollegare il cavo di connessione del modulo inferiore.

  12. sKGja5JR2l1W2MPG
    sKGja5JR2l1W2MPG
    VamGDsxGqsQFsmGx
    • Usa le dita per rimuovere il modulo inferiore.

Conclusione

Per rimontare il tuo dispositivo, segui queste istruzioni in ordine inverso.

Per rimontare il tuo dispositivo, segui queste istruzioni in ordine inverso.

Informazioni su che cosa fare con ilk vecchio modulo si possono trovare sulla pagina di supporto FairPhone e sul forum FairPhone.

Porta i tuoi rifiuti elettronici a un riciclatore certificato R2 o e-Stewards.

La riparazione non è andata come previsto? Prova delle soluzioni di base ai problemi, oppure rivolgiti alla nostra comunità Risposte per trovare aiuto nella risoluzione dei problemi.

Adriana Zwink

Membro da: 18/12/19

47656 Reputazione

11 commenti

Spitze, jetzt lädt mein Fairphone 3 wieder tadellos. Tolle Anleitung!!!

Petra Breit -

Super, das freut uns!

Adriana Zwink -

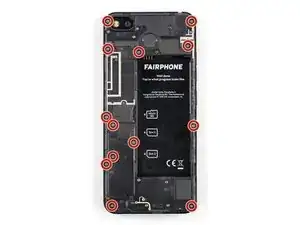
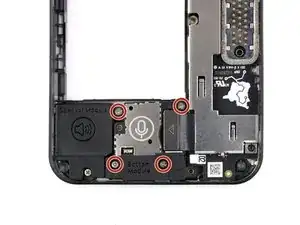
Thanks for the guide, it was very helpful. However, I'm pretty sure we don't need to remove so many screws on Step 5.

I for one had a hard time removing one, and I left it in place, and I could achieve the repair without any problem.

I think only the 6 screws on the very outside edge, that correspond with the screen's locations for the screws.

mll -

Hello @mll, thank you for sharing your experience with us! We're glad that the repair worked out. I've rechecked the display and the phone assembly. All screws should be removed to make sure not to damage components of the phone. Feel free to check Fairphone's video on replacing the display unit: https://www.youtube.com/watch?v=hG6OVPTn...

Adriana Zwink -

@adrianazwink , you are right indeed, and I stand corrected.

mll -

ok pour moi j'ai suivi les instruction et c'est bon

bruno roucou -

Hört sich gut an. Jedoch sind die Untermodule für das Fp3+ leider nicht mehr lieferbar, nach noch nicht mal 2 Jahren.

Haben Sie einen Tipp, wo man noch eines bekommt?

Vielen Dank Birgit

Birgit Reis -

Hallo @birgitreis11702 , da gibt es aktuell leider Lieferschwierigkeiten, wir sollten aber ab September wieder welche lieferbar haben. Wenn du oben beim Ersatzteil auf "kaufen" klickst, wirst du auf die Produktseite weitergeleitet und kannst dann dort "Benachrichtige mich" aktivieren, so dass du eine Email erhälst, sobald der Artikel wieder lieferbar ist - damit hast du natürlich noch nix verbindlich gekauft, also keine Angst!

Sandra Hiller -

Wegen Problemen beim Laden habe ich das Modul getauscht. Der Austausch des Moduls hat mit der Anleitung super funktioniert.

Hinterher habe ich das alte Modul genauer untersucht und habe festgestellt, dass der Tausch gar nicht nötig gewesen wäre. Die Ladeprobleme wurden durch Fusseln verursacht, die sich in der Buchse festgesetzt und so den Kontakt mit dem Stecker verschlechtert haben. Bei Problemen beim Laden also erst mal die Buchse auf Verschmutzung prüfen und reinigen. :-)

Markus Faller -

Die Anleitung ist perfekt. Die Lasche des USB-C war durch einen Kabelunfall beschädigt worden. Jetzt lädt das Fairphone 3 wieder perfekt, ne Menge Geld und Resourcen gespart. Vielen Dank, Fairphone und Community!

Dieter Jäger -

Yeah! Very nice. Phone is charging again. And this is exactly as Fairphone Team was thinking it should be working! I used this phone for many years now. And once it broke, I just ordered a new piece and.... voilà! Very nice.

Evaf70 -