Introduzione
Strumenti
-
-
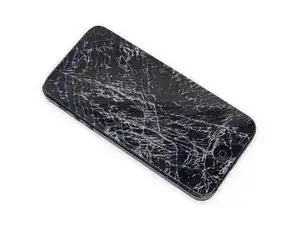
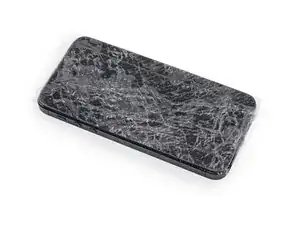
Se lo schermo del tuo display è crepato, contieni ulteriori rotture e previeni danni fisici durante la riparazione coprendo lo schermo con del nastro adesivo.
-
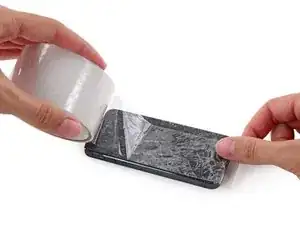
Posiziona delle strisce sovrapposte di nastro adesivo da imballaggio sopra al display dell'iPod finché tutto il vetro non sia coperto.
-
-
-
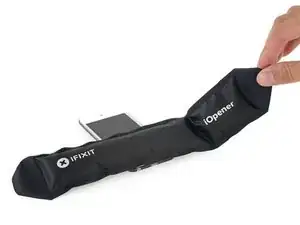
Utilizza un asciugacapelli oppure prepara un iOpener e applicalo al bordo inferiore dell'iPod per circa un minuto al fine di ammorbidire l'adesivo sottostante.
-
La base dello schermo (vicino al pulsante home) è tenuta in posizione con un adesivo potente.
-
Mentre inizi a fare leva per rimuovere lo schermo nei prossimi passi, potresti aver bisogno di applicare più calore per mantenere la colla calda e flessibile.
-
-
-
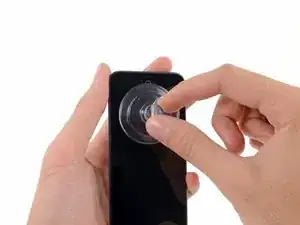
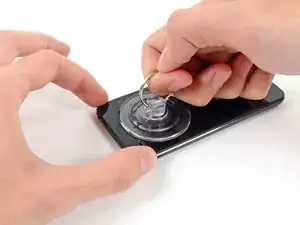
Centra la ventosa nella sezione inferiore del vetro, con il suo bordo centrato sopra al pulsante home.
-
Premi con fermezza e assicurati che la ventosa abbia una presa forte.
-
-
-
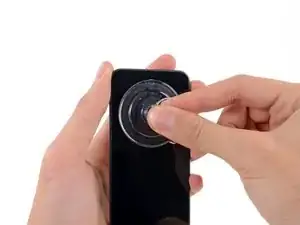
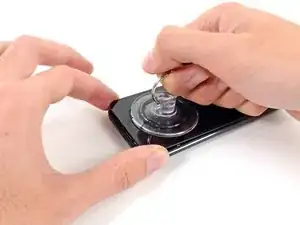
Tieni con fermezza l'iPod contro un tavolo o una panca.
-
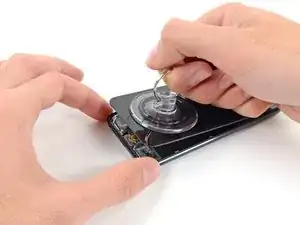
Solleva la ventosa verso l'alto e indietro verso la parte superiore dell'iPod. Sii paziente, e tira con forza costante finché l'adesivo si rompe e il display viene via dal case posteriore.
-
Potrebbe essere necessario utilizzare una pistola termica per ammorbidire l'adesivo (specialmente nei climi più freschi). Se riesci a fare leva e a sollevare lo schermo, ma l'adesivo rimane ancora attaccato e si stacca come il formaggio su una pizza, puoi far scorrere una lametta sottile dentro e tagliare delicatamente l'adesivo.
-
-
-
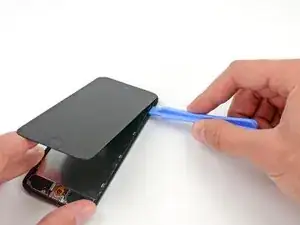
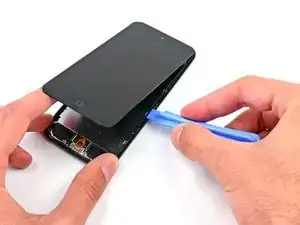
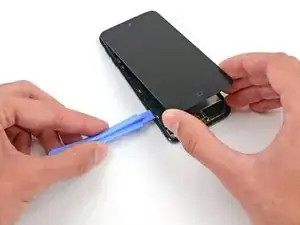
Iniziando nella parte superiore destra del dispositivo, inserisci uno strumento di apertura in plastica nello spazio che si trova tra il telaio in plastica e il case posteriore in alluminio.
-
Fai scorrere lo strumento giù per questa fessura, allentando il telaio dal case.
-
-
-
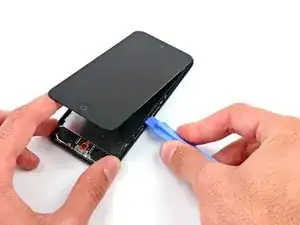
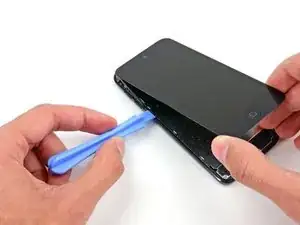
Inserisci uno strumento di apertura in plastica tra il telaio e il case posteriore dietro la prima clip.
-
Muovi lo strumento lateralmente, per allargare lo spazio dietro la clip e separarlo dal case posteriore.
-
Questo potrebbe anche non liberare la clip inizialmente, ma ripetendo la procedura per ciascuna clip questo inizierà a far allentare il pezzo.
-
-
-
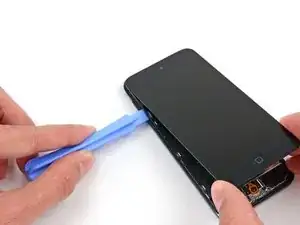
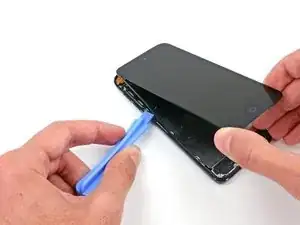
Spostandoti sul lato sinistro del dispositivo, inserisci lo strumento di apertura in plastica nello spazio tra il telaio in plastica e il case posteriore in alluminio vicino alla parte superiore.
-
Fai scorrere lo strumento giù per la fessura, allentando il telaio dal case.
-
-
-
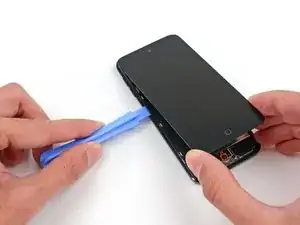
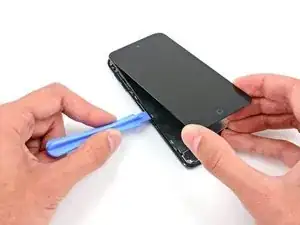
Inserisci lo strumento di apertura in plastica tra il telaio e il case posteriore dietro alla prima clip che si trova sul lato sinistro.
-
Muovi lo strumento lateralmente, per allargare lo spazio dietro la clip e separala dal case posteriore.
-
-
-
Ripeti la procedura con le prossime due clip su questo lato.
-
Inserisci lo strumento di apertura in plastica tra il telaio in plastica e il case posteriore in alluminio dietro la seconda clip.
-
Muovi lo strumento lateralmente, allentando la clip dal case.
-
-
-
Utilizzando la stessa procedura, allenta l'ultima clip che fissa il telaio in plastica al case posteriore.
-
-
-
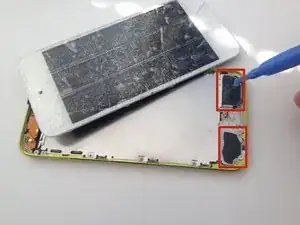
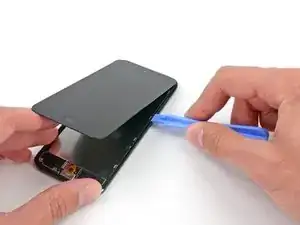
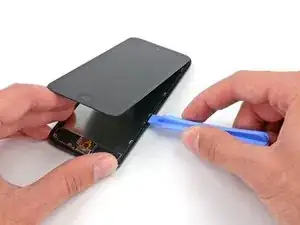
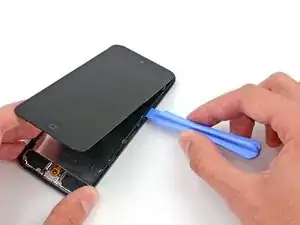
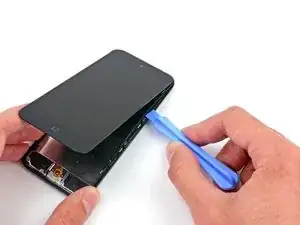
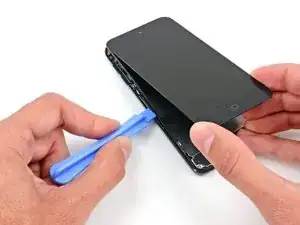
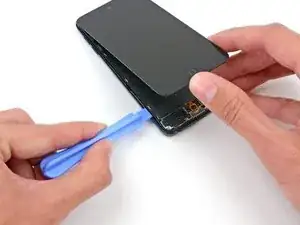
Inserisci lo strumento di apertura in plastica tra il gruppo schermo e il case posteriore vicino alla parte superiore dell'iPod.
-
Ruota leggermente lo strumento di apertura per fare leva e sollevare il pannello anteriore dal case posteriore.
-
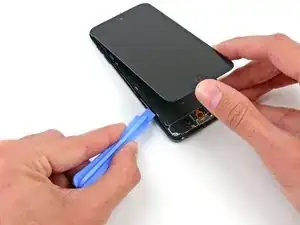
Separa il gruppo schermo dall'iPod.
-


Per riassemblare il tuo dispositivo, segui queste istruzioni in ordine inverso.
Any repair guides for front camera?
ipod touch 5th generation front camera freezes then returns to rear camera. This happened after replacing battery. Any ideas? Tried hard reset & restoring. Nothing worked.
Libby -