Introduzione

Il paraurti anteriore dell'Ecovacs Deebot 900 viene usato per rilevare gli ostacoli sul suo cammino. Un paraurti anteriore che non funziona correttamente può far muovere in cerchio il Deebot. Segui questa guida per rimuovere o sostituire il paraurti anteriore del tuo Ecovacs 900 Deebot.

  1. VHK2cONFvHuigp3j
    • Rimuovi tutte le spazzole dal Deebot.

  2. ZoLK3UZkhrKpFVgt
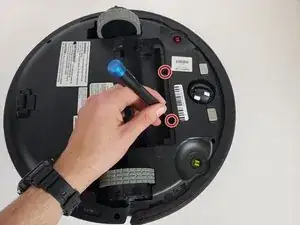
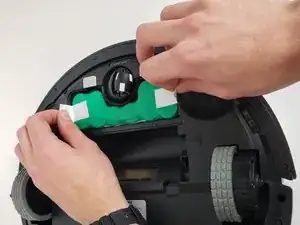
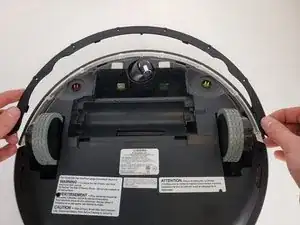
    • Usando un cacciavite a croce Phillips #0, svita le due viti da 12,25 mm che tengono ferma la copertura della batteria.

  3. K2VZcVAmgKmvvij3
    • Rimuovi la copertura della batteria.

    Anyone know where I can buy the battery for the Deebot 900. Evovacs is saying they won’t/dont sell them.

    Mike -

  4. S6j5WVJvdw3KwRYR
    • Usando le due alette bianche sui lati della batteria, rimuovila delicatamente.

    • Stai attento a non strappare il cavo della batteria.

  5. wqInpF4eQPGaQJHN
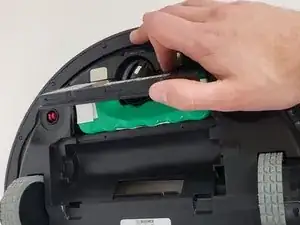
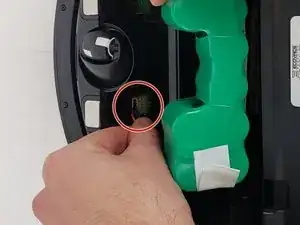
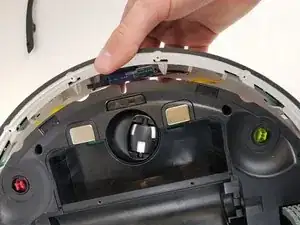
    • Scollega attentamente il cavo della batteria tirandolo da vicino al connettore in fondo al compartimento della batteria.

    I have two issues with these instructions.

    Title is Ecovacs Deebot 900 Battery Replacement. The battery was never replaced the device was reassembled.

    For battery replacement you need a battery it would be nice to have the replacement battery part number as well.

    Rick Sargent -

    I’d like some more info on part numbers, too. I have a Deebot 901 with a battery that, already after 2 years, has deteriorated significantly. Deebot 901 is also called “DE5G.10” in Europe, and it’s existing Battery back has model number ZJ1517-HFR, on which I can find almost no info, let a lone a compatible part somewhere in The Netherlands.

    eymert -

  6. cVHXroOd2QmmmIEx
    cVHXroOd2QmmmIEx
    jQQCtdUFVFH2RmuG
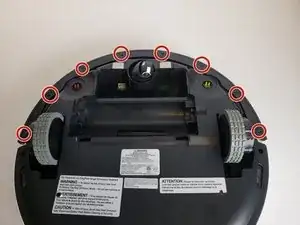
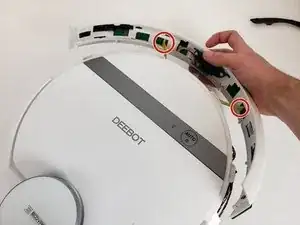
    • Usando un cacciavite a croce Phillips #00, svita le otto viti dal bordo inferiore del paraurti.

  7. H5AgGyvq6XChQPRe
    • Rimuovi la striscia nera sotto il paraurti.

  8. SGHYMJJexfLtrLKY
    SGHYMJJexfLtrLKY
    yoOpbKOnP3As2264
    • Solleva attentamente il paraurti finché non scatta via dalla sua posizione.

  9. UADkZUE2gmBgncyG
    UADkZUE2gmBgncyG
    vMeA13dOwNNT1xUY
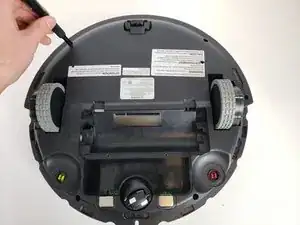
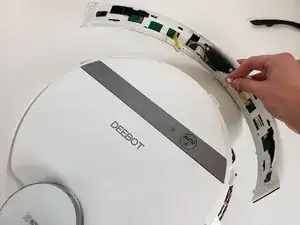
    • Scollega i due cavi che collegano il paraurti al corpo del Deebot.

    • Rimuovi il paraurti anteriore dal dispositivo.

Conclusione

Per rimontare il tuo dispositivo, segui le istruzioni in ordine inverso.

Gillian Blumer

Membro da: 16/01/20

555 Reputazione

Un commento

Where may I buy the front bumper assembly? I'm trying to replace one for a deebot 901 but the mfg tells me they don't see the part directly.

Chris Khacherian -