Introduzione

Se hai dei problemi con la tastier o il trackpad e devi sostituirli, pulire la polvere nella ventola del sistema o accedere ai componenti, questa guida ti mostrerà come rimuovere il poggiapolsi.

Note dell guida

*Anche se il cavo della tastiera è molto lungo, il cavo del trackpad è sensibilmente più corto. Stai attento mentre scolleghi il connettore del trackpad.

  • Per poter smontare questo sistema, deve essere smontato dall'alto in basso. Assicurati che la tastiera, il trackpad e il tasto di accensione siano scollegati prima di rimuovere il poggiapolsi.
  • Questa è una riparazione difficile. È una buona idea avere un modo per ordinare le tue viti in quanto ci saranno due viti per rimuovere il poggiapolsi. Questo portatile usa viti di diversa lunghezza.
  1. QCrPTDYLCBf36Zh5
    QCrPTDYLCBf36Zh5
    Jd4OjkdY1h4pqSyL
    tfC24TIHNIiNhify
    • Spegni il laptop finché non è in ibernazione o spento. Non rimuovere la corrente finché tutte le luci non sono spente.

  2. U1voM6erQwEfZff5
    U1voM6erQwEfZff5
    HCLYfYgVLhoTYaBT
    SMnJL5bjl21Hw6Gb
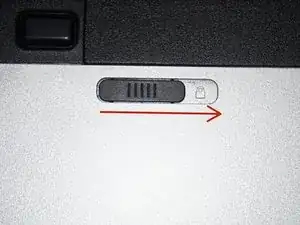
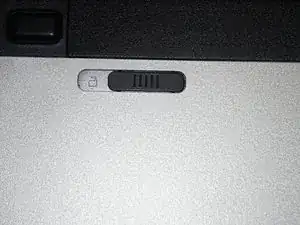
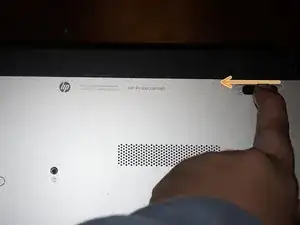
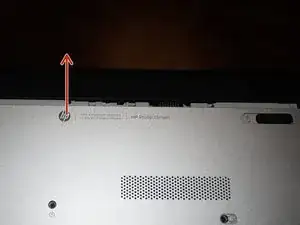
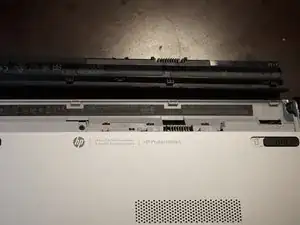
    • Una volta che il computer è spento, rimuovi la batteria. Fai scorrere il cursore piatto verso la posizione di sbloccaggio.

  3. NTpA6elav5TyoLAv
    NTpA6elav5TyoLAv
    5lVAiSsnfFhJxCos
    • Rimuovi la batteria. Spingi la batteria in avanti e rimuovila dal laptop.

  4. OoErKhBKLXSLZ4Xo
    OoErKhBKLXSLZ4Xo
    CRH34by2FTkFPFEP
    tqO6geSscbfZVTjh
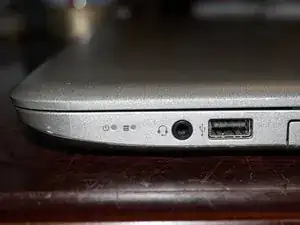
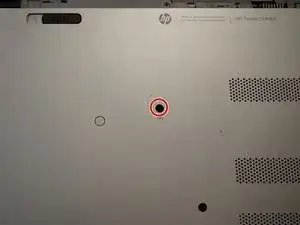
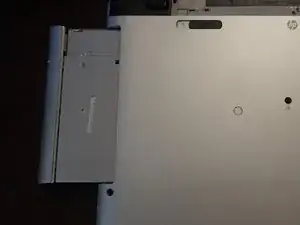
    • Svita la vite che fissa il lettore CD. Per fare ciò, utilizza un cacciavite a croce Phillips #0. Sfila il lettore CD dopo aver rimosso la vite.

    No puedo quitar la unidad

    César -

    Try using a Philips #00 and see if that works. Not the first time this occurred.

    Spanish translation:
    Intente usar un Philips #00 y vea si funciona. No es la primera vez que esto ocurre.

    Nick -

  5. yDyRxsVYCsvcw3Xm
    • Il sistema usato nella guida aveva solo una vite. Se il tuo ne ha tre, agisci di conseguenza.

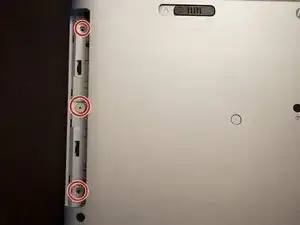
    • Dopo aver rimosso le viti del poggiapolsi, svita le viti sotto il lettore CD. Utilizza un cacciavite a croce Phillips #000.

    If I'm having troublds removing this screw what should I do? Using a Phillips #00

    mjsbak -

    Try a Phillps #000 screwdriver. It worked for me with a #00, but #000 is a better fit when I revisited this.

    Nick -

    Mine has been worn out due to excessive use. What should I use to remove this screw?

    Ahmed Khan -

    It's too difficult

    César -

  6. OTP1BsEDWcVrwmil
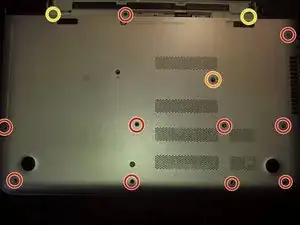
    • Dopo aver rimosso la batteria ed il lettore CD, svita le 11 viti che tengono fermo il poggiapolsi.

    • Questa vite è nascosa dietro un'adesivo. Se persa/danneggiata, è solo per estetica.

    • Non si trovano su tutti i modelli. Su alcuni modelli, ci sono viti in questa zona. Se vedi delle viti qui, devono essere svitate.

    Caution: There are two additional screws on some models in the battery pack area on the far left and right of single screw shown in the picture above. Make sure to remove those screws as they are also securing the back of the palm rest to the computer.

    David May -

    Good catch. I made the assumption all machines in the P series come apart the same way since multiple chassis in the same line are rare. What model machine do you have?

    Now that I’ve looked at my picture, I think I know what you’re talking about. I think you’re taking about the square areas that were never used on my machine?

    Nick -

    I added a marker to account for this. I meant to do it sooner, but it slipped past me. Let me know if I put the markers in the wrong location. I have not seen one of these, so I don’t know with 100% certainty.

    Nick -

  7. OoBlbI2H2FoECOD3
    OoBlbI2H2FoECOD3
    mkQhThhk6Hm3b4sx
    qQmyRnSdQHjS6eQl
    • Se vuoi riutilizzare i piedini originali, incollali ai cappucci della cerniera per preservarne l'adesivo.

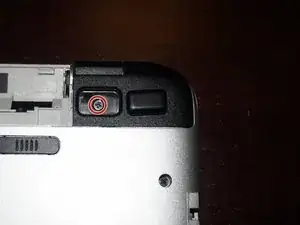
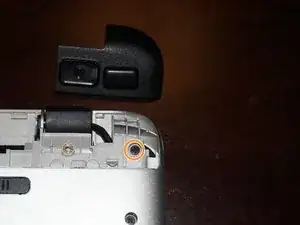
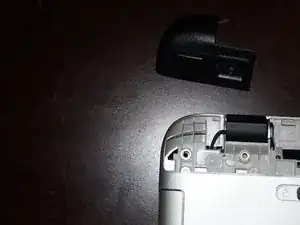
    • Rimuovi i cappucci della cerniera. Per fare ciò, rimuovi i piedini in gomma. Utilizza un cacciavite a croce Phillips #0.

    • Svita le viti sotto i cappucci della cerniera. Per fare ciò, utilizza un cacciavite a croce Phillips #0.

  8. nidZSi3wWBteFx1l
    nidZSi3wWBteFx1l
    jOMEyYNT6wE5Sje6
    efriUUICNApAkAHd
    • Non rimuovere completamente il poggiapolsi: il tasto di accensione è ancora collegato alla scheda madre.

    • Se stai avendo problemi nel rimuovere il poggiapolsi, prova ad usare un plettro.

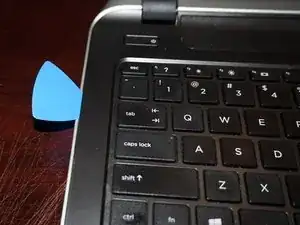
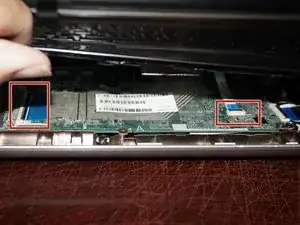
    • Usa uno strumento in plastica per rimuovere il poggiapolsi. Dopo aver liberato tutti e 3 i lati, scollega la tastiera ed il trackpad. Ruota le alette in plastica nera sui connettori verso l'alto per rimuovere i cavi.

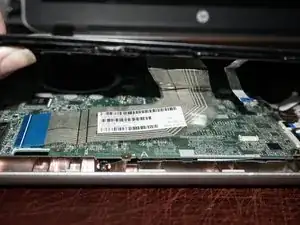
    • Dopo aver scollegato la tastiera ed il trackpad, il poggiapolsi può essere spostato in avanti. Se necessario, puoi usare uno strumento di apertura.

    >Step 8 Remove the palmrest

    >Do not remove the palmrest.

    lolwut

    Toynbee Idea -

    Not sure if you’re being serious or sarcastic. If you’re serious, it says it in the line you quoted that from why it has to wait.

    Nick -

    This is very difficult to remove. I managed to get the hard drive removed without removing it completely. The corners would not come loose and I didn’t want to risk cracking the palmrest.

    Hollow Hills Ranch & Homestead -

    The trick I’ve used on this HP chaissis is I will go over the back tabs with more attention then the rest, and then go over it again just to be sure.

    The alternative is to buy anything else that isn’t awful to service, but sadly if you own it you can’t do much about it.

    Nick -

    NOTE! The ONLY cloning tool that created bootable (HP Pavillion) clone was DiskGenius software's "OS Migrate" button. I spent tens of hours with other software only to experience BSOD's (Blue screen of death) during the boot-up. Windows 8.1 install DVD's standard Command line boot repair tools could not fix the issues that other cloning tools created. The cloning tools tried were Acronis, Clonezilla, Macrium Reflect but they produced unbootable laptop. DiskGenius is not the cutest software but I wish I had it in the beginning. My two cents..
    - Teemu Parkkunen

    Teemu Parkkunen -

    EDIT: On my previous comment I mentioned that DiskGenius was the the only working option for this Windows 8.1 Pavillion cloning. Now it turned out that the target SSD was faulty. There was bad sector on boot area. This may have contributed to the fact that cloning was a hit or miss process. So feel free to try any cloning sofware.

    Teemu Parkkunen -

  9. PVoOPWjuXn3JBRFE
    PVoOPWjuXn3JBRFE
    DHg5qgZ3UmsXavLY
    fFn3xgYFeM1Fs4GU
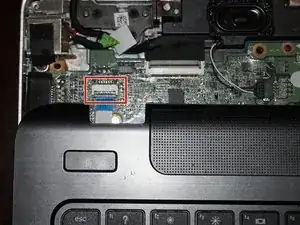
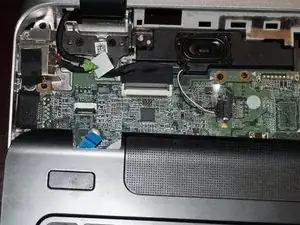
    • Dopo aver scollegato la tastiera ed il trackpad, Scollega il tasto di accensione. Ruota l'aletta in plastica nera verso l'alto e rimuovi il poggiapolsi.

Conclusione

Per rimontare il tuo dispositivo, segui le istruzioni in ordine inverso.

Nick

Membro da: 11/11/09

88371 Reputazione

5 commenti

My power button is bad and my mouse track stopped working. I couldn't find a replacement for it. What can I do?

Trevor Gilbert -

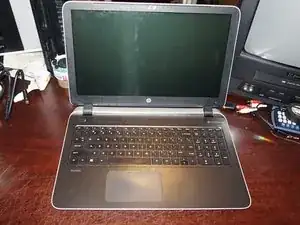
hi where can i source a replacement palm rest assembly for my hp pavilion 15 2015. its the same as the first laptop picture

Oche Ejiga -

You have the US ENG keyboard most likely. I posted the parts list as new steps (762529-001 or 762530-001). Verify it based on the part number sticker to be absolutely sure though but that is likely a match.

Nick -

Hi my hinge broke off and so was some of my speaker. Plus, its making my screen close on its own and I can't keep it still. :( Where can I get a replacement for the palmrest, keyboard, and touchpad? My model for my hp pavillion laptop is: 3C310UA#ABA

thecrowrules1982 -

Parts laptop, or a junk laptop with a bad motherboard (BIOS lock or dead power). The bare part tends to be ~$150+ if it's available and will only get worse as they become hard to find.

Nick -