Introduzione

Usa questa guida per sostituire la porta di ricarica del tuo smartphone Huawei Mate 10 Pro.

  1. rg3xpGgvKOjMBPWO
    • Spegni il telefono.

    • Prepara un iOpener e applicalo sul retro del telefono per circa due minuti per ammorbidire l'adesivo sotto la cover posteriore.

    Erm… Simply impossible to open the phone this way…

    I used the iOpener for 2 mins as instructed, I’ve used even an hair drier for 30 secs on max power (could barely touch the phone after) and still with the suction tool I was not able to open the phone.

    It simply doesn’t budge!!!

    Miguel Oliveira -

    This was much easier than I expected! ;-)

    I put the phone on a hot-water bottle for about 5 minutes. I put the first pick in the side of the phone, not the top as shown in the next section. Then I kept the phone on the hot water bottle through all the following steps so that the battery glue was nice and warm when it came to that section.

    Oliver Moffatt -

  2. vJVBYc2fWjWoTSNG
    vJVBYc2fWjWoTSNG
    wgXxR6VJO4alrBKR
    illPhNTBeVFxigjt
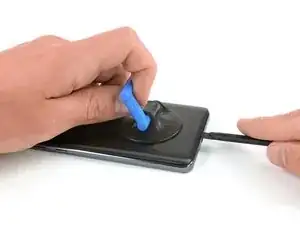
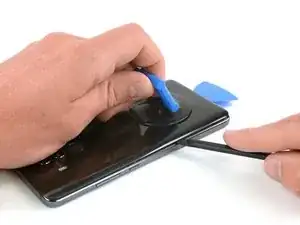
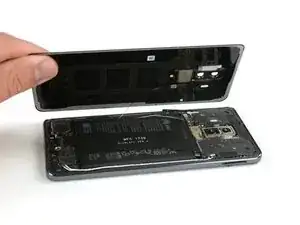
    • Solleva la cover posteriore con una ventosa finché non riesci a inserire l'estremità piatta di uno spudger halberd.

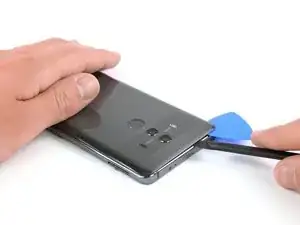
    • Usa lo spudger halberd per tagliare l'adesivo sotto la cover posteriore lungo tutti i bordi del telefono.

    • Lascia in posizione dei plettri di apertura per impedire che l'adesivo possa riattaccarsi alla cover posteriore mentre tagli l'adesivo lungo gli altri lati.

    Faire attention à ne pas enfoncer trop le cutter/spatule hallebarde. Surtout à l’approche des boutons ON/OFF et volume, la nappe ne passe pas loin et se branche à coté de l’empreinte digitale.

    Bilan, j’ai coupé cette nappe et n’ai plus de bouton volume et on/off.

    Plus qu’à chercher la piece de rechange pendant que le telephone est ouvert ;)

    NeoX -

    I found it easiest to insert the first pick on the side of the phone, not the top as shown in the pictures. The side is slightly more flexible than the ends because it is longer.

    Oliver Moffatt -

  3. C5QkPmrDkMAECFTO
    C5QkPmrDkMAECFTO
    lV1jdUdq1oorWMA2
    • Non cercare di rimuovere completamente la cover posteriore già ora. Il cavo del sensore impronte digitali è ancora collegato alla scheda madre.

    • Ribalta la cover posteriore ruotandola attorno al lato lungo.

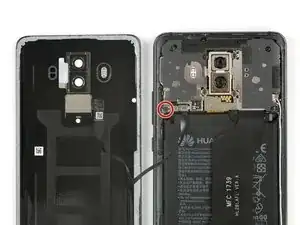
    • Rimuovi la vite a croce Phillips #00 che fissa la schermatura metallica disposta sopra la connessione del cavo del sensore impronte digitali.

    When re-assembling, you can test the phone before putting the covers back on. If you test it before you connect the fingerprint reader then you need to re-start the phone before the fingerprint reader will work.

    Oliver Moffatt -

  4. VcxMNTBJfNQCqTLN
    VcxMNTBJfNQCqTLN
    Mx42vEmk5nW5QvKv
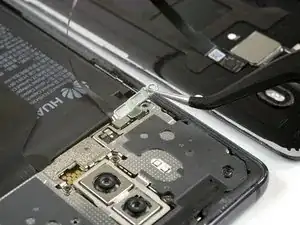
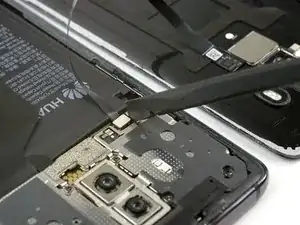
    • Usa delle pinzette per rimuovere la schermatura metallica che copre il connettore del sensore impronte digitali.

    • Disconnetti con uno spudger il cavo del sensore impronte digitali.

    • Nel rimontare il tuo telefono, applica del nuovo adesivo dove necessario.

  5. tAqccddL4PorxOAC
    tAqccddL4PorxOAC
    SF3upv2yvfqMQaPC
    CNBw4EBW6koEH2Ex
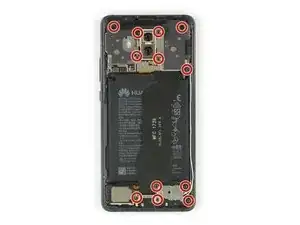
    • Rimuovi le dodici viti a croce Phillips #00.

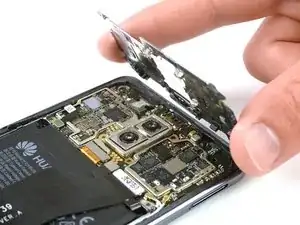
    • Rimuovi con attenzione le schermature sopra alla scheda madre e alla scheda di ricarica.

    • Nel caso che le schermature non venissero via facilmente dopo aver rimosso le viti a croce, puoi usare l'estremità a punta di uno spudger per estrarle.

    When re-assembling, you can test the phone before putting the covers back on. However, if you test it before you fit the top inner cover (the one in the middle picture above) the speaker will not work.

    Oliver Moffatt -

    The top and bottom inner covers both have tiny flanges which you need to insert into slots in the outside edge of the phone before you drop the rest of the cover into place. If you don't put the flanges in first the covers will not fit properly.

    Oliver Moffatt -

  6. AJKvpcjmmVncyGQ2
    AJKvpcjmmVncyGQ2
    GwxgGLrKtEWpWCmO
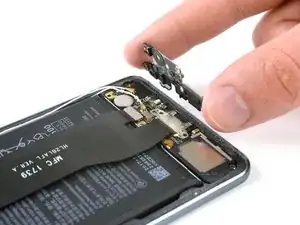
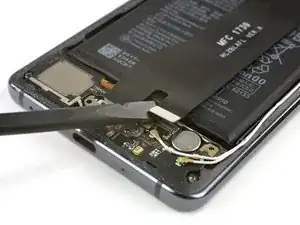
    • Usa uno spudger per scollegare il cavo flex della porta di ricarica dalla scheda madre e dalla scheda figlia.

  7. O6QARa6cJ26AKtOX
    O6QARa6cJ26AKtOX
    pv3hObwLtKYKUyhH
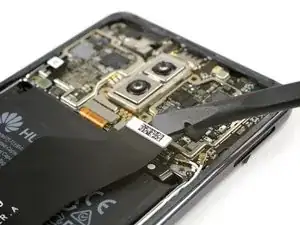
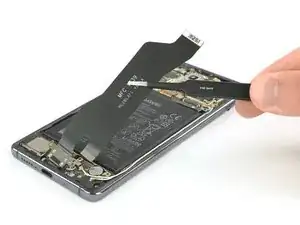
    • Usa delle pinzette per rimuovere con delicatezza la porta di ricarica insieme al suo cavo flex.

    • La porta di ricarica è ben incastrata nel suo alloggiamento. Nel caso tu abbia problemi a rimuoverla, usa l'estremità piatta di uno spudger halberd per farla uscire fuori.

    Do I need to apply a new sealer / adhesive tape in order to assemble the phone back together? If yes, where can this be purchased for Huawei Mate 10 Pro?

    Megan -

    If the adhesive on the back cover is damaged too much and/or doesn’t stick any more it is recommended to remove the old adhesive from the back cover and clean off any residue with isopropyl alcohol (>90%). Then use thin double sided adhesive tape and apply new strips of adhesive.

    Tobias Isakeit -

    hi, after this install it will still will water proof ?

    David Tay -

    Hi David,

    opening the Mate 10 Pro will damage the waterproof sealing on the device. If you do not replace the adhesive seals, your phone will function normally, but will loose its water-protection.

    Dominik Schnabelrauch -

    Hi there, I completed the battery replacement nicely with all your steps, the phone could turn on and function normally, the only issue after the battery replacement is the phone has no sound and vibration. I have ensure all connectors are back to place securely. Does anyone have any clue of the cause of no sound and no vibration?

    Shawn W -

    You do not have to remove the charging port for battery replacement, it does not interfere anywhere. I couldn't get the charging socket out at all. Where is the trick?

    Christian -

Conclusione

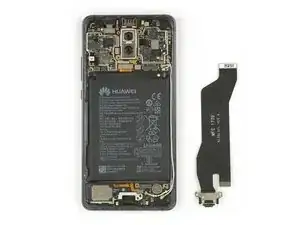
Per rimontare il tuo dispositivo, segui queste istruzioni in ordine inverso.

Dominik Schnabelrauch

Membro da: 23/11/16

200687 Reputazione

2 commenti

Great tutorial! It has been a month without being able to charge my phone, and now it charges 2x as fast with my repair.

Bruce Panagopoulos -

I recommend testing the USB C flex cable assembly before you reassemble the phone. As soon as it’s connected to the upper connector and the battery is plugged in the phone should be charging. Mine was broken from the factory but I went to a great local repair shop and got a new one, the guy said 1 out of 15 is broken from the factory. Great tutorial, successful repair.

Martin Olsson -