Introduzione
Questa guida ti mostrerà come sostituire la presa jack delle Apple EarPods. Questa guida richiede di avere delle buone abilità di saldatura. Come per qualsiasi progetto che coinvolge la saldatura, stai attento ai fumi ed al calore che potrebbero venire prodotti durante la procedura. Le Apple EarPods sono delle cuffie di buona qualità, ma sono abbastanza care e possono essere riparate abbastanza facilmente. Questa guida ti aiuterà a risparmiare ed evitare i rifiuti derivanti dallo smaltimento di queste cuffie. Prosegui la lettura di questa guida per riparare le tue Apple EarPods.
Ricambi
-
-
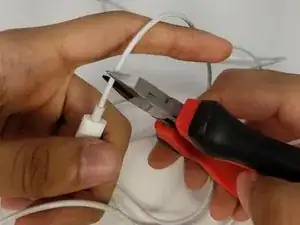
Taglia il cavo ad una lunghezza comoda per l'utilizzatore delle cuffie (Preferibilmente il più vicino possibile alla presa jack originale).
-
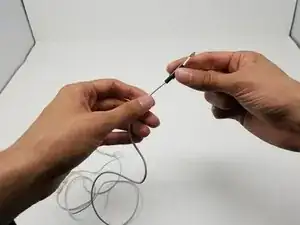
Usando uno spelafili, rimuovi circa un paio di centimetri di isolamento dall'estremità del cavo.
-
-
-
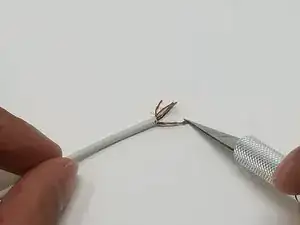
Separa ogni cavo dagli altri.
-
Assicurati di avere 6 diversi cavi: Rosso, Verde, Oro, Rosso-Verde, Oro-Verde, Rosso-Oro.
-
-
-
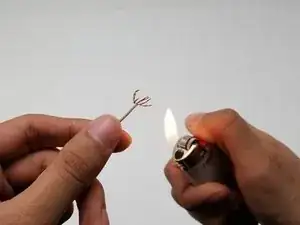
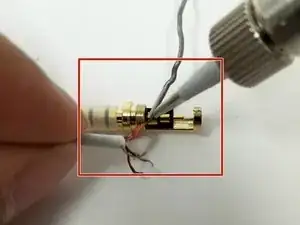
Brucia via la cera isolante dai cavi che portano il segnale con un accendino e/o usa un coltello per grattarla via.
-
-
-
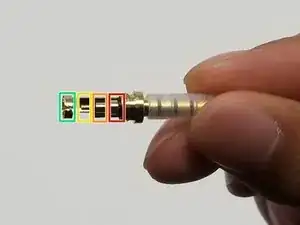
Salda i cavi ai contatti sulla presa jack come indicato nei passaggi successivi. I contatti sono evidenziati nella prima immagine, separati dai colori. Per delle tecniche di saldatura corrette, fai riferimento alla guida alla saldatura di iFixit.
-
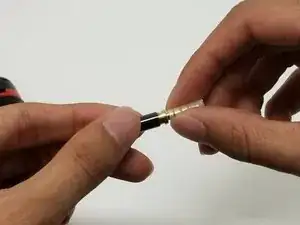
Il primo contatto (evidenziato in rosso) è la terra. Salda qui i cavi verde-oro, rosso-oro- e rosso-verde. La terza immagine mostra questo passaggio.
-
Il secondo contatto (evidenziato in arancione) è per la cuffia destra. Salda qui il cavo rosso.
-
Il terzo contatto (evidenziato in giallo) è per la cuffia sinistra. Salda qui il cavo verde.
-
Infine, il quarto contatto (evidenziato in verde) che non è collegato agli altri è per il microfono. Salda qui il cavo oro.
-

6 commenti
Difficult, indeed, but I made it, and it works! Great satisfaction! One modification in the process, I’ve made – instead of burning the isolation inside wires, I separate the wires, and cut out isolation, because it was unable to solder in different way.
Chris -
Step 5 wrong! The Mic is the red&green cable and the gold cable doesn't exist in my earpods. There is a 6th cord however which is a nylon like support cord.
Andi -
The gold wire is hidden inside the red-green wire. Unwind the red-green to find it. The gold is the mic, the red-green is the mic ground. If you use the original jack (cut away the moulded on white plastic) you can use a multimeter to find the mic connection which is on the other side of the ground connection. Thanks for the page. Good luck
Jonathan -
I recycled the same factory jack and identified the poles with a multimeter. I followed the same instructions. Their volume is lower than usual. Thanks for the page.
Necesito ayuda pero no son los mismos earpods los cables que tiene son de la siguiente manera: rojo, verde, 2 dorados (por separado) y uno azul envuelto con el dorado
Le Rorro -